.
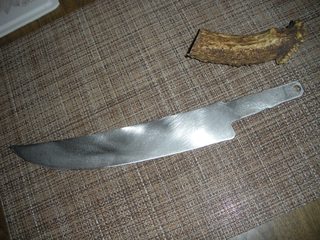
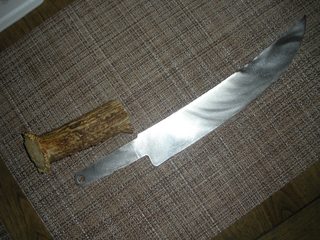
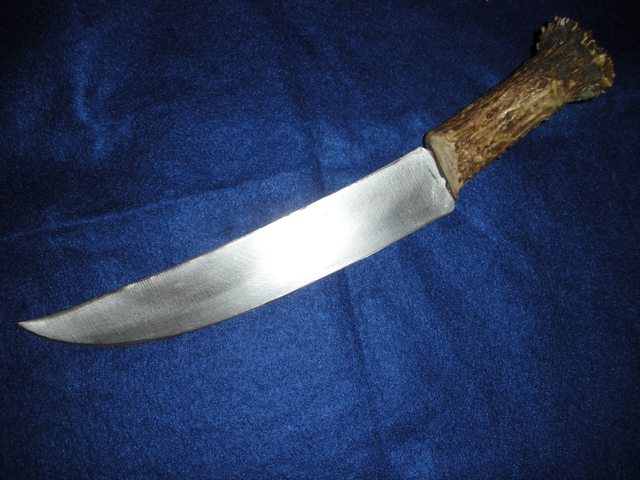
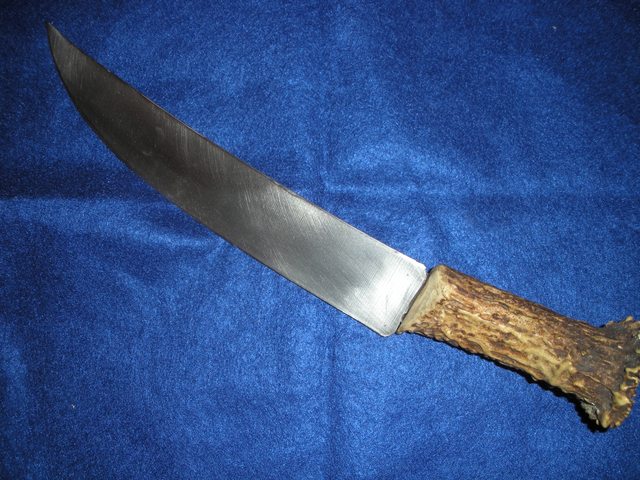
Gus, the blade is 1/8" thick for about 3/4's of the length, on the rear portion of the 10" blade.
It came out with an OAL of 15".
I think it looks like a scalper, myself - whaddya think ?
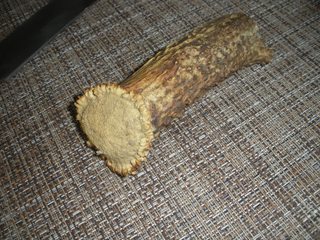
After trying various cross guard configs, I decided to go w/o one, simply dressing down the front end of the stag/antler a bit.
IDK if I'll make a sheath for it yet...………………
.
VERY interesting information, Pete. Thank you!
Yes, with the blade shape, thickness and length, it is right inside "specs" for an 18th Century French Scalper Trade Knife. That is good to know information and I do appreciate it.
May I be so bold as to suggest something in case you wish to make it look more authentic? (Please understand I am not trying to tell you what to do, only making a suggestion and feel free to ignore it.)
In the period for a Trade Knife, a replacement handle would more likely have been made of wood, BUT that is not to say antler is out of the question, so don't get me wrong. They would have used "cutlers resin" or pine pitch mixed with sawdust or other media, as the "glue" to fill and seal gaps between the blade tang and handle material, as well to help keep the handle on. (They also might have used lead or pewter, as well.) However, they would not have relied on the cutler's resin, alone, to keep the handle on and would have used 2 or 3 "cross pins" in the handle material made of Iron and around 3/16" in diameter, to keep the handle attached to the blade.
Now the problem for us is that we have to make cutlers resin ourselves, if we want to use that and SOFT Iron pins are extremely hard to find, if one can find them at all. Further, personally I would not risk damaging an antler grip by peening both sides of each pin, because it is much easier to crack antler than wood, when peening the pins. (Can you tell this happened to me one time? Shucks. GRIN)
Original documentation for cutlers resin states if often had a reddish brown color, though I'm not entirely sure where the reddish color came from. The media used as a filler in the cutler's resin was sometimes sawdust and sometimes other things. I've been thinking on how simulate period cutler's resin, but with the added protection of epoxy both to better seal the gap and stop possible infection from blood/meat that can get trapped in pine resin.
I think I'm going to experiment with Clear 2 Ton Epoxy and add some Medium Brown Leather dye to get the reddish brown color. I would also add sawdust, or in your case maybe antler dust, as the filler/binder. I haven't actually done this yet, but I will try making up a small batch in the next few days to see how it sets up.
I use common nails around 3/16" diameter instead of Iron Pins that I can't find and don't have a forge to make. No one can tell the difference once they are in place, anyway. HOWEVER, I would not peen the outer edges of the pins, but rather just drill holes for the pin through the handle and tang and trust the Epoxy Mix to keep them in place. Then file/dress the pins down to the surface of the grip material, after the epoxy mix cures.
Again, please understand these are only suggestions and feel free to ignore them.
Gus


")

