-
This community needs YOUR help today. We rely 100% on Supporting Memberships to fund our efforts. With the ever increasing fees of everything, we need help. We need more Supporting Members, today. Please invest back into this community. I will ship a few decals too in addition to all the account perks you get.

Sign up here: https://www.muzzleloadingforum.com/account/upgrades -
Friends, our 2nd Amendment rights are always under attack and the NRA has been a constant for decades in helping fight that fight.
We have partnered with the NRA to offer you a discount on membership and Muzzleloading Forum gets a small percentage too of each membership, so you are supporting both the NRA and us.
Use this link to sign up please; https://membership.nra.org/recruiters/join/XR045103
You are using an out of date browser. It may not display this or other websites correctly.
You should upgrade or use an alternative browser.
You should upgrade or use an alternative browser.
Shooting bag build. How I do it.
- Thread starter jethro224
- Start date

Help Support Muzzleloading Forum:
This site may earn a commission from merchant affiliate
links, including eBay, Amazon, and others.
Fresh blood into this hobby..
Pun intended?
'Cause there most likely will be a little blood involved. :haha:
More power to him. I hope his first one turns out well.
GreyWhiskers
69 Cal.
Some years ago I tried my hand at making a few shooting bags. Found out that I don't have much talent but I do have the patience of a 2 year old. :surrender:
Since then Jethro has made at least 2 bags for me. They look great and are about perfect for their purpose. :thumbsup: :thumbsup: Hope to post pics soon. GW
Since then Jethro has made at least 2 bags for me. They look great and are about perfect for their purpose. :thumbsup: :thumbsup: Hope to post pics soon. GW
GreyWhiskers
69 Cal.


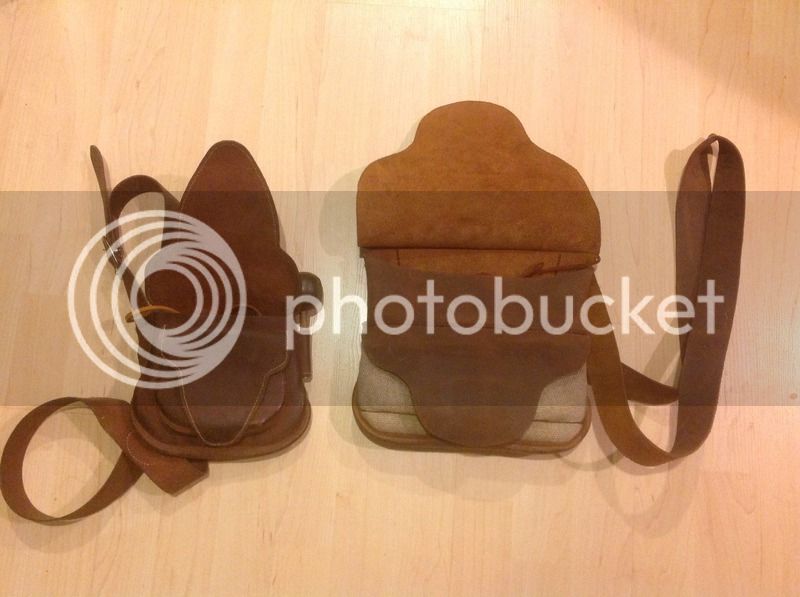
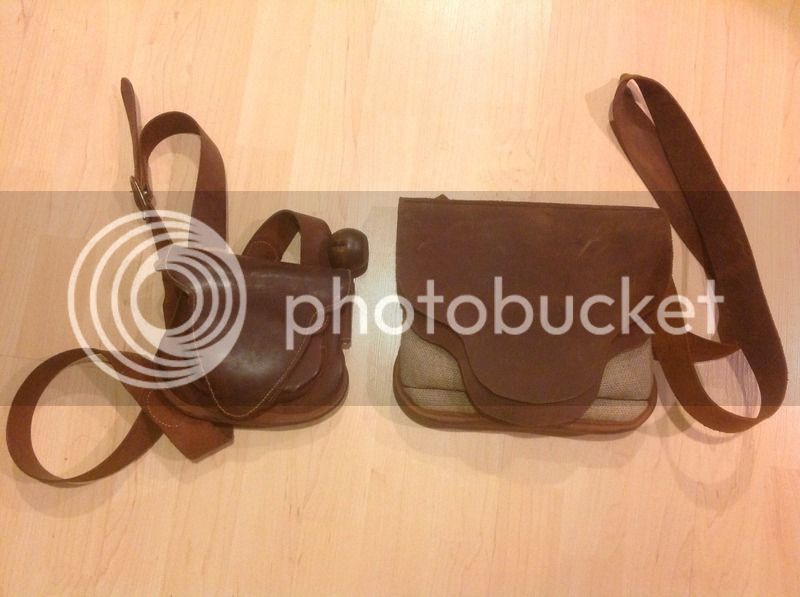
Pics of Jethro's hand-did bags. Hunting bags for my rifle and scattergun. GW
That 3-pocket linen burlap front panel on the bag on the right was probably the trickiest thing I ever stitched up. Took about 3 tries to get it right. :surrender:
Glad you like them bags GW. Looks like that rifle bag has a few miles on it since I built it. :thumbsup: It's holding up pretty decent for old scrap leather cobbled up by an amateur. That was one of the first good ones I ever did.
Glad you like them bags GW. Looks like that rifle bag has a few miles on it since I built it. :thumbsup: It's holding up pretty decent for old scrap leather cobbled up by an amateur. That was one of the first good ones I ever did.
cositrike
40 Cal.
That's a brilliant tutorial Jethro. Hope to have a look at one of your bags one day.
Regards
Simon
Regards
Simon
I was thinking about doing my own bag. Getting one of those kits from crazy crow. It looks like I might need to buy some tools first. Nice bags. Gives me a better idea of the work that goes into it.
- Joined
- Jan 31, 2016
- Messages
- 1,296
- Reaction score
- 1
simon said:That's a brilliant tutorial Jethro. Hope to have a look at one of your bags one day.
Get A Jethro Bag. Whatever he wants, just send it to him! :bow:
I just received mine in the mail today, and it looks like it was touched by the Hand of God. I'm Not Exaggerating! :bow:
- Joined
- Apr 4, 2010
- Messages
- 973
- Reaction score
- 372
Very inspiring thread. Love these kinda posts. Thank you and count me in on making this permanant
Greenjoytj
54 Cal.
What is the purpose of the narrow leather “welt” strip?
It appears to add complexity to the construction with out adding functionality.
It appears to add complexity to the construction with out adding functionality.
Cruzatte
50 Cal.
Usually a welt serves to protect or hide stitching that would otherwise be exposed.What is the purpose of the narrow leather “welt” strip?
It appears to add complexity to the construction with out adding functionality.
- Joined
- May 6, 2014
- Messages
- 16,892
- Reaction score
- 15,307
A welt also adds "reinforcing" when stitching some of the thinner 3 - 3 1/2 oz leather that some folks prefer to make their shot pouches from. This means the leather around the stitches is much less likely to rip/tear out when hand stitching or when in use. So adding a welt really does add functionality and longer life.
Of course when one adds a welt where the welt leather is doubled over (and perhaps a cord put inside) really makes a strong and beautiful welt. The stitching then goes through four thicknesses of leather.
Gus
Of course when one adds a welt where the welt leather is doubled over (and perhaps a cord put inside) really makes a strong and beautiful welt. The stitching then goes through four thicknesses of leather.
Gus
Brokennock
Cannon
Whatever happened to the idea of making this a "sticky" or finding other permanent place as a reference?
When I made my first bag (about 30 years ago), I integrated the flap with the back panel (I just made it longer), and simply folded the flap end after the bag was reversed - which save some sewing (and a possibly needed future repair).
I also sewed a loose leather panel to the strap for a patch knife sheath.

I've used this bag ever since, and it still looks like it did when I finished making it.
I also sewed a loose leather panel to the strap for a patch knife sheath.

I've used this bag ever since, and it still looks like it did when I finished making it.
Similar threads
- Locked
- Replies
- 5
- Views
- 569
- Replies
- 3
- Views
- 440


