• This community needs YOUR help today. We rely 100% on Supporting Memberships to fund our efforts. With the ever increasing fees of everything, we need help. We need more Supporting Members, today. Please invest back into this community. I will ship a few decals too in addition to all the account perks you get.


    Sign up here: https://www.muzzleloadingforum.com/account/upgrades
  • Friends, our 2nd Amendment rights are always under attack and the NRA has been a constant for decades in helping fight that fight.

    We have partnered with the NRA to offer you a discount on membership and Muzzleloading Forum gets a small percentage too of each membership, so you are supporting both the NRA and us.

    Use this link to sign up please; https://membership.nra.org/recruiters/join/XR045103

Shooting bag build. How I do it.

Muzzleloading Forum

Help Support Muzzleloading Forum:

This site may earn a commission from merchant affiliate links, including eBay, Amazon, and others.
Good advice. I'll try the bag balm. Usta use that stuff a lot when I worked on cars for a living. Good stuff. :thumbsup:

Glad to hear some of you guys are enjoying this topic.

OK, some words about pocket and strap placement;

Sometimes, if I use a larger pocket and/or a smaller back panel, the strap and pocket stitching may interfere with one another. Think about this ahead of time to avoid any issues when sewing them on.
I have done several bags where the inside seam of the strap winds up inside of the pocket. When this happens I just work around it by sewing the inside strap seams, then the pocket, then the outside strap seams. You don't want to have to try and sew inside of a pocket if you can help it.

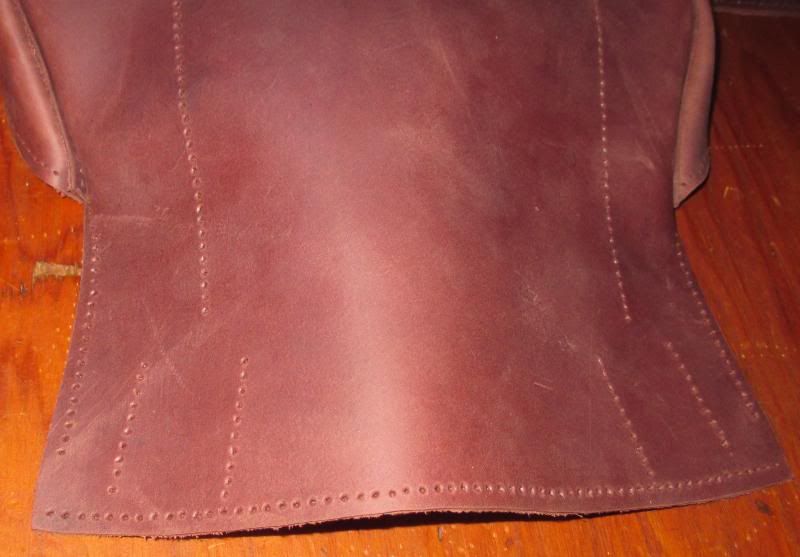
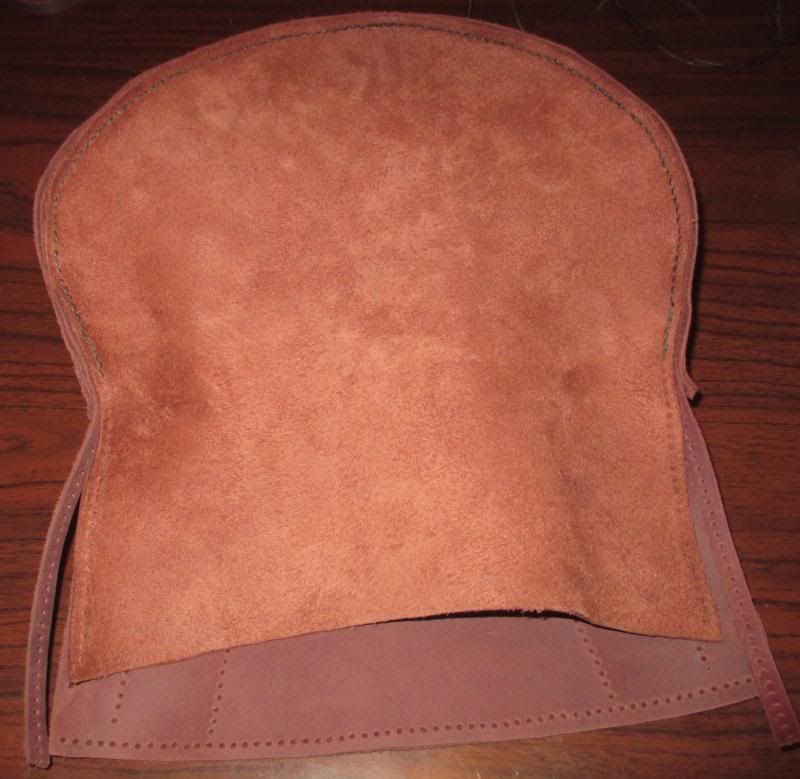
On this particular bag there won't be any such issues. The strap is located clear of the pocket. Notice here that the strap stitching holes are placed at an 11 degree angle relative to the top of the bag. This makes the bag ride better across your shoulder.


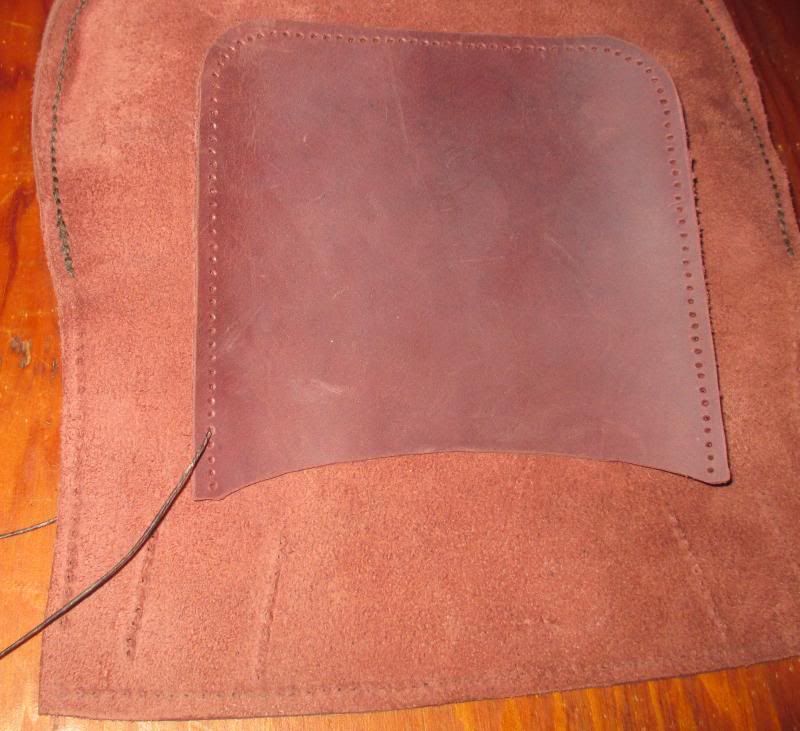
We will stitch the pocket on now. Actually we could have done this first but I wanted to show you some of the more interesting stuff. Pockets are relatively straight forward and boring...

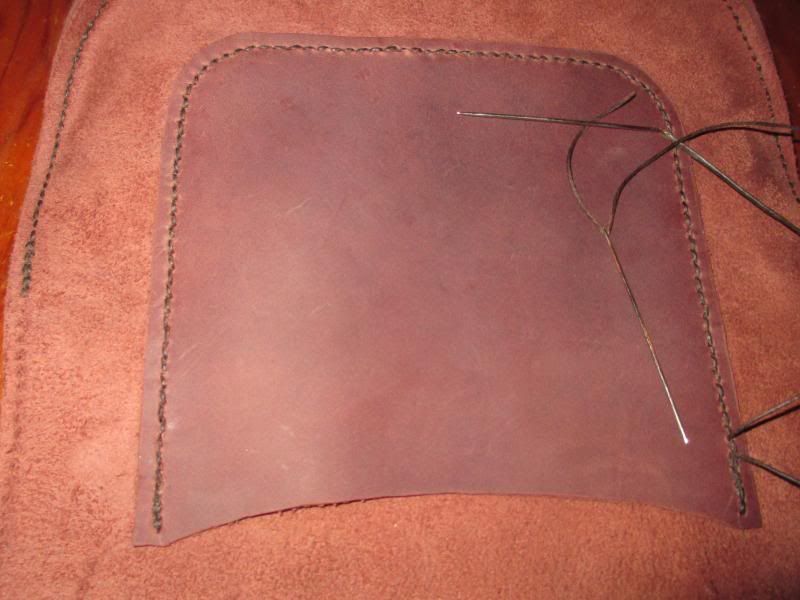
The top edges of the pocket seams are a stress point so I like to backstitch the ends on both sides for extra strength. Just start about 5 holes below one end and then stitch up to the top.


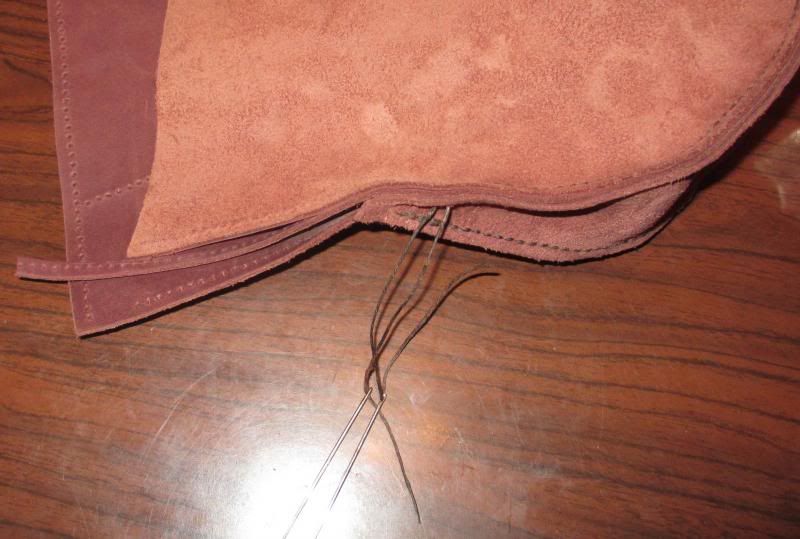
Then, reverse direction and stitch all the way around to the other end. Backstitch 4 or 5 stitches here to lock everything in.


Since the strap is not going to give me any problems on this bag, I'm going to hold off on it for a while yet. It's easier to sew when you don't have to deal with a strap flapping around all over the place.

Now I'll start on the front panel. For this step you will need a strip of welting that is a couple of inches longer than the entire seam around the front panel. Don't cut it short.
The strip of welting should be placed shiny side toward the shiny side of the front panel and the front panel placed shiny side against the shiny side of the back panel. Here again, start at the center of the front panel and the center of the gusset and stitch toward one end of the gusset just like we did earlier.


When you get to the end of the gusset, stop and backstitch 4 or 5 stitches to lock it in just like we did on the back panel. Do NOT trim the welt this time.


Then stitch the other side the same way starting in the same hole. Backstitch again at this end of the gusset too. Now this thing is really starting to look like a bag!


Next installment coming soon.
 
Wow, this has been a very educational and enjoyable thread. That bag is looking real nice! :hatsoff:
 
Now run one needle up thru the next hole (either direction, doesn't matter) and then run the other needle down thru the same hole. Be careful not to run the second needle thru the thread but along side of it. This is a saddle stitch.

Thank you for this great tutorial. I understand the saddle stitch and have used it on my beginner bags. But is there a reason that it would not work to stitch one direction with one needle and then turn and come back the other way with same needle, completing what looks same a saddle stitch?
 
There are probably other reasons, but having not tried it I can only speculate. But here's one thing that stops me. On a long seam, that hunk a thread you'd be passing back and forth would be twice as long and even more prone to wrap around things than two threads half as long.

Come to think of it, there's another reason I'd be reluctant. Part of the value of the saddle stitch is that each time the needles pass through, you can pull on them and really suck the stitch up tight. I could see a whole lot of puckering going on if you try to tighten while sewing as you propose.

Try it an let us know how it goes!
 
BrownBear said:
Part of the value of the saddle stitch is that each time the needles pass through, you can pull on them and really suck the stitch up tight. I could see a whole lot of puckering going on if you try to tighten while sewing as you propose.

That's it exactly. :thumbsup:
There is no way to get the stitches anywhere near as tight or the tension even doing it the other way. My bags will literally hold water.
 
I'll see what Claude thinks about that idea when I'm done.
Glad you're enjoying it.
 
BrownBear said:
Jethro224 said:
Sometimes the skin on my fingers will crack open from all the pulling needles and thread.

I get a lot of that from the leather drawing oils or whatever from my skin. Oiled leather isn't so bad, but veg tanned and all the others make it happen fast. Only solution I've found is a high test lotion after each sewing session, or especially Bag Balm. "Udder-ly" great for dry hands. :grin: Standard remedy here when working in saltwater.

To protect your fingers get some:
1) Rubber fingertips from an office supply - they come in various sizes and you can use one on your thumb and the other on your forefinger. Aids your grip on the needle immensely and keeps your fingers from getting sore
2) As an alternative buy some good rubber gloves and cut off the fingers you need and use as in #1

I sew a couple hundred feet of leather per day (even more when beading) at least 5 days a week and no sore, dried out fingers...
 
DMills,
If you want to use one needle, I recommend using a back stitch to achieve the effect you are talking about. Instead of running the length and then coming back, you skip a hole each time and then come back through the skipped hole. This is actually a good stitch for something to be turned inside out and historical to good saddler's work.
Prior to sewing the bag inside out with the back stitch, you whip stitch the welt to one piece.
 
Capt. Jas. said:
DMills,
If you want to use one needle, I recommend using a back stitch to achieve the effect you are talking about. Instead of running the length and then coming back, you skip a hole each time and then come back through the skipped hole. This is actually a good stitch for something to be turned inside out and historical to good saddler's work.
Prior to sewing the bag inside out with the back stitch, you whip stitch the welt to one piece.

The other option is to setup your thread just like you would for a saddler's stitch with tow needles, place in first hole with two equal lengths just the saddler's stitch, sew with only one side of the needles/thread combo then the other - shortens the length of the thread so less fray possibilities and less hassle with a real long thread. When I sew this way (especially on softer leathers I sew about ten to twenty stitches with one thread, then go back and sew the second, and so on...that way if one of the sides breaks you can rescue it easier...
 
LaBonte said:
Capt. Jas. said:
DMills,
If you want to use one needle, I recommend using a back stitch to achieve the effect you are talking about. Instead of running the length and then coming back, you skip a hole each time and then come back through the skipped hole. This is actually a good stitch for something to be turned inside out and historical to good saddler's work.
Prior to sewing the bag inside out with the back stitch, you whip stitch the welt to one piece.

The other option is to setup your thread just like you would for a saddler's stitch with tow needles, place in first hole with two equal lengths just the saddler's stitch, sew with only one side of the needles/thread combo then the other - shortens the length of the thread so less fray possibilities and less hassle with a real long thread. When I sew this way (especially on softer leathers I sew about ten to twenty stitches with one thread, then go back and sew the second, and so on...that way if one of the sides breaks you can rescue it easier...

So basically with that you get what looks like a saddle stitch but has no cast knot locking within each stitch right?
 
That's right and the cast lock stitch does not necessarily a saddle stitch make - it's the "English/Euro" version in which the threads are also on an angle - the "American" version (as taught by Al Stohlman for instance and which is more influenced by Spanish leather work)generally is not at an angle and does not have the so-called lock stitch and is usually finished by using the over stitch wheel to smooth things out

FWIW - after pulling miles of thread while doing repairs I've yet to see any advantage at all to the extra lock stitch (when threads break they break and that extra little overcast makes no real difference in my experience especially when using coad (mix of beeswax and resin, etc.) rather than plain beeswax. On the other hand if you want to do period correct work than look at the originals for the time period concerned to see whether one should use the "Eng/Euro" version or the "American"....
 
BrownBear said:
There are probably other reasons, but having not tried it I can only speculate. But here's one thing that stops me. On a long seam, that hunk a thread you'd be passing back and forth would be twice as long and even more prone to wrap around things than two threads half as long.

Come to think of it, there's another reason I'd be reluctant. Part of the value of the saddle stitch is that each time the needles pass through, you can pull on them and really suck the stitch up tight. I could see a whole lot of puckering going on if you try to tighten while sewing as you propose.

Try it an let us know how it goes!

Not planning to try. Just asking. Your points make sense.
 
LaBonte said:
That's right and the cast lock stitch does not necessarily a saddle stitch make - it's the "English/Euro" version in which the threads are also on an angle - the "American" version (as taught by Al Stohlman for instance and which is more influenced by Spanish leather work)generally is not at an angle and does not have the so-called lock stitch and is usually finished by using the over stitch wheel to smooth things out

Wonderfully explained as always. Wish I had the flair for explaining. :thumbsup:
 
Are y'all ready to finish this project?

Here we go.

Now we gotta sew them strap ends in while it's still easy to get to 'em. This is probably the highest stressed area of the whole thing so I double stitch the entire seams. Sew 'em on with the finished side against the finished side of the back panel.


Then we can sew up the rest of the sides. This too can be a high stress area so I start about 5 holes up from the tip of the gusset, sew down to the gusset, then back up to the top.


The last couple of stitches right at the gusset are probably the trickiest part of the whole project. You're dealing with 3 seams coming together at different angles and it can be hard to get the needles thru the holes. I like to leave those last 2 stitches slightly loose until I have the threads all thru where they need to be. Then I pull them tight.


Next, reverse direction and stitch all the way up to the top of the front panel. Backstitch 4 or 5 stitches here and trim off the little bit of extra welt even with the top of the front panel now.


Sew the flap on being extra careful to keep your stitching neat as this will be visible on the finished bag. Start about 5 holes in from one end, go out to the end, and reverse again to the other end. Backstitch again to lock everything tight.


Almost done. We still need to cut the strap to length, put a buckle on, and punch a few holes for adjustment. I like the buckle on the back and a couple of holes shorter and longer than where I intend to buckle the strap. This bag gets a forged iron buckle made by Steve Baxter.
I use my hole puncher to make a slot about 3/4 inch long where the tongue of the buckle goes thru. They make a tool for this...


All that's left now is the hard part. You may have noticed that your new bag is inside out! Now you gotta turn that sucker. Push, pull, cuss, get 2 men and a boy to help, whatever it takes, you'll get it eventually. On really tough bags I have used the handle of a sledge hammer with the head on the ground to push up on the bag while I pull down.

If you've been following along and keeping up, you now have a quality shooting bag that will give you years of service. :thumbsup:


One more thing...
If you used the oil-tanned leather like I did, you will have scuffed and stretched looking lighter places on the leather after turning the bag.


You can heat the leather with a hairdryer and/or rub it with your hands to bring the color back up.
 
Jethro224 said:
...scuffed and stretched looking lighter places on the leather after turning the bag.

You can heat the leather with a hairdryer and/or rub it with your hands to bring the color back up.

They get that way almost every time you use them, and the hair dryer is a good trick. Of course, I kinda like all that scuffing, so I only heat or rub mine a couple of times a year. Nice to be able to make something look "new" again so easy.
 
Hot dang, that bag is a beauty! This was an excellent build along and the out come superb. Thank you for sharing your building method. :hatsoff: :thumbsup:
 
Back
Top