• This community needs YOUR help today. We rely 100% on Supporting Memberships to fund our efforts. With the ever increasing fees of everything, we need help. We need more Supporting Members, today. Please invest back into this community. I will ship a few decals too in addition to all the account perks you get.


    Sign up here: https://www.muzzleloadingforum.com/account/upgrades
  • Friends, our 2nd Amendment rights are always under attack and the NRA has been a constant for decades in helping fight that fight.

    We have partnered with the NRA to offer you a discount on membership and Muzzleloading Forum gets a small percentage too of each membership, so you are supporting both the NRA and us.

    Use this link to sign up please; https://membership.nra.org/recruiters/join/XR045103

Shooting bag build. How I do it.

Muzzleloading Forum

Help Support Muzzleloading Forum:

This site may earn a commission from merchant affiliate links, including eBay, Amazon, and others.

jethro224

Moderator
Joined
Sep 29, 2005
Messages
7,428
Reaction score
15
I've been thinking about posting something like this for some time now. Maybe it will help somebody learn how to build their own shooting bag. Follow along as I show you how I do it.

I just started on this bag tonight. Took some pictures as I went. I'll try and describe what I'm doing and add pics and text as I get things done until the bag is finished.

Feel free to ask questions, add comments, or give advice at any time.

What you will need;
A pattern.
Leather. I like 4-5oz oil tanned for shooting bags.
A good sharp pair of scissors.
Awl. I like the round tipped ones. Some prefer the blade tips.
Overstitch wheel. Used for laying out evenly spaced stitching.
Small pair of pliers.
Harness needles.
Waxed linen thread.
Ruler / straight edge.
Hole punch.
Not pictured but you will want a chunk of beeswax and a soft wood board.
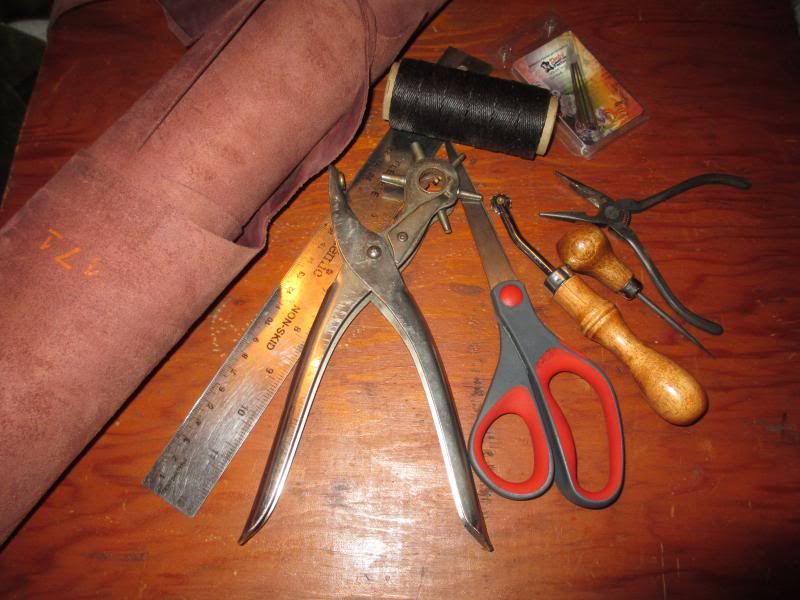


First thing you'll need is a pattern. Get a copy of an existing one or make your own. Graph paper is very useful if you decide to make your own pattern.
Once I make a pattern on paper, I like to transfer it to heavy card stock. The card stock makes it easier to handle while scribing it on to the leather. It also holds up better to be used again in the future.
I like to use my overstitch wheel to lay out the stitches on the card stock pattern rather than directly on the leather. Then I can use the pattern to mark the hole location using my awl.
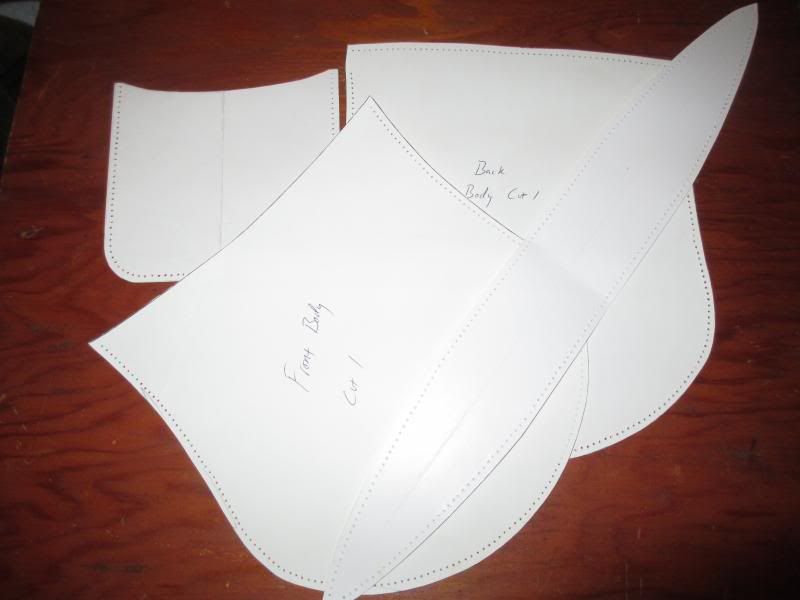


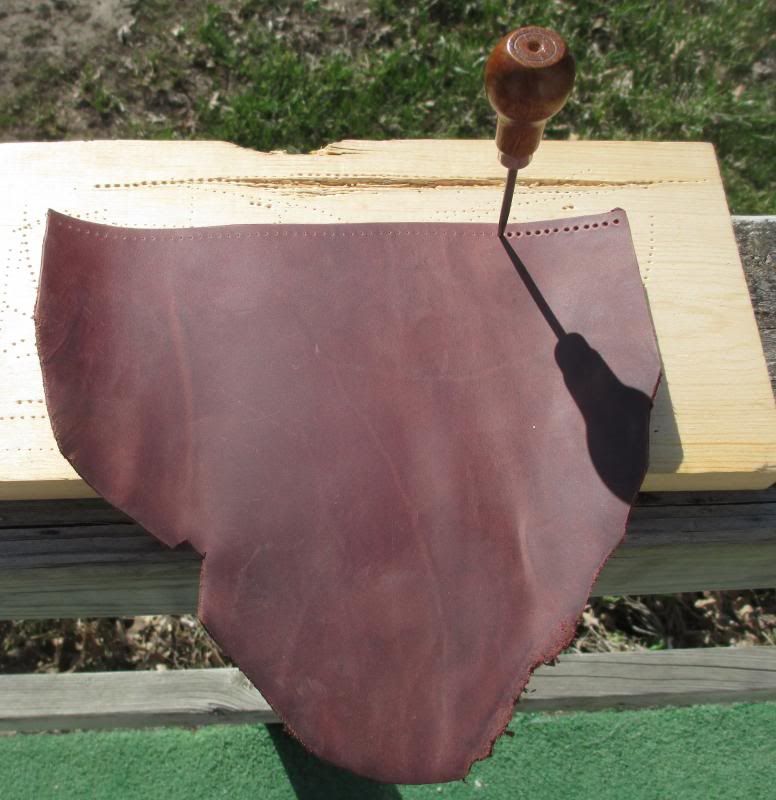
Leather is expensive, don't waste any more than you have to. Lay out your pattern as close as possible to the edge and make the best use of your whole hide. Hold the pattern still while you use your awl to scribe a line all around the edge. I also lightly poke hole marks at this time thru the locations laid out earlier on my pattern with the overstitch wheel. I use 7 holes per inch.
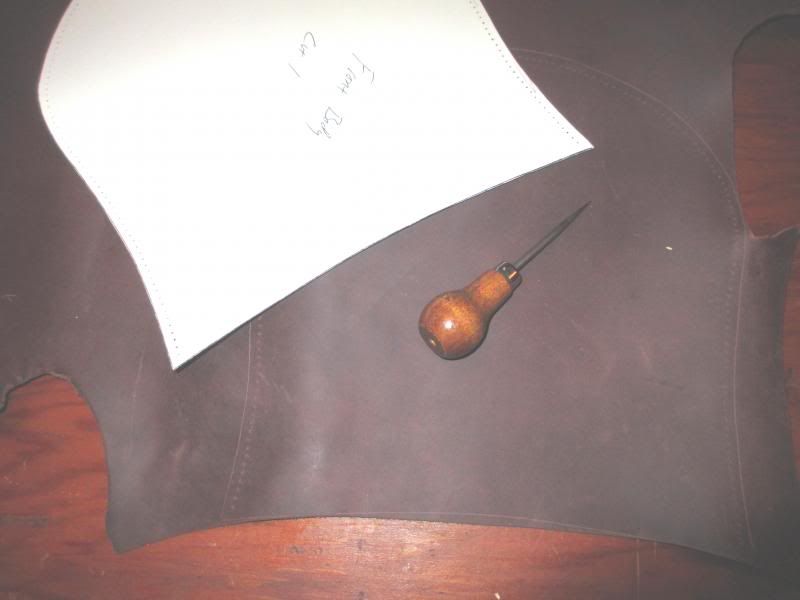


This bag will have the rough edge of the hide as a flap rather than cutting it to any certain design. I think this makes for a cool rustic look on a shooting bag. There are countless shapes you could use instead.
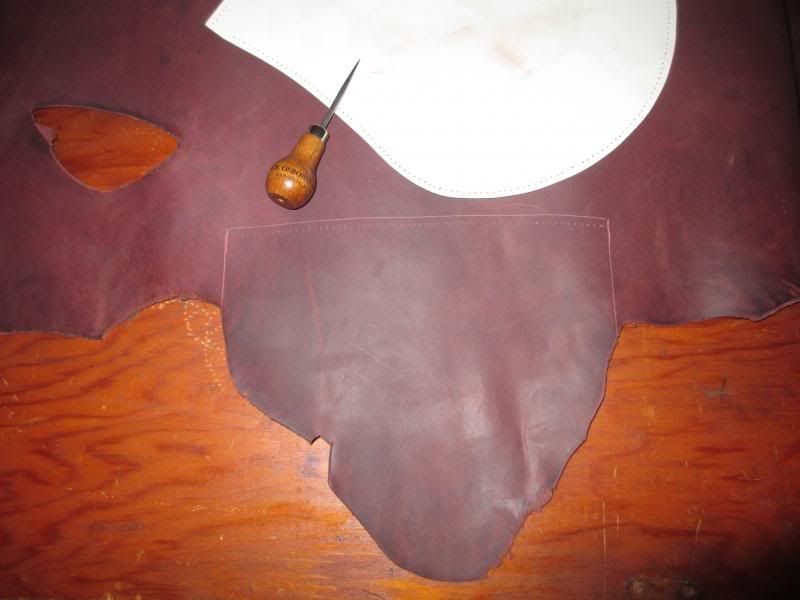


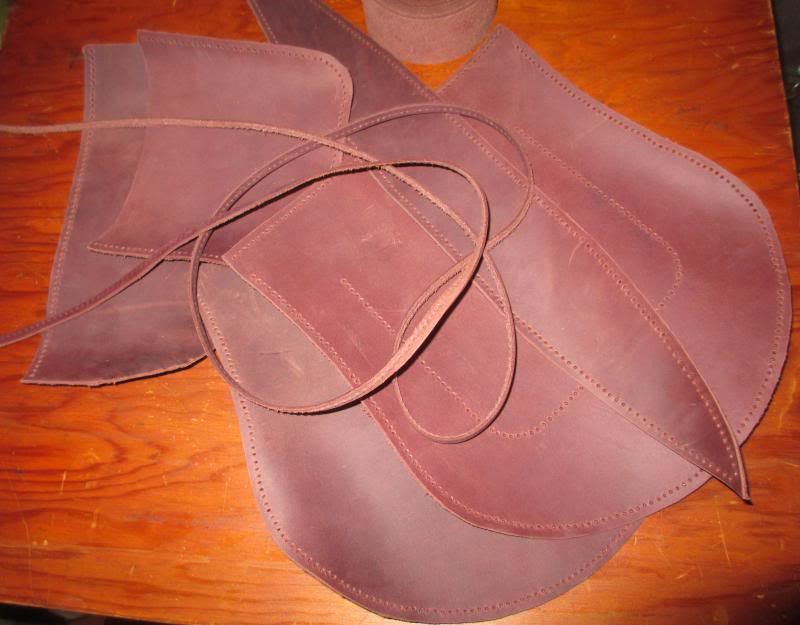
And here we have all the parts necessary to build our bag. Front and back panels, flap, tapered gusset, an inside pocket, strap, and welt.
They sell a strap cutting tool and one of these days I will buy one. I'm sure it makes a bagmakers life a lot easier, but for now I still lay them out with a long straight edge and carefully cut using my scissors. About 1.5" width seems perfect for the strap. My welts are about 1/4 inch wide.
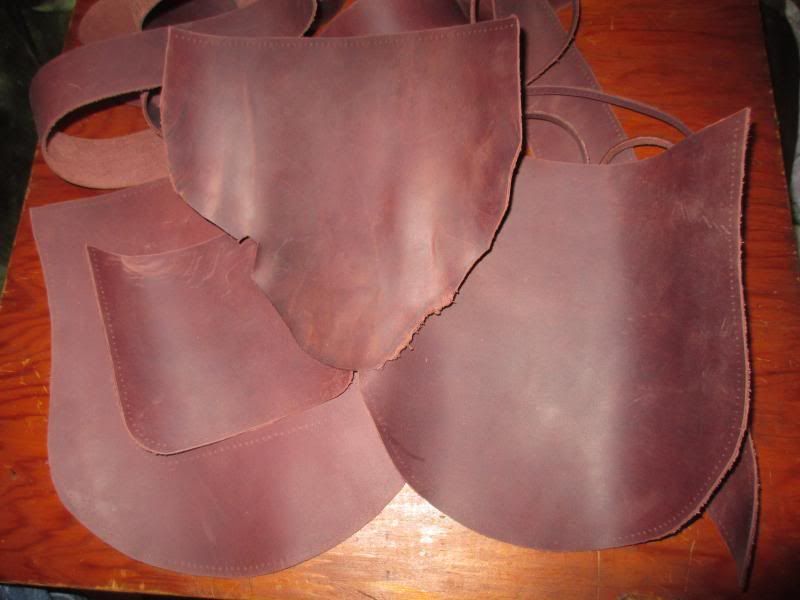


Next thing will be to poke about a gazillion holes for the stitching and start putting this thing together. Check back for more.
 
Alright, this is just too cool! Mind if I ask what the beeswax is for? :grin:
 
Jethro224 said:
Next thing will be to poke about a gazillion holes for the stitching and start putting this thing together.

You're a better man than me getting the holes to line up, pre-punching like that. After cutting out the pieces I "set" the distance of my stitches from the edge using a Stitching Groover on the side that will be up as I sew, then run my overstitch wheel down the groove.

Using that as a pattern I go along every few inches and "baste" in a tie to hold everything in place as I sew. Only then do I start poking holes, and it's mostly poke-as-I-go, punching no more than half a dozen at a time before I follow along with the sewing. Just lots easier to keep the edges nicely aligned that way, along with the straight stitching.

A couple of BTW's-

Some guys like the groover and some don't. I get virtually zero wear on my stitching with hard use because the groover sets the stitches partly below the leather surface, protecting them.

With oil tanned leather the marks from the overstitch wheel easily rub off with handling while you are working. Kinda makes me nutty. My habit now is to follow the overstitch wheel with a fine-point brown Sharpie and "remark" the spots so they don't get lost. If you use a staking or "pricking" wheel rather than an overstitch wheel, which makes a little cut instead of a mark or a small ding in the leather, the extra marking step isn't needed. Each "point" on the wheel is instead a tiny blade set at the perfect angle for stitching, so it is also a guide for the angle of a blade-type awl, which is my choice. Downside is that staking or pricking wheels are darned expensive.
 
WillametteT said:
Alright, this is just too cool! Mind if I ask what the beeswax is for? :grin:

Even tho I use waxed linen thread I will still rub more wax into the thread. Especially the ends when I'm trying to thread my needles and when I'm doing a particularly long run of stitching sometimes I will add more wax partway thru the run. The wax lubricates the thread, keeps it from fraying out while you work, and maybe preserves it too.
I will also rub wax on some of the edges of the completed bag.
 
I have never used a groover. Might hafta try one some day. What I do is run the overstitch wheel along the edge of my pattern using the side of the wheel as a guide. You gotta go slow and careful to keep the distance even. Then I poke small holes thru the pattern with my awl where the overstitch wheel marks lie. When I scribe the pattern on to the leather I hold it real steady and poke thru all those holes again with my awl. This leaves permanent marks in the oil tanned that will not erase.
As I will show in the next installment, I then go ahead and poke all of my stitch holes completely thru the leather before I ever begin stitching.

Never heard of the staking/pricking wheel. Sounds like a useful tool.
 
Fine Leatherworking has the blade-type (called pricking wheels). These are definitely the "high priced spread," but you get what you pay for. Lotta interesting tools on that site.

Bruce Johnson has Osborne "pricking wheels" on this page, but they're basically longer points rather than blades. Do a great job if you don't need the cuts, and not so expensive as the European version at Fine Leatherworking.
 
One thing I forgot to mention... When I poke the holes in my pattern, I first fold the paper pattern in half vertically, then I mark the holes so that one is dead center of the front and back panels. There will be an equal number of holes on each side of center. I poke an extra hole just outside of the stitch line and also mark that location on my leather when I transfer the pattern.
Doing this saves me from counting a lot of holes later to find the center of each piece during assembly. Also, if and when I want to make another bag from the same pattern, all of the counting is already done.

Holes;
Poking the holes is a long and tedious process. I can't stress enough tho that care and patience during this process will make all the difference in the world in the finished product. Make sure you poke the holes straight! Both on the stitch line and vertically. Be extra careful on the stitch lines that will show on the finished bag.
This is where you use the piece of soft wood as a backer for your leather as you use the awl to poke holes. Don't use a hardwood board. You want the tip of the awl to penetrate all the way thru the leather and into the board.


I poked a bunch of holes tonight. About all I want to poke. Will do some more tomorrow night. Then we will talk about stitching and start the assembly.
 
Ok, the gazillion holes are punched.
Don't forget the welt. You will need one strip of welt a little bit longer than the edge of the gusset and another that is a little bit longer than the back panel down one side, across the bottom, and up the other side.

A welt is not absolutely necessary but it is well worth the extra time and effort in building a quality bag. The welt adds to the looks of the finished bag and also protects the stitching in the seams.


Too late to do any stitching tonight. Tomorrow we start putting the bag together.
 
way cool - thanks for the post!

BrownBear ... drat you !!! another expensive tool which I have now come to realize I need desperately! AAARGH! Oh, the humanity!!!
:rotf:

seriously, that is a heck of a cool gadget, although you're right ... the 'high priced spread' ... typical French tool: beautifully made, good for only one purpose, will last a lifetime, and costs a boat load of money .. what's not to like?
 
Time to do some stitch work!
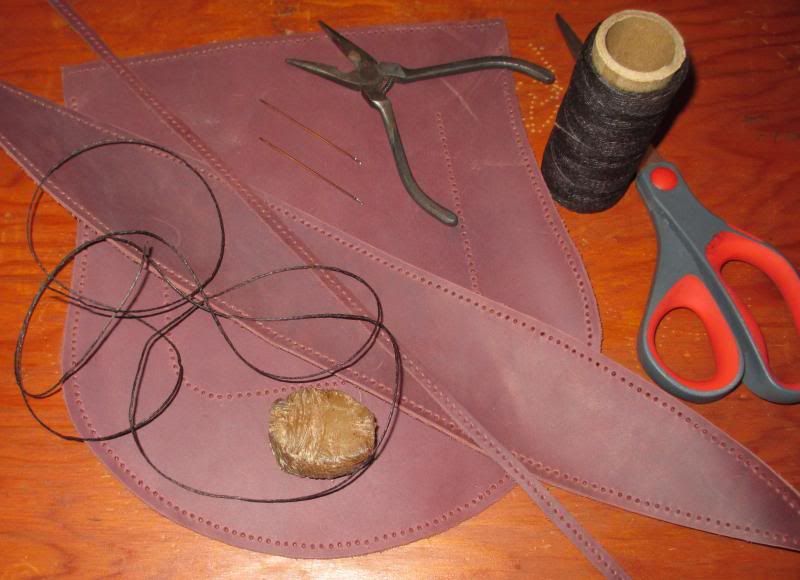
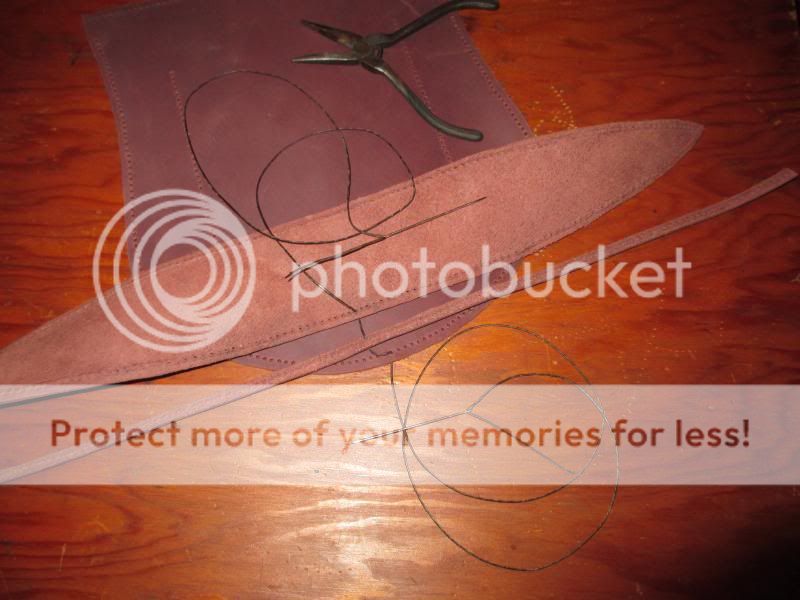
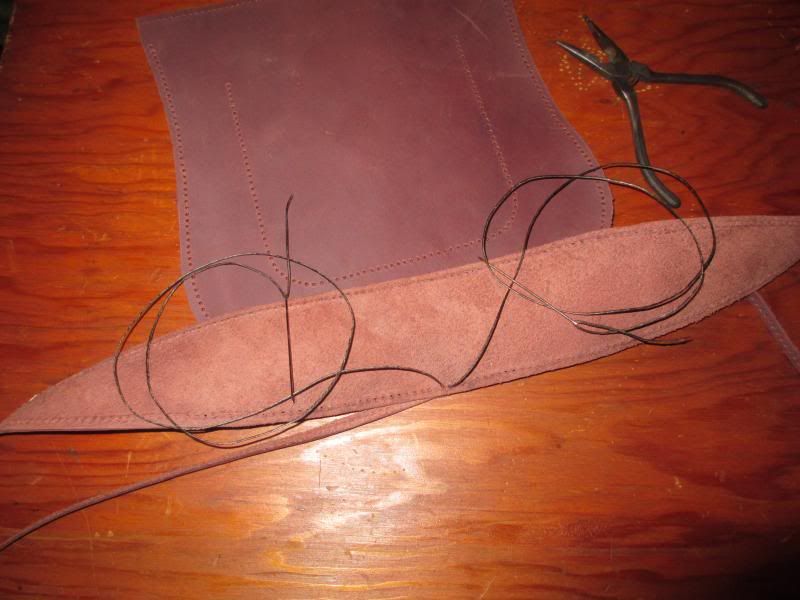
For this part of the project we will need the back panel, gusset, and a strip of welt that is a couple inches longer than the gusset. We will also use 2 harness needles, waxed linen thread, beeswax, a small pair of pliers, and a scissors.


First we need to cut a length of thread long enough to make our initial run of stitching. This run will be one half the length of the gusset. The thread will need to be about 4 times the length of the run plus a bit. I measure by unspooling thread as long as the side of the gusset, doubling that, and then adding enough to thread my needles plus a bit of extra for good measure. Better to waste a few inches than come up short.

Pull the thread across the wax to add wax if needed. Especially near the ends. Makes it easier to thread the needles...

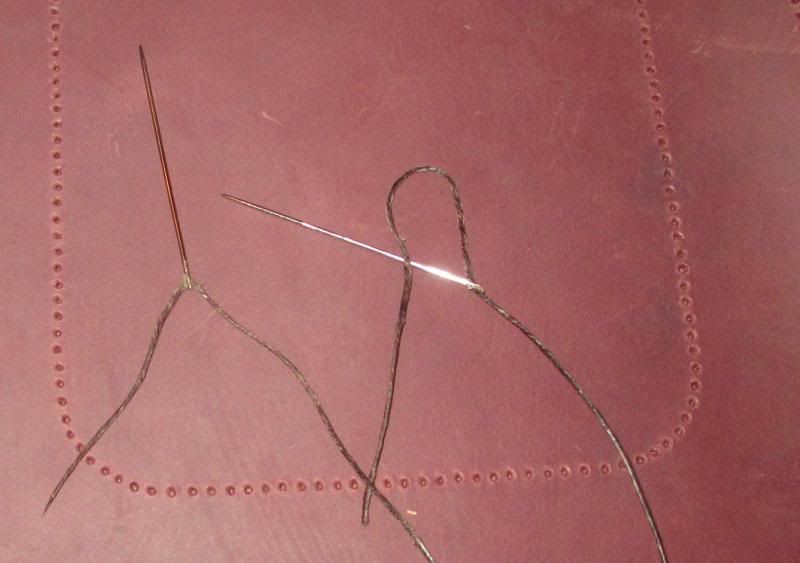
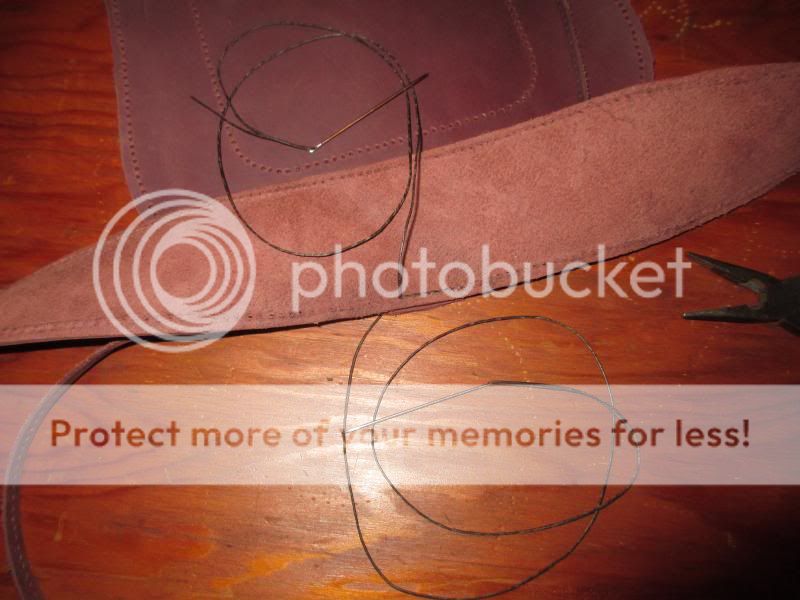
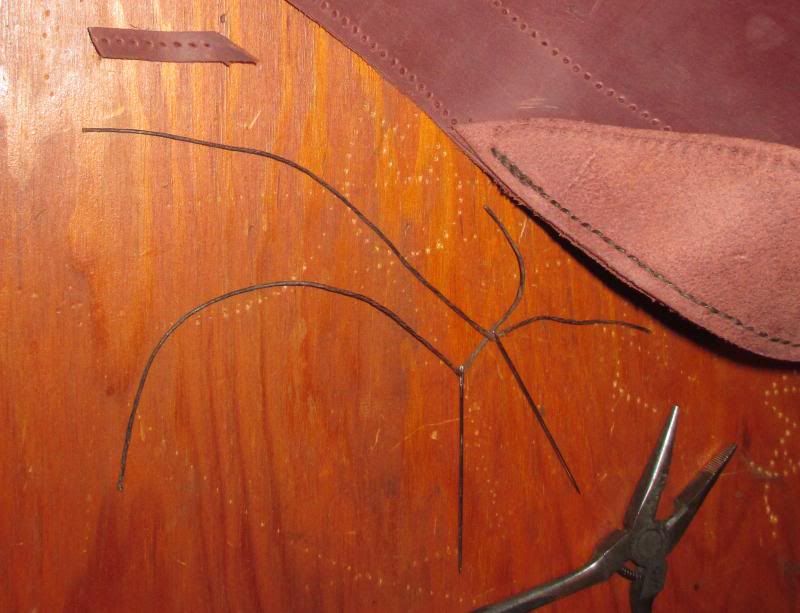
Now we need to thread the needles. One needle goes on each end of the same thread. A helpful tip; if you have trouble with pulling the needle off the end of the thread as you are sewing, lock it on by running the needle back thru the center of the thread like the one on the right. Pull it all the way thru and snug up the "noose".


Remember back when I said that I mark the center hole with a pinprick using my awl? Now is when that comes in handy. You need to start the stitching in the center of the back panel and the center of the gusset. If you didn't mark the center hole now is when you need to count a bunch of holes to find the center ones.
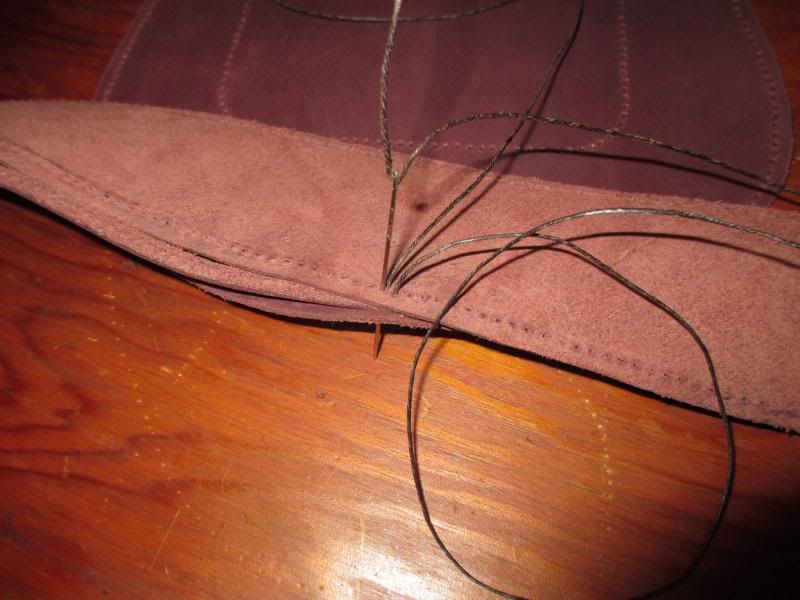
Run one needle down thru the shiny side of the back panel. Run the other needle up thru the middle of the welt (I don't count those holes, just fold and come close enough) and the center hole of the gusset. The shiny side of the gusset should be facing the shiny side of the back panel. Like this...


Pull them all together and center the thread so you have equal lengths on each end.


Now run one needle up thru the next hole (either direction, doesn't matter) and then run the other needle down thru the same hole. Be careful not to run the second needle thru the thread but along side of it. This is a saddle stitch.
Use the pliers to help pull stubborn needles thru the leather if necessary.


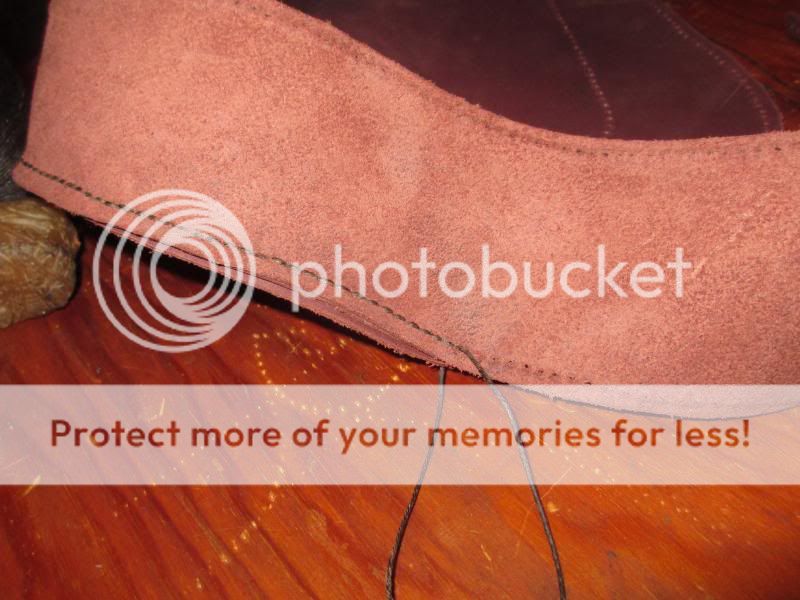
Continue this pattern pulling each stich tight as you go. Pull on both ends of the thread at the same time to get equal tension on both side of the stitch.


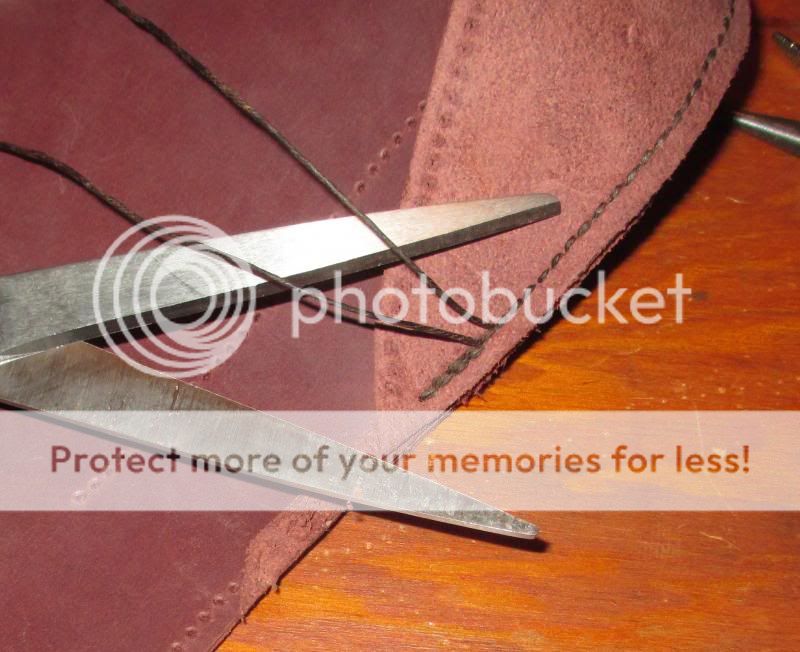
When you get to the end of the gusset, reverse direction and stitch back thru the same holes for 4 or 5 stitches. End with both threads on one side and cut them flush with the leather. No knot is necessary.


Then trim the leftover extra off the welt even with the gusset.


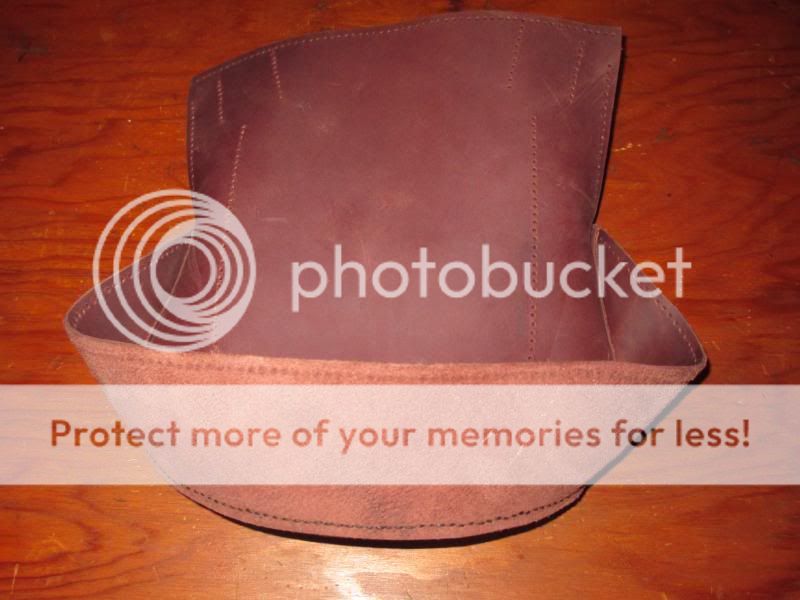
Now cut another length of thread. Thread both needles on it just like before. Start the 2nd run of stitching in the same hole as you started the first run but go the other direction. Don't skip to the next hole.


Finish the end the same way as the first one. We are well on our way now and, if you've been working along, your fingers are probably sore. We'll take a break now and get back to this tomorrow.


Next we will talk about pockets, straps, and such.
 
Wow, that is some serious work there! How do your fingers feel after stitching up a bag?
 
Depends how many times I poke the needle in 'em. :haha:

Seriously, I don't poke myself very often any more. I guess practice makes... better.

My fingers do get pretty sore from stitching up a bag if I do too much at once. And if I don't use the pliers as much as I should. Sometimes the skin on my fingers will crack open from all the pulling needles and thread. :idunno:

I got some more done on this bag today. Too tired now to do the write-up. Will post more tomorrow.
 
Jethro224 said:
Sometimes the skin on my fingers will crack open from all the pulling needles and thread.

I get a lot of that from the leather drawing oils or whatever from my skin. Oiled leather isn't so bad, but veg tanned and all the others make it happen fast. Only solution I've found is a high test lotion after each sewing session, or especially Bag Balm. "Udder-ly" great for dry hands. :grin: Standard remedy here when working in saltwater.
 
Back
Top