• This community needs YOUR help today. We rely 100% on Supporting Memberships to fund our efforts. With the ever increasing fees of everything, we need help. We need more Supporting Members, today. Please invest back into this community. I will ship a few decals too in addition to all the account perks you get.


    Sign up here: https://www.muzzleloadingforum.com/account/upgrades
  • Friends, our 2nd Amendment rights are always under attack and the NRA has been a constant for decades in helping fight that fight.

    We have partnered with the NRA to offer you a discount on membership and Muzzleloading Forum gets a small percentage too of each membership, so you are supporting both the NRA and us.

    Use this link to sign up please; https://membership.nra.org/recruiters/join/XR045103

Reamer Made to Correct a Cannon Bore

Muzzleloading Forum

Help Support Muzzleloading Forum:

This site may earn a commission from merchant affiliate links, including eBay, Amazon, and others.
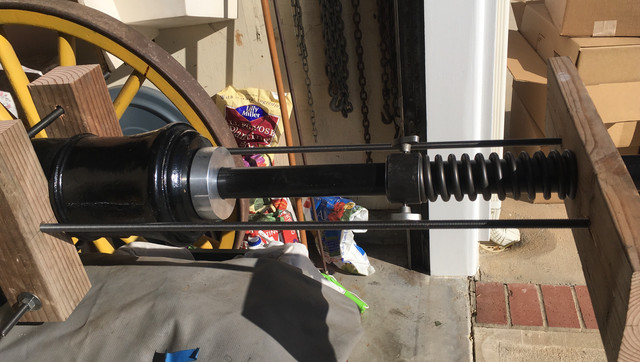
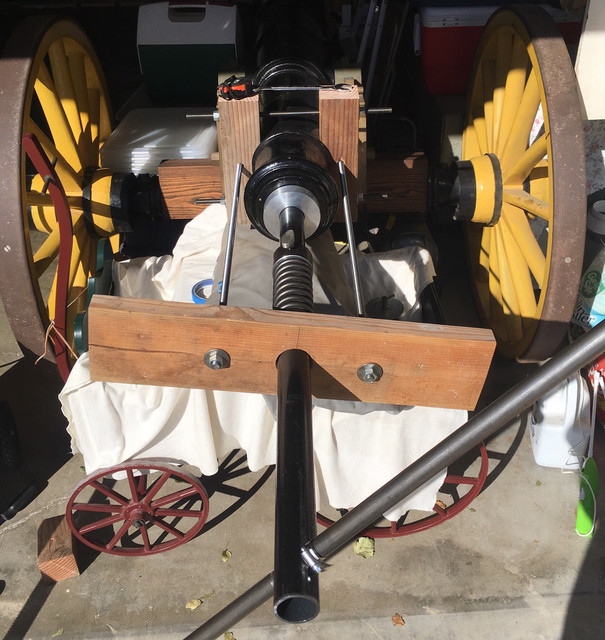
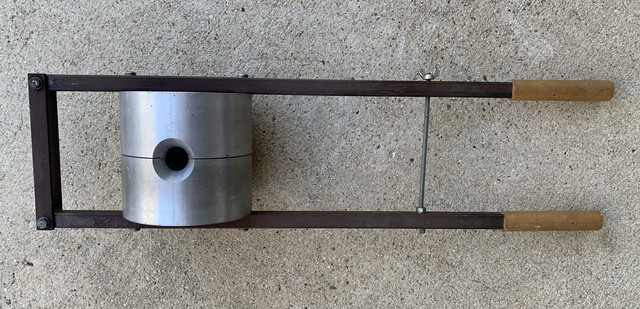
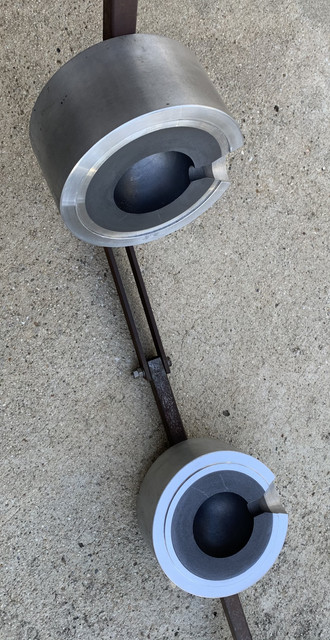
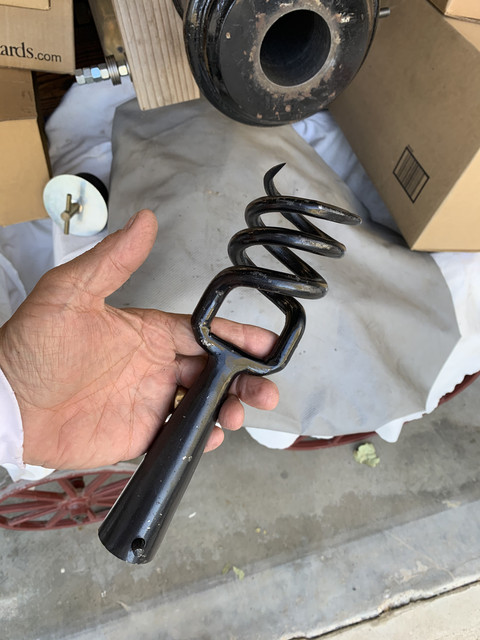
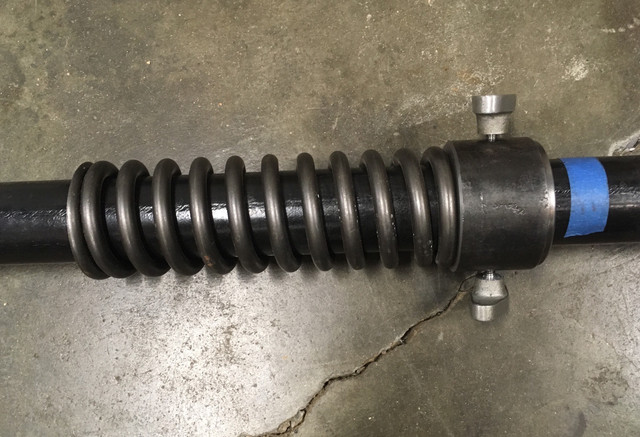
Here are the first two parts for the spring arrangement to advance the reamer while I turn the handle, the spring and the movable spring stop. The spring rate is ~104 pounds per inch of compression, so it should be more than enough to force the reamer into the cut without me having to push. I'm sure I was not applying more than 40 or 50 pounds of force when I was struggling to cut a few inches. The rest of the arrangement is a clap trap of all-thread rods and lumber. I didn't want to spend too much time and effort making a sophisticated rig....I don't think I will be doing this type of work more than once in a lifetime. :eek:

I'll take more pictures when I have it all put together and fins out if it works. ??


Does not look culgy at all, in fact it looks quite professional. Maybe even “period correct”. There is a lot of weight out there on the handle end though, I might suggest some support to prevent any tendency (however small) for the (admittedly piloted) reamer to head for the sky. Of course I could just be envious of your canon and handiness in building and operating the tooling.
 
Well, another project completed. I finished the reaming of the bore today all the way to the breech and then did some honing to polish up the bore surface some. The spring assist was a huge help. I could only compress the spring about 3/4" at a time to keep the tool force low enough for me to hand turn the "T" handle. The length of the spring would allow me to compress it over 5 inches but the tool force would be more that 700 pounds if I did. So I just used the all-thread to compress the spring 3/4", turns the handle until I had advanced that far, compress the spring 3/4" again, turn the handle, etc., etc.., until I inched my way all the way to the breech. Took a while but it was not hard to do....and a heck of a lot easier than trying to wrestling 600 pounds of barrel onto a lathe...and I don't have one that big. So this was a good way to do the job fairly easily and inexpensively.

This doesn't look like the bore of a new Browning 12 gage, but for a cast iron cannon bore it looks fantastic. And the best part is that it is a constant diameter now (2.752") from muzzle to breech. I will rework the ball mold to put out a cannon ball 2.747" diameter now. This should improve accuracy considerably.

This is not the greatest picture but you can tell that the bore is good......


I will start another thread but I wanted to ask if any of you have purchased and use a Teslong bore scope......
 
Where did you get the actual reamer and did it leave a smooth shiny bore
Ed.....sorry....I missed your question. I purchased the shell reamer and the mating tapered shaft from an on-line tool outfit..I can look up the exact place if you need the information. As I mentioned in a previous post, since the barrel is cast iron, it doesn't look like a modern shotgun bore, but is it smooth and has a gloss to is that doesn't show up in the pictures. But it is way more than adequate for a cannon bore. And if I rework the mold to just 0.005 under bore size (rather than the usual 0.050" to 0.060" of windage recommended for a cannon ball this size), the accuracy of the gun should be greatly improved.
 
Slightly better picture of the bore. It really looks great in real life.


And here is the ball mold that I need to rework now to better match the cleaned up bore......


And here is a new, better fitting worm for the gun as well......


Really admire the bore! What's the dark liner in the mould?

You'll get variation in ball diameter, so 0.005 should be OK. If you can engineer a way to improve sphericity, you could even go closer.
I was out shot by an original riverboat smooth-bore cannon that was bored quite precisely and the shooter used a cloth patch...and he practiced ... a lot!
 
The inside of the mold is made of pyrolytic graphite. The outer shell is aluminum that was shrunk onto the graphite before I machine the mold halves.
 
WOW! With that sort of accuracy and precision and material selection, you can have bare minimum windage, i.e. closest fit of ball to bore to get max velocity and accuracy/precision in shooting. A winning combination! Good on ya!

I look forward to seeing some shooting results.
 
This is why, when I built a Coehorn mortar in 1975, I did it all in a 20" American Pacemaker lathe. This was a project for my students interest, when I taught Junior College machine shop. How to do heavy parts in a big machine, how to make your own spade drills, etc. The Wood Pattern shop made the carriage, and a farrier student made the hardware. We blasted it with a blank wadding charge a couple of times at the farm unit, but it scared the **** out of the cows, literally. I later sold it to a cannon collector, along with it's shop made ball mold.
 
Philip,

I made the mold out of graphite for two reasons: First, I make rocket nozzles out of it and I had some. Second, I cut the hemisphere in each half with a home made half round spade bit. The graphite guts very easily, so a fairly flimsy spade bit cut a perfect hemisphere in a single plunge of the tool. What diameter was the ball you made a cast iron mold for ?
 
Back
Top