• This community needs YOUR help today. We rely 100% on Supporting Memberships to fund our efforts. With the ever increasing fees of everything, we need help. We need more Supporting Members, today. Please invest back into this community. I will ship a few decals too in addition to all the account perks you get.


    Sign up here: https://www.muzzleloadingforum.com/account/upgrades
  • Friends, our 2nd Amendment rights are always under attack and the NRA has been a constant for decades in helping fight that fight.

    We have partnered with the NRA to offer you a discount on membership and Muzzleloading Forum gets a small percentage too of each membership, so you are supporting both the NRA and us.

    Use this link to sign up please; https://membership.nra.org/recruiters/join/XR045103

Meet Mr. Hoots

Muzzleloading Forum

Help Support Muzzleloading Forum:

This site may earn a commission from merchant affiliate links, including eBay, Amazon, and others.

mogrene

32 Cal.
Joined
Nov 21, 2012
Messages
38
Reaction score
1
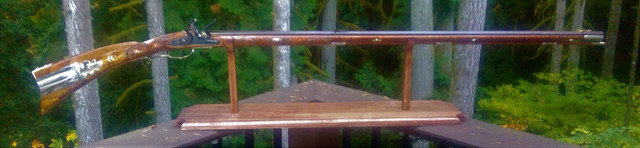
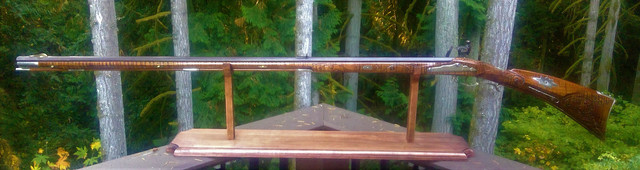
Well, it only took 6 years, but I finally finished the Lehigh Valley-style rifle from parts ordered in August, 2012.

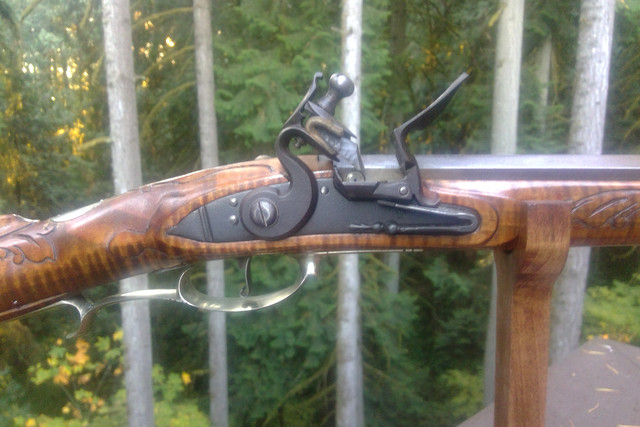
Rifle is .40 cal, with a 42" straight octagonal barrel. Lock is a Chambers “Dale Johnson,” with a single-set Davis trigger.

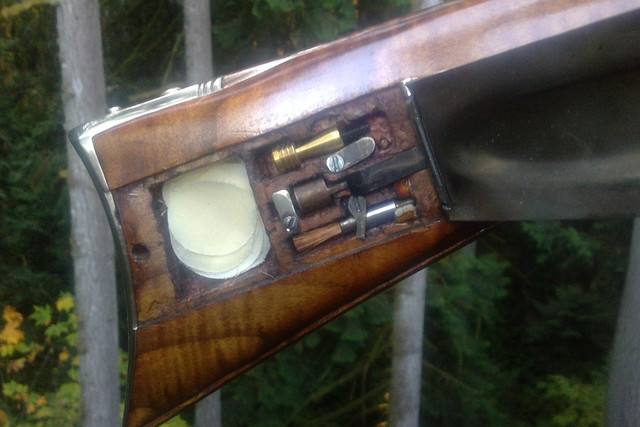
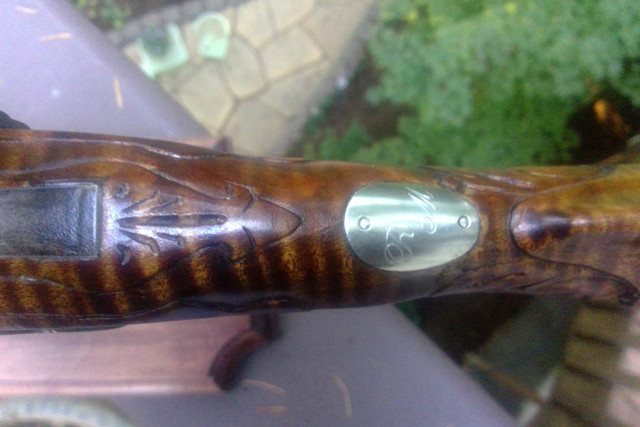
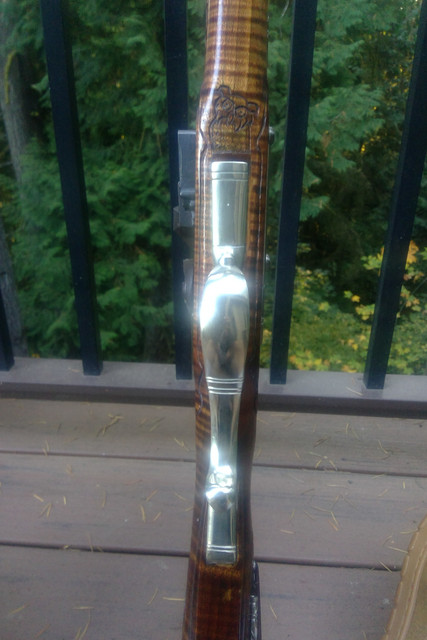
This is the second rifle I've built (the first was from Dixie Gun Works in 1982) and my first attempt at stock carving. I'm trying to work up the courage to engrave the patchbox, cheek piece, and side plate.

For stain, I started with aqua fortis. After it was neutralized and dry, I applied one coat of a 50-50 mix of Homer Dangler's red brown stain and rubbing alcohol. The finish is 5 to 7 coats (lost count) of Birchwood Casey Tru Oil, followed by a coat of BC gun stock wax.

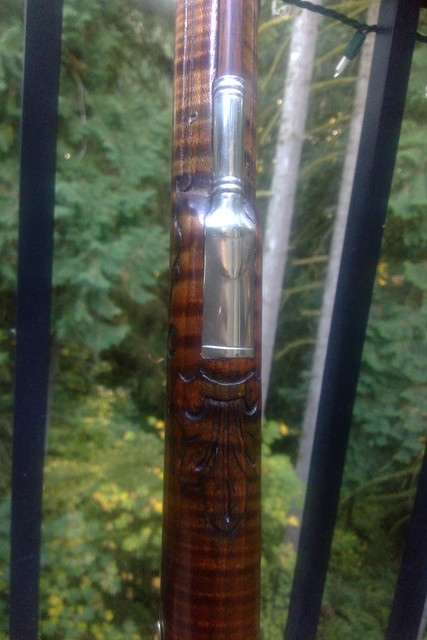
My son’s older sister gave him the nickname “Mr. Hoots” when he was a baby. The gun is named after him. You'll see the owl carving in place of Rupp's lady/Indian just forward of the trigger guard.
I finished the gun this past Monday and took it to the range yesterday. Shoots great.

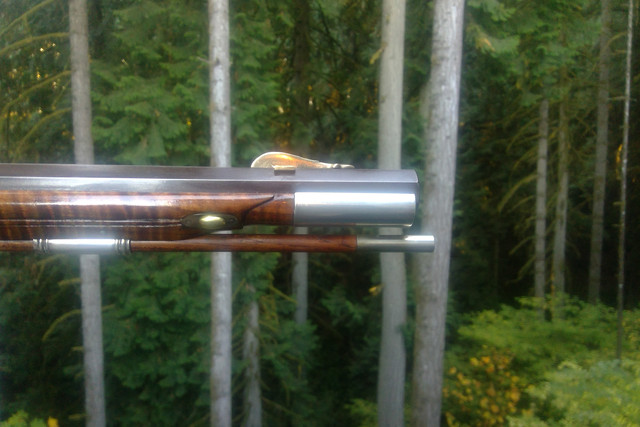
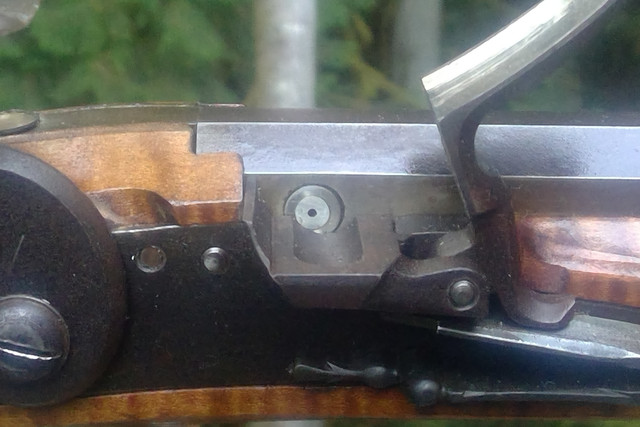
One lesson learned on placement of the touch hole liner: The biggest mistake I made was in setting the barrel about 1/4" too far to the back (don't ask). This put the breech plug face about 1/4" behind the center of flash pan. The standard placement of the touch hole is supposed to be centered over the pan and flush with or drilled into the breech plug face.

Per advice from a couple of you I gulped hard and moved it back a bit, as you'll see in the attached pix. As built, the outer edge of the White Lightening liner’s inside cone is just forward of the breech plug face, placing the touch hole about 1/16" or so off-center. I was worried about misfires, but that proved to not be a problem. Works fine, with no noticeable delay or misfires. So thank you, J.D. and Zonie!

The downside is that it takes a bit longer to clean gunk from the breech.

Got a bunch of good advice from several others of you and Ryan at Muzzle Loader Builder's Supply. Thank you all!


what is a baby wolf called
 
You did a great job on the carving and I really like the way you set the patchbox up.
 
Very nice indeed, thanks for sharing. The photos are also well done. It is also good to hear someone admit their mistakes. We all make them!
I did know a feller once that said he only made one mistake in his whole life. "He thought he was wrong, but he was actually right :rotf:
Flintlocklar :thumbsup: :hatsoff:
 
Have you started on your next one yet? Once you get one done, the urge is usually there to start the next one, and get all the mistakes of the last one right on the next.
 
Thank you all for your kind and encouraging comments. Much appreciated.

[Have you started on your next one yet? Once you get one done, the urge is usually there to start the next one, and get all the mistakes of the last one right on the next.]

In response to dctengdin, not quite. I need to replace and tune the touchhole liner on my earlier built flintlock rifle.

After that, I plan to replace the barrel on an old Euroarms .44 cal percussion Kentuckian I bought when stationed in Germany in the mid 1970s. My plan is to cut the stock to half-stock, and refinish in a Hawkins-style gun. Won't be historically correct, but would be fun to work on.
 
If you are going to do another one, one of the things that you will likely find beneficial is to be really really hard on yourself in listing what you think are mistakes on this one. And, as much as that, figure out WHY you made them--what was the thought process you went through when you made the decision that rendered a mistake. If you can identify the source for the decision that rendered the mistake, then you can eliminate the mistake next time around.

Many of the members here can also give you constructive criticism on things to look out for, or errors they perceive you made. But you have to ask first. Many are reticent to render criticism if they don't think you're really looking for it, but rather, looking for congratulations instead. Just bear in mind that not everybody that has an opinion, has a properly grounded and informed one on what is a "correct" Lehigh, and what is not. The distinguishing features of a "Rupp inspired rifle" are not necessarily "correct" for a Hess . Take for instance the left side plate. Rupps (and most Central Lehigh County makers) used an arrowhead design at the tail. A Hess gun typically doesn't have that.

Lehighs are really tricky rifles to make, because they are sort of weird. So much of what is done in all the other schools doesn't really apply to them. Compounding that, each original maker (or sub region within Lehigh County) did things a little differently. Even highly experienced makers typically have to make a couple of runs at them before they feel like they "got it right".

The following article should help you with some of the differences between features discernable of the major gun making families of the county.
http://americansocietyofarmscollectors.org/wp-content/uploads/2013/05/B047_Gabel.pdf

Hope this of some help to you.
 
Last edited:
Col. B:

This is really good advice - thank you. And thanks for the link. The article on Lehigh gun making families is VERY interesting.

For this gun, I relied on the how-to books by Alexander and Dixon and the illustrations in Shumway's Volume 1. Needless to say, there are also lots of photos on the internet by contemporary master gun makers and photos of surviving antiques.

You are absolutely right about the advice available on this site. There are some amazing craftsman on this site who are very generous with their ideas and suggestions. And, as you point out, almost all are polite enough to wait to be asked before criticizing. I've followed your posts and count you among those very skilled and courteous gentlemen.

Here's a thought for those who may be thinking about building their first long rifle: There is a fundamental choice to be made at the beginning. One option is to duplicate the work of one of the old masters or families or schools. The other option is to duplicate their process. Rifles by the old masters all share common design features. Those that span the eastern colonies/states and give the long rifle its place in American history. Those that span regions gives us a variety of styles and schools. But each gun builder also experimented with design features of their own. Because they did, they left hundreds of unique works of art to marvel and inspire.

For Mr. Hoots, I took the second approach. For example, the place where the forestock and nosecap meet is my own design. I don't hunt, so no need to worry about catching branches on the ramrod. It's also easier to grasp the ramrod when my fingers get greasy at the range. Another example is the sites; I chose these because (1) I have the same on another rifle and like them and (2) they look cool. For the carving, I looked to old rifles for rococo and baroque design motifs, but the designs are my own.

The rifle has its share of "oops" mistakes. Most of those I was able to work around. The two I wish I could do over are the placement of the barrel/touch hole and the butt plate. The inletting of the upper buttplate into the comb is one of those unique and weird Lehigh things you mention. After too many hours, I finally declared "good enough" and just let it go. Sigh. And I can only wish I had Crewdawg's skill at fitting metal to wood. The craftsmanship on his recent Kibler build is awesome.

I guess my bottom line is that I designed and built a gun that I wanted to shoot and am pretty pleased with the result. Master craftsmanship?: not even close. Rupp and Lehigh inspired?: yes. Exact copy?: not the intent.

Rick
 
Back
Top