• This community needs YOUR help today. We rely 100% on Supporting Memberships to fund our efforts. With the ever increasing fees of everything, we need help. We need more Supporting Members, today. Please invest back into this community. I will ship a few decals too in addition to all the account perks you get.


    Sign up here: https://www.muzzleloadingforum.com/account/upgrades
  • Friends, our 2nd Amendment rights are always under attack and the NRA has been a constant for decades in helping fight that fight.

    We have partnered with the NRA to offer you a discount on membership and Muzzleloading Forum gets a small percentage too of each membership, so you are supporting both the NRA and us.

    Use this link to sign up please; https://membership.nra.org/recruiters/join/XR045103

Making a fine mid-18th century English rifle

Muzzleloading Forum

Help Support Muzzleloading Forum:

This site may earn a commission from merchant affiliate links, including eBay, Amazon, and others.
Dear Hatman,
That is why I do this. I am trying to offer information that you may not get anywhere else unless you are working in the shop of a maker of these kinds of guns. And some of what I am presenting is what you might learn from those working in the 18th century gun trade in London. My purpose is to expand your understanding and inspire you to try hard things in making guns and to honor those craftsmen from yore who did this kind of stuff routinely.

dave
 
Hi Bob and thanks,
I am thinking about it, one that focuses on making British flintlock guns. Something that fills in gaps in other resources like "Gunsmith of Grenville County" or "Recreating the American Longrifle". I have to figure out how to go about it though.

dave
Oh, a book would be fantastic.
I thought of suggesting it in the past, maybe I have, can't remember. That would be one gun building book I would buy.
 
Dave YOUUUUUUUUUUU HAVE GOT TO BE KIDDDDDDDDDING ME!! Absolutely a work of art. I am AMAAAAAZZZZED. THANK You for showing us this. I really hope to see more of your work.
 
Dear Hatman,
That is why I do this. I am trying to offer information that you may not get anywhere else unless you are working in the shop of a maker of these kinds of guns. And some of what I am presenting is what you might learn from those working in the 18th century gun trade in London. My purpose is to expand your understanding and inspire you to try hard things in making guns and to honor those craftsmen from yore who did this kind of stuff routinely.

dave
Dave, thanks again and to let you know I've already used your info from other posts on my last build and it made a difference...big time!

Rich
 
You are the man Dave, you made my year. Im in the gumakers guild and am very impressed with your work and now I want to try it. Thank you also for the posts.
 
Thank you very much for sharing what you have learned, Dave. Your work is amazing and I hope to use your tutorials to do some more decorative, artful work in the future.

I'm curious... Would you mind sharing roughly how many hours it might take you to complete a highly decorative gun such as this one if you are working from a blank and inletting your barrel and RR channels?
 
Hi HU,
With engraving and casting, probably about 200-250 hours. There is only a small but challenging amount of wood carving on this gun, and more carving can add a lot of time too. The time includes designing the decoration and drawing plans for the rifle. It does not include time for research. I did my research for this gun some years ago and could get right to it but for something new to me, I might spend 200 hours just reading, and visiting museums and collections.

dave
 
Hi HU,
Just a little more information. Rough and final shaping of the stock on this gun did not take me much time at all. I guess maybe 40 hours. I am very familiar with this stock design so I can go at it fast and furious. It did not take long to make the drawing and it really is not much different than a Brown Bess musket, something you know I am very familiar with. Also the barrel was already partly inlet. I just had to turn an inlet for an octagon to round fowler barrel into one for a short swamped octagon rifle barrel. It was quite easy. The real time comes with all the decoration, designing it, making it, inletting it, and engraving. That is when I really slow down.

dave
 
Hi Guys,
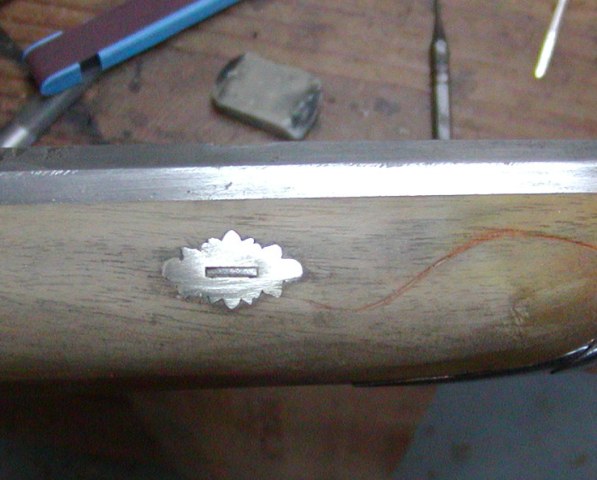
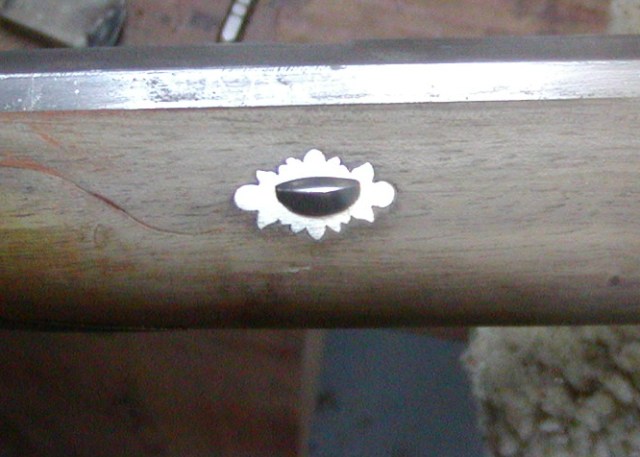
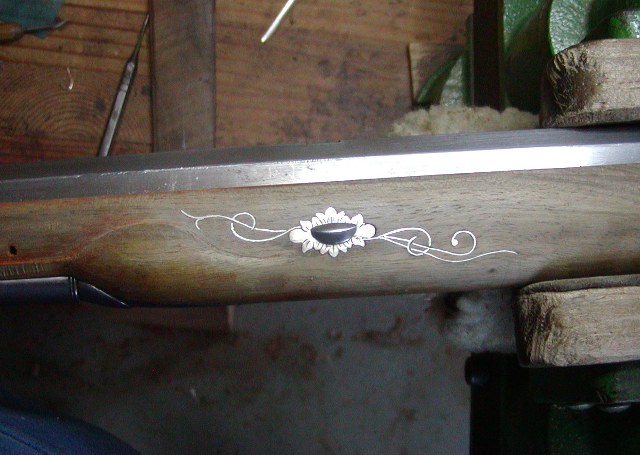
Well got more done but had to spend some days doing taxes and a ruffed grouse smashed through one of my shop windows shattering the glass everywhere. What a mess. So I am making and inletting silver escutcheon plates for the rear barrel key. I designed a nice floral motif and in let it. I cut the slot for the key first and then use the key to position the plate on the stock. I marked the outline by taping it to the stock, covering it with a flexible ruler and smacking the ruler with a small hammer. The silver makes a nice mark on the stock and I cut the wood away with micro chisels. It only took about 15 minutes to inlet each plate. After they are in place, I glue them using AcrsGlas.
fgK6GzA.jpg

yVasNn3.jpg

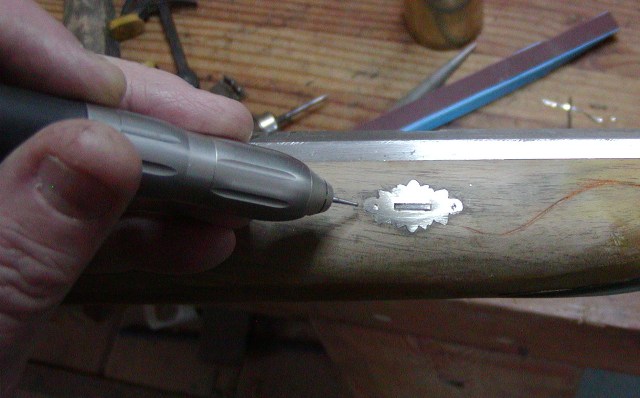
Then using a high speed rotary grinder, I mark the spots for pin holes. I use the grinder to prevent dimpling from using a center punch and hammer.
xVHms11.jpg

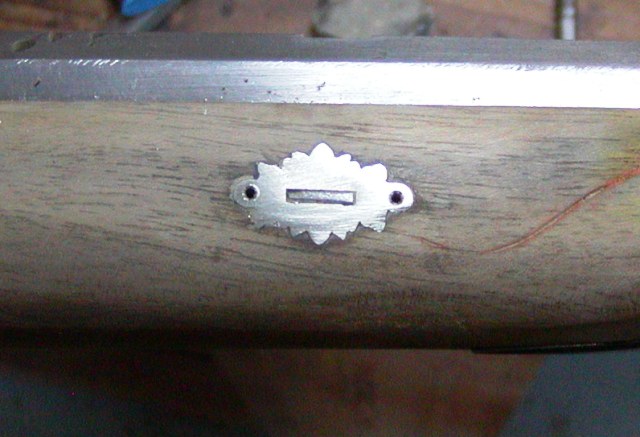
Then I drilla pin clearance hole thorough the plate and a smaller hole into the wood behind. I slightly counter sink the holes.
tooayFd.jpg

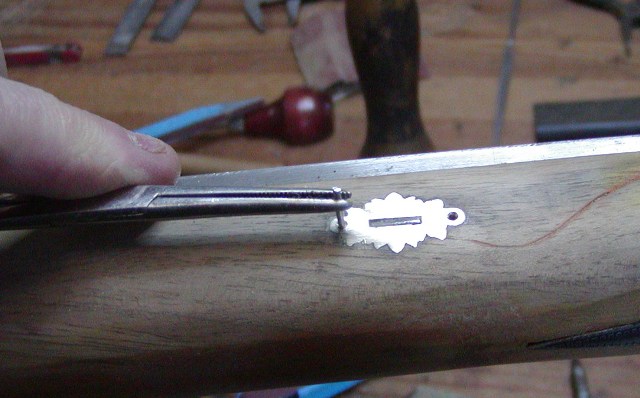
Then I cut a pin from silver wire and hold it with forceps in the hole and tap the pin in with a hammer leaving some above the surface of the plate.
6X23PbK.jpg

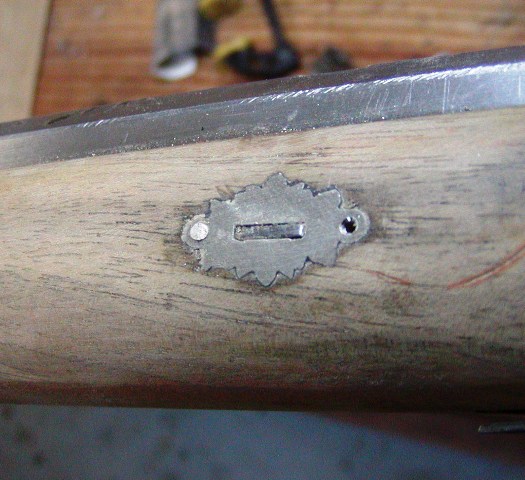
Finally, I peen the excess pin into the countersink
kNQFtUZ.jpg

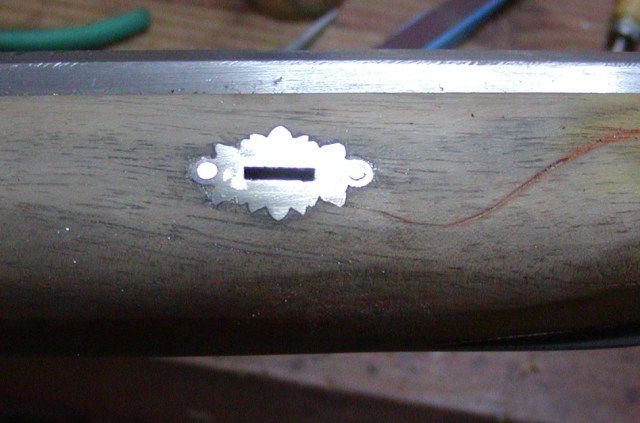
Finally, I file and then sand the pins flush with the plate.
9k7Gbo2.jpg


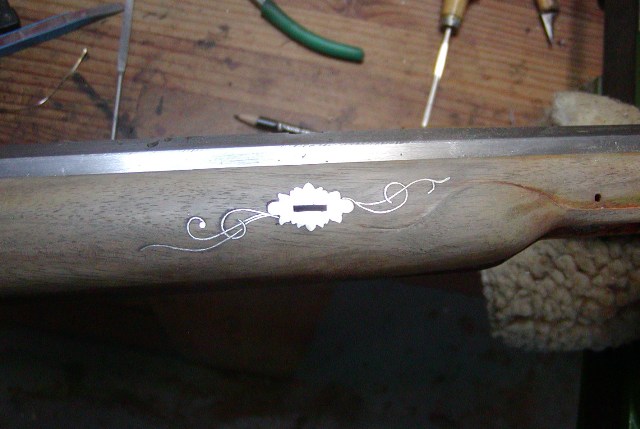
Finally, I added silver wire inlay to accent the plates,
rvsdSV2.jpg


The plates and wire complement the carving at the swell by the rear ramrod pipe. Finally, the plates will be engraved.

dave
 
I have been a lurker here for sometime and never posted anything.

Your work is nothing short of amazing. Very nice.
 
Hi Folks,
Thank you all for looking and taking the time to comment. I finished the barrel lug escutcheons on both sides and engraved them. Unfortunately, lighting in my shop today just could not do justice to the engraving so I'll post more photos later.
t0pSBQf.jpg


A word about engraving on these early to mid-18th century English guns. If you have John Schipper's great book on historical gun engraving you will see lot's of great designs and great engraving. However, the style is not accurate with respect to English guns from this period. Schipper's examples with heavy cross hatching to produce shading is not what you typically find on the original guns. You do encounter it somewhat with finely engraved silver decoration but not much on anything else. So for example, when the engraver on an English gun wanted to create shading or depth, he usually just cut a series of converging lines into the deep area and just cut more until the shaded area was essentially relief. Often they would use a round-bottomed graver to cut into that recess to create shadow. It is not like the style you see in Schipper's book.

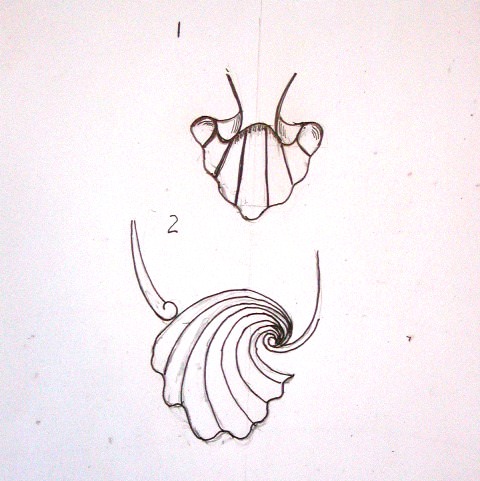
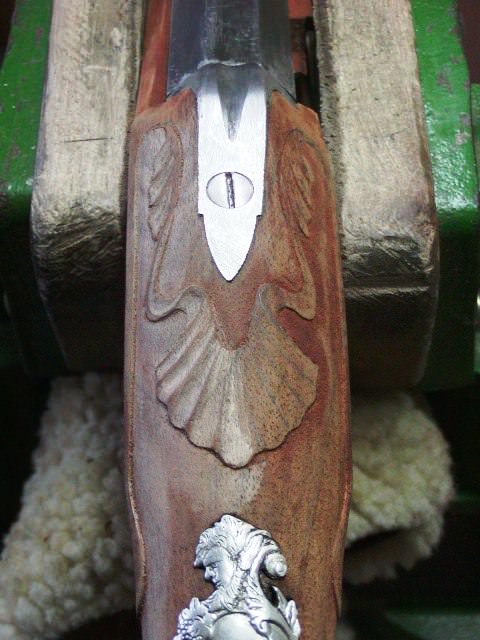
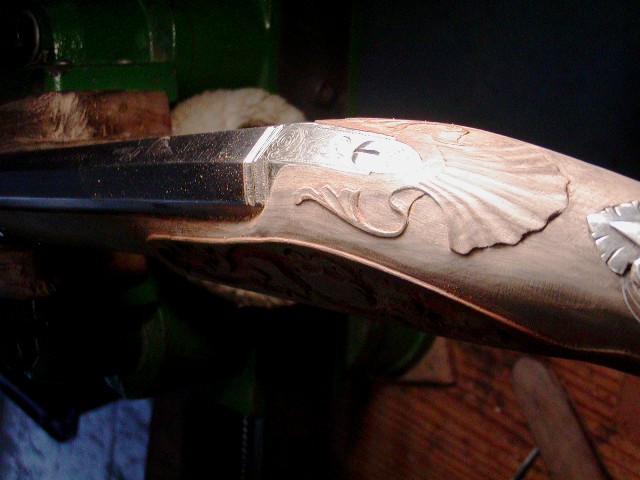
I started finishing the carving around the standing breech. Shell carving was the most common decoration and it usually had 3 distinct designs on British guns. They were the symmetrical rococo shell, symmetrical folded shell, and the rolling shell. The last 2 designs are illustrated in my drawings below.
ktOk4la.jpg

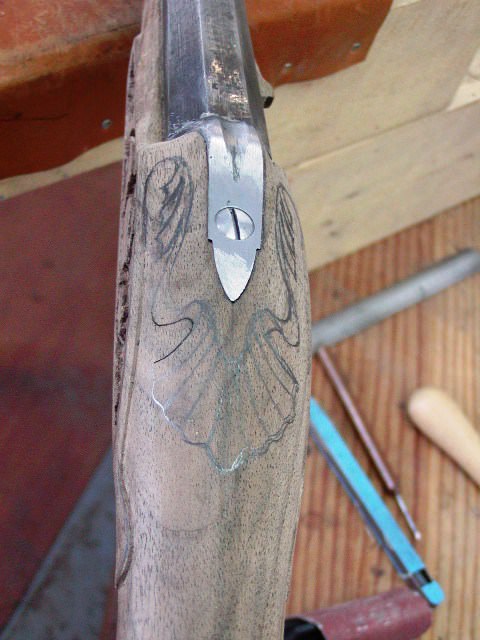
The shell rolling in from one side came later in the century but the folded shell was common and often used by the Griffin family of gun makers. My shell is the baroque symmetrical shell that was the most popular at the time. To begin the carving requires a good drawing on the wood and then stabbing in the edges.
ewgeb5w.jpg

Then removing the background often using a skew chisel.
v0DtJgw.jpg

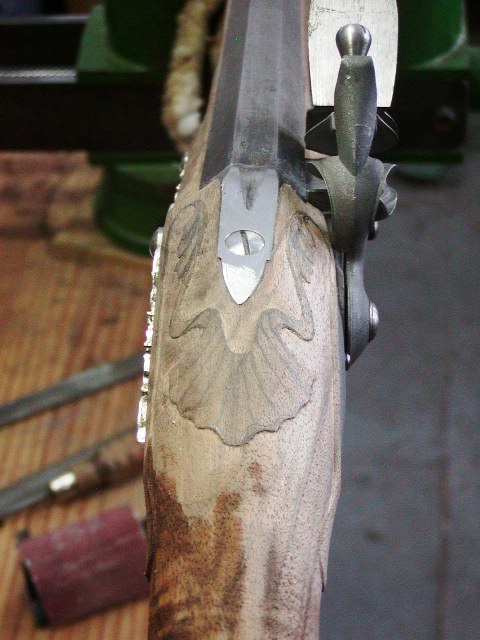
At that point, I whisker the stock and after that process, cut in the carving details.
OajFy9g.jpg

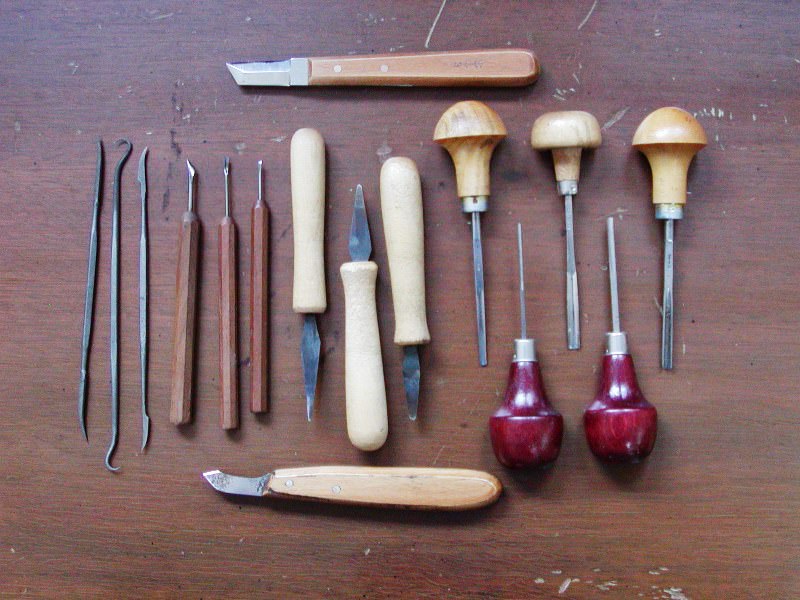
Here is an image showing most of the tools I use for the carving.
spiWfFJ.jpg

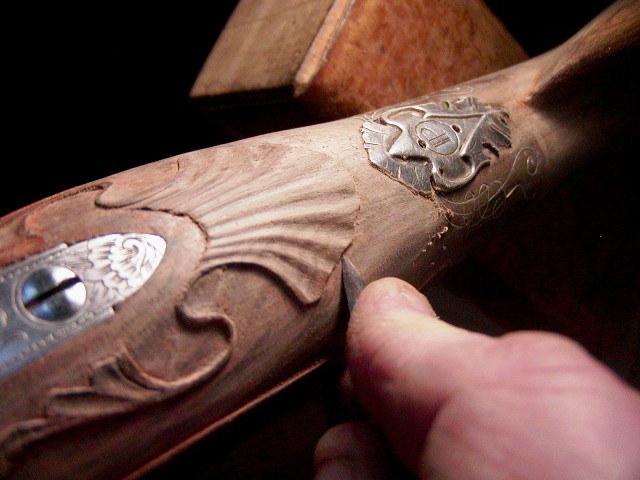
In this thread I show finishing the carving. It is important to illuminate it with low angle light, which shows up the rough spots. I use a skew knife to scrape away wood and clean up edges.
nSk2LNk.jpg


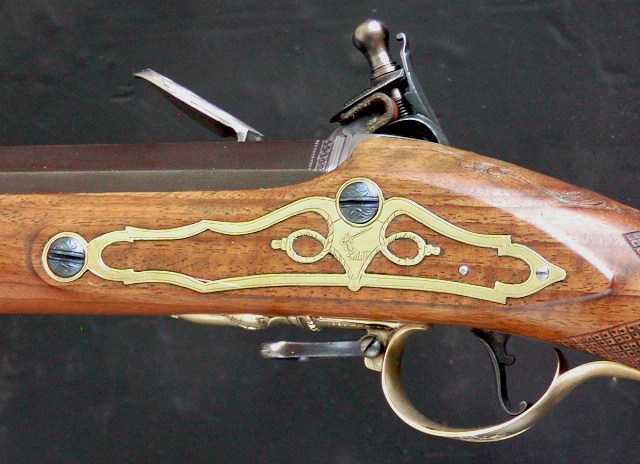
The moldings around the lock and side plate panels on this gun are a bit different than found on most English guns. The molding is a rounded bead and was popular during the first half of the 18th century.
Os8Dfo5.jpg

The bead extends all the way around the side and lock panels.

dave
 
Hi,
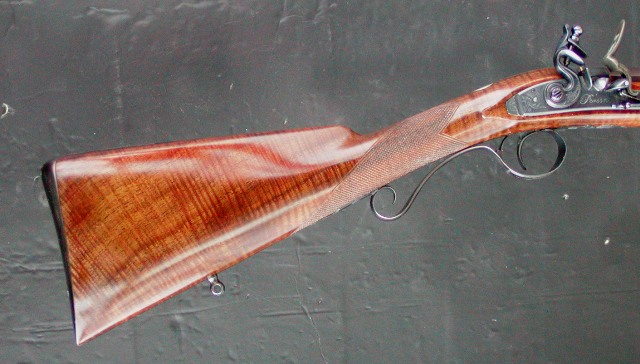
I finished the stock and painted it with stain that is alkanet root powder infused in mineral sprits. In an 8 oz jar, I place 3 heaping tablespoons of the powder and fill it with mineral spirits. Then I let it sit for 10-14 days. After that I filter the liquid using a "bird's nest" style coffee filter into another jar and throw away the used powder. I buy the powder online and it usually ships from India or Pakistan. You get quite a lot of powder for not much money even with the shipping. It lasts a long time. I use the stain in 2 ways, directly as a stain or added to my finish. This is the traditional stain used by British gun makers for English walnut. It produces nice color and makes any figure pop. I stained the stock but noticed several spots around edges and carving that still need a little clean up. Easy to do and then just touch up the stain. The guns below with English walnut stocks were stained with alkanet root.
MCplaIf.jpg

BIXK3zL.jpg

xES8ufA.jpg


I wanted to spend a little time discussing the sporting gun trade in Britain during the 18th century. In America, we think of the 18th century gunsmith as working in a small shop with a few apprentices and possibly journeymen. Although they typically used imported barrels and locks, and sometimes hardware, they were capable if required to make everything. The gunsmith usually did his own decoration and engraving. That is not the model for Britain nor most of Europe. There was much greater division of labor and in fact, the sporting gun product might be the work of up to 20 different tradesmen (and some women). Barrel makers, barrel polishers and finishers, rough stockers, stock finishers and decorators, lock makers, lock polishers, silver and goldsmiths, hardware makers and polishers, engravers, and setter uppers (the guys that did the final assembly sometimes called "screwer uppers"). That specialization enabled high quality work to be done at relatively low cost. Just like today, gun makers in the 18th century mostly made their fortunes from government contracts for military guns, for the East India Company, or trade guns for the Africa trade when times were peaceful. Not many gun makers who catered only to the sporting gun trade made fortunes and many went bankrupt because the well heeled gentry were notoriously bad at paying their bills, whereas the government could always be relied on to eventually pay what they owed. However, that specialization also created a profusion of really formulaic guns and many that have grossly mismatched decoration. For example, look at British guns with fancy side plates and notice that quite a few have an oblong tab for the forward lock bolt. That tab allowed the plate to fit different locks and really looks awkward on many guns. It was a case where the parts were made by a specialist trade in bulk and the gun makers used it when desired but in the process, no one was guiding any artistic design. It is just throwing together components that fit the spaces. However, there were some makers like the Griffins, Barbar, Hadley, Freeman, Turvey and later Twigg, Wogdon, and the Mantons who did not do that and their work is rightfully esteemed. In the case of my rifle, it should be clear that a single mind was directing its design and construction and that was not always the case with British sporting guns. It would represent the best work from that time.

dave
 
Beautiful work.

Also, thanks for the history. I really enjoy reading threads like this and others that contain historical information. It makes all of these rifles a lot more than just rifles.
 
Back
Top