• This community needs YOUR help today. We rely 100% on Supporting Memberships to fund our efforts. With the ever increasing fees of everything, we need help. We need more Supporting Members, today. Please invest back into this community. I will ship a few decals too in addition to all the account perks you get.


    Sign up here: https://www.muzzleloadingforum.com/account/upgrades
  • Friends, our 2nd Amendment rights are always under attack and the NRA has been a constant for decades in helping fight that fight.

    We have partnered with the NRA to offer you a discount on membership and Muzzleloading Forum gets a small percentage too of each membership, so you are supporting both the NRA and us.

    Use this link to sign up please; https://membership.nra.org/recruiters/join/XR045103

Making a British Officer's Pistol

Muzzleloading Forum

Help Support Muzzleloading Forum:

This site may earn a commission from merchant affiliate links, including eBay, Amazon, and others.
Wow Dave how the heck did I overlook this thread? Your work is awesome as usual, Bill is definitely smiling looking down at your work. In his words to me, You took what I taught you and ran with it. It’s now your turn to teach. Boy are you doing a heck of a job of teaching. Quite a bit better than me I’d say. BJH
 
Hi,
Thanks for looking folks. I thought some of you might want to see how I install a morticed front sight, which was a common way these sights were installed. Many horse pistols did not have any sights but many did and I wanted one. These were typically installed without any solder. The sight of gold, silver, brass, paktong, etc, was made with a tiny dove tail along the bottom edge. I cut a line with a jewelers saw and then file a dove tail on that line with a tiny triangular needle file.
cP89clY.jpg

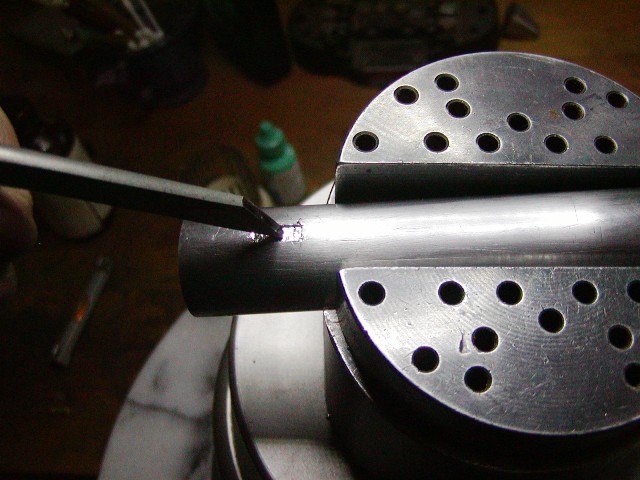
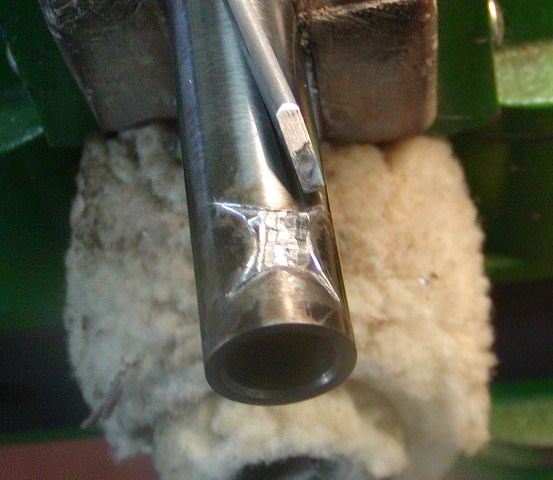
Then I engrave the outline of the mortice on the barrel. I find the center by placing the barrel upside down on a flat surface and keep it square to the surface. Then I slide a flat needle file under the barrel where the sight will go, and draw it out. It marks the center line perfectly. I outline the mortice with a square graver and then cut parallel lines within it to remover waste material.
GI8Lk43.jpg

Then I cut a smooth bottomed mortice with a 1/8" wide flat die sinker's chisel. When the mortice is at the right depth, I undercut the sides with a tiny flat on which the bottom flares out a little wider than the top. By cutting along the edges with that flat, it uncuts them.
BdAmlfn.jpg

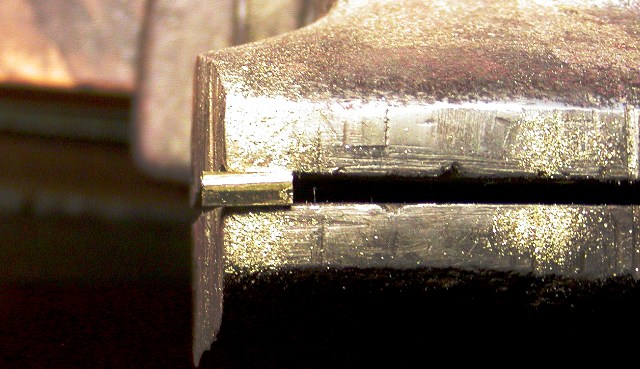
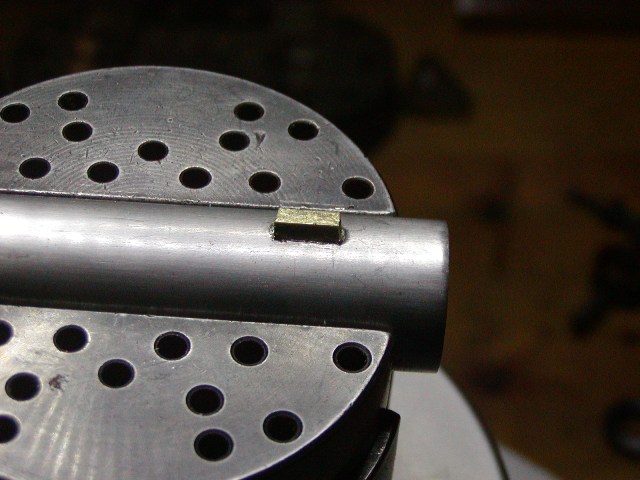
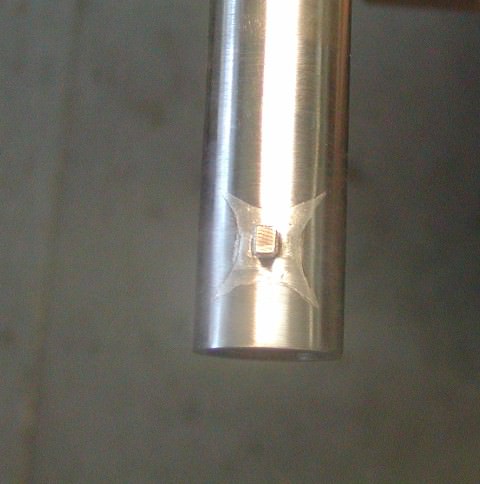
Next, I place the sight in the mortice and tap it hard with a small ball peen hammer. That usually locks it in place so I can take a punch and peen the barrel around the sight. That peens metal into the dovetail on the sight and permanently locks it in place.
UHlriTs.jpg

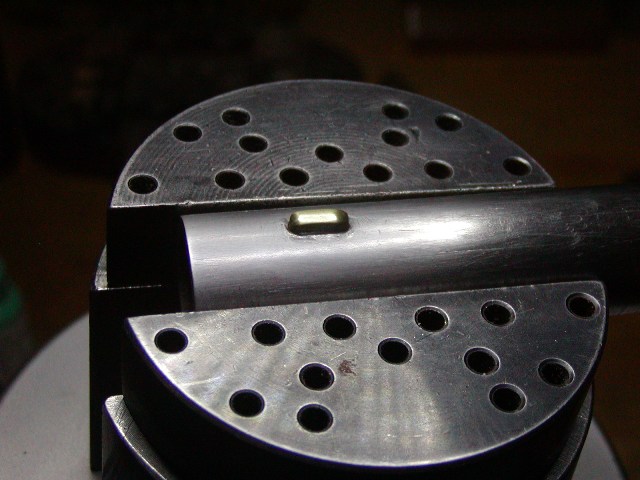
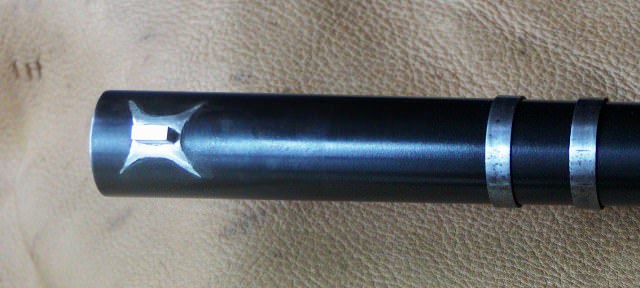
Finally, I clean up the barrel and sight and now have a neat and historically correct front sight.
pSdP8Rf.jpg


dave

Hi Dave,

Sorry it has taken me a while to ask these questions.

I am truly fascinated by this technique to hold a front sight in place!

I must admit at times I thought some of these front sights were held in place by brazing.

I can't help but wonder if those sights eventually got loose and fell off?

Do you know if front sights on other period guns were held in place in a similar manner?

As an aside, many Brown Bess Muskets have the front sight dovetailed into place with a tiny shallow dovetail, but it is not noticeable because the sight and dovetail are both made of Iron and so is the barrel of course.

Gus
 
Hi Gus,
Gun makers used all of those methods for attaching front sights. The peened mortice and dove tail was commonly used on pistols and fowlers and is extremely secure. There really is no way it can loosen and no solder or brazing to fail or risk over heating the barrel. The fancy silver "spider" sights are the same basic procedure with no solder required.
kTxVdkD.jpg

4AaPf4Z.jpg

lM0fAP3.jpg


Remember Gus, the barrels were wrought iron not our modern steel, so cutting a mortice was not very hard. I have to work at it much harder than they did in the 18th century.

dave
 
Hi Dave, I’m a new member but I was amazed at the complete and thoughtful descriptions that you provided for everyone. Using your time for the benefit of others is to be commended. Again, thank you , andy
 
Back
Top