• This community needs YOUR help today. We rely 100% on Supporting Memberships to fund our efforts. With the ever increasing fees of everything, we need help. We need more Supporting Members, today. Please invest back into this community. I will ship a few decals too in addition to all the account perks you get.


    Sign up here: https://www.muzzleloadingforum.com/account/upgrades
  • Friends, our 2nd Amendment rights are always under attack and the NRA has been a constant for decades in helping fight that fight.

    We have partnered with the NRA to offer you a discount on membership and Muzzleloading Forum gets a small percentage too of each membership, so you are supporting both the NRA and us.

    Use this link to sign up please; https://membership.nra.org/recruiters/join/XR045103

Knife sheath

Muzzleloading Forum

Help Support Muzzleloading Forum:

This site may earn a commission from merchant affiliate links, including eBay, Amazon, and others.

Trade knife J

32 Cal
Joined
Jul 10, 2019
Messages
23
Reaction score
23
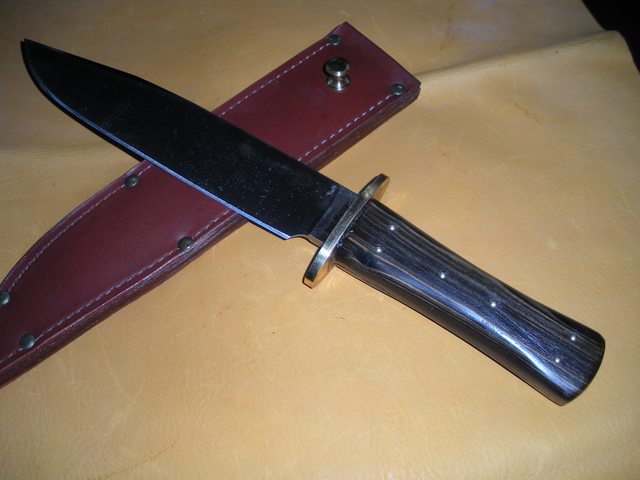
I wasn't sure where to post this, so please forgive me if this is the wrong place. Mods, please move as needed. Would anyone be able to recommend a sheath maker? I'm looking to have one in the style of a cross draw under the belt/sash style made. Thanks for any input!
 
Like this one?
20190522_161614.jpg 20190522_161752.jpg
Flap is wet molded and keeps sheath from slipping through sash or belt. Thong can be tied off to prevent loss or hang sheath/knife from something else.
A picture of the knife you want a sheath for, as well as time period it needs to fit, would help a lot. A picture of the type of sheath you want would help too if what is shown isn't right.
 
Like this one?
View attachment 14046 View attachment 14047
Flap is wet molded and keeps sheath from slipping through sash or belt. Thong can be tied off to prevent loss or hang sheath/knife from something else.
A picture of the knife you want a sheath for, as well as time period it needs to fit, would help a lot. A picture of the type of sheath you want would help too if what is shown isn't right.

Thanks! Similar but with a "side seam" At least I think that's what it would be called. Looking at F&I timeframe. Not sure if these fit the time but looking for a similar style. Would be for my new Longhunter shown here. https://www.muzzleloadingforum.com/threads/new-knife.116051/
 

Attachments

  • 29g.jpg
    29g.jpg
    306.5 KB · Views: 272
  • 26d.jpg
    26d.jpg
    331.4 KB · Views: 273
  • 35e.jpg
    35e.jpg
    289.3 KB · Views: 260
Okay. I could be wrong but my impression is that the edge seam was far less common at the time. But it can be done. A couple of those looks like thick leather or rawhide with a thinner more distressed looking leather stretched tight and stitched over/around the sheath doing the work. Not sure I can do anything as fancy as some of those. Send me a p.m. with where you are from and whatever other info you think pertinent to what you want.
 
While I am far from an expert, as I understand it, the center-seam is far more correct for F&I impressions. What Brokennock is showing you is a nice sheath. To get it to fit 100%, you might have to send him the knife, - or you could do it yourself.

Soak the leather first, wrap the oiled blade in Saran Wrap, and fold the leather over and cut/sew it as if you were going to make a side seam. Then place the wrapped blade in sideways, so the seam is at the center of the back side. Use your hand to mold the wet leather around the blade, leaving space at the entrance for the widest part of the blade. Then let the sheath dry with the blade in it. Burnish the seam with a wood dowel.
If you’re not up for making your own, you could do far worse than the one Brokennock posted...
 
Thanks. I was going to go over all that in a p.m. with him. I make the edge, or side seam sheath as usual (except for leaving off the belt loop), apply painter's tape to the blade if it isn't there already from the tracing process, then wrap in plastic wrap, and put the knife in the wet sheath. Then, slowly and carefully turn the sheath around the knife until the seam lands where you want it. I have some pieces of craft maple cut to shape/size with the appropriate edges rounded, that I then lightly clamp to either side of the seam on one side of the blade, and another piece on the unseamed side to create a press or form, but, this is not really needed. Let dry. Heat and apply beeswax.
 
Not a side seam but here’s what I did for my cross draw long knife...

It’s worn on my left side , tucked under my belt ball bag. Belt is 3” wide Latigo Leather cut from a Latigo side.

I’m not sure if the side seam would be more appropriate or not.

I would think those ol’ boys were probably like most of us..and both would have been fairly common.


E2380CDC-6D6B-418E-BC2D-3B16A7772ABD.jpeg


EB42E0A2-B555-40AC-A59F-B2680238E0B8.jpeg
 
Thanks. I was going to go over all that in a p.m. with him. I make the edge, or side seam sheath as usual (except for leaving off the belt loop), apply painter's tape to the blade if it isn't there already from the tracing process, then wrap in plastic wrap, and put the knife in the wet sheath. Then, slowly and carefully turn the sheath around the knife until the seam lands where you want it. I have some pieces of craft maple cut to shape/size with the appropriate edges rounded, that I then lightly clamp to either side of the seam on one side of the blade, and another piece on the unseamed side to create a press or form, but, this is not really needed. Let dry. Heat and apply beeswax.

You make a nice sheath! Center-seam sheaths were really common in the 18th century, and they offer some real advantages over the side-seam type. I guess there is simply too much work involved in wetting the leather, turning it, and letting it dry for most modern knives.
 
By the way, Brokennock, who made the knife in your picture? It’s a good representation of the common trade knife mentioned in many descriptions, right down to the red grips and what looks like a half tang.
 
By the way, Brokennock, who made the knife in your picture? It’s a good representation of the common trade knife mentioned in many descriptions, right down to the red grips and what looks like a half tang.
Funny you should ask,
Redoing the handle on one of a pair of knives I bought years ago, before I knew the tacks are no good for my times and place,
View attachment 9329 View attachment 9330 View attachment 9331
I also addressed that, too close to my knuckle rear corner of the blade,
View attachment 9332
Not quite as thin or well squared as I wanted,
View attachment 9333
Mistakes were made, should have cut the pins shorter.
Used what I had, home improvement store craft maple, wish I had boxwood or similar. Used burgundy Fiebings dye hoping to kill some of the maple look and mimic the period referenced "red handled scalpers."
Finishing now with a few applications of b.l.o. then some beeswax.

I should have extended the scales a little forward onto the blade, as well as a couple other things I'd do different. I believe the pair were made by Jeff White. I bought them off someone on the Frontier Folk forum many years ago.
I'll get the whole thing right when I do the other knife.
 
I appreciate the pics and your comments. Do you need two knives for your impression? If not, you might want to keep the one the way it is and use it in modern life; it’s not correct until the 19th century, but it looks very nice.
 
I don't need two, but, I'd like to get it right. And, for whatever reason, the one I left as I got it takes a much better edge. I figured I'd experiment with the one that I can't get as sharp, if I really messed it up I wouldn't care as much. The one I did the handle on gets sharp, but not to the level I demand. I'm very persnickety about cutting tools being as sharp as possible....
 
What are the advantages of the center seam?

This is only speculation on my part, but from period techniques used to mass produce bayonet scabbards.

Most "Industry" back then was "Cottage Industry," where work was farmed out to small shops that employed perhaps a few to maybe a dozen or more workers. (One shoe/boot making factory in Norfolk, VA set up in the late 1740's, employed 17 workers and that was considered a large factory in either the British or American tradition.)

To make Trade Knives and Sheaths as inexpensively as possible and thus gain the most profit, they were made to patterns, though not exactly alike. Still, they were close enough that leatherworkers did not have to custom make sheaths for each knife. They used different wood forms to mark out the leather to be cut for one pattern of knife sheath and cut out many pieces to be sewn into sheaths. They sewed a single line of stitching, wet the leather, then worked the leather by hand and inserted wooden forms so the stitching would be in the center and not exposed the to the knife edge when the sheath/s dried. This way they could make many sheaths fairly quickly and economically.

Gus
 
I have a couple of pics of French sheaths. They are center seamed up the back and have an integral tab rising up the back with what appears to be silk or other cloth attached through holes in these tabs. The seam appears to run up the middle of the tabs. I saw a pic from a museum showing some English sheaths found in a sunken wreck, but they were 1850's as I recall. I'll look and see what I have.
 
Appropos of nothing, I like this type of sheath, which is simply thrust under the waistband - the stud prevents it from going too deep/through.

CG060VUl.jpg
 
Back
Top