• This community needs YOUR help today. We rely 100% on Supporting Memberships to fund our efforts. With the ever increasing fees of everything, we need help. We need more Supporting Members, today. Please invest back into this community. I will ship a few decals too in addition to all the account perks you get.


    Sign up here: https://www.muzzleloadingforum.com/account/upgrades
  • Friends, our 2nd Amendment rights are always under attack and the NRA has been a constant for decades in helping fight that fight.

    We have partnered with the NRA to offer you a discount on membership and Muzzleloading Forum gets a small percentage too of each membership, so you are supporting both the NRA and us.

    Use this link to sign up please; https://membership.nra.org/recruiters/join/XR045103

Kentucky rifle build questions

Muzzleloading Forum

Help Support Muzzleloading Forum:

This site may earn a commission from merchant affiliate links, including eBay, Amazon, and others.
The drum has to be supported by the lock plate. Easy fix..... cut a strip of brass of the necessary thickness, from a shell casing( etc) and soft soldier it to the lock plate ....... a shim. You can then dress it down with a file or a sanding drum on a Dremel until it " Fully " supports the drum. Wood will not support anything very well. Filling the gap is not a matter of aesthetics; it is a matter of safety. Your picture shows no support of the drum at all. Try this ...... it really is easy.
 
Going back to filing down the plate on the inside of the lock. As long as the hammer clears a cap on the nipple am I fine to have it a little off center? Obviously not ideal. Just trying to find the balance.
As long as the hammer nose clears the cap you are fine. Also, a minor bending of the hammer to line it up after you have fit the lock plate to the barrel is an accepted practice to bring the nose of the hammer to center over the cap. I have several sets of instruction published in the 1980's on building of muzzle loading kits and one of the detailed instructions for the CVA kit was the procedure for bending the hammer.
 
As long as the hammer nose clears the cap you are fine. Also, a minor bending of the hammer to line it up after you have fit the lock plate to the barrel is an accepted practice to bring the nose of the hammer to center over the cap. I have several sets of instruction published in the 1980's on building of muzzle loading kits and one of the detailed instructions for the CVA kit was the procedure for bending the hammer.
That’s interesting!! So have you ever bent a hammer on one of your guns? What are your thoughts on the drum completely bedded on the lock plate vers only touching part of it?
 
Yes, I have bent hammers to properly align the nose of the hammer to the nipple.

Squirrel gun, tinkering on junk. But, so far so good... | The Muzzleloading Forum

Hammer and Nipple Not lined Up | Page 2 | The Muzzleloading Forum

Does anyone recognize this lock? | Page 3 | The Muzzleloading Forum

Follow the link in the third thread to see the actual article. These threads pretty well describe what you will have to do.

Completely bedded on the lock plate is the best practice. Partially on the lock plate is good too.
 
So Iv not had time to do any more work on lock or hammer. To stay ahead I wanted to ask a question related to side plates.
From pictures it looks like they are mounted with about half the plate inset. Is this right?
Also the one I ordered has beveled edges. It is beveled from the front and the back side to create a ridge. Do you sand this all flat with a slight slope towards the backside of it or do you leave the bevels? I’m assuming you leave the bevels to better highlight the curves?
158603EF-DAD7-4F27-8D96-6AB552238F69.jpeg
EBA676E8-CD7C-4316-ADF4-A9B3A16F2B3E.jpeg
 
IMO, if the sideplate has a chamfer (angular edge on it), the straight, lower area should be inlayed into the wood leaving the chamfered edge exposed.

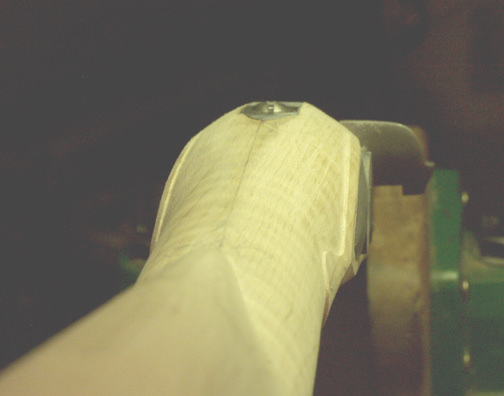
Before doing this, the lock plate must be installed into the stock.
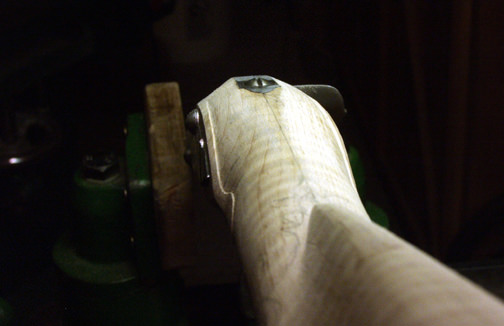
Once the lockplate is installed, figure out where the rear screw hole needs to be in the lock plate. (It should be in the raised up area just above and forward of the tumbler. In many locks, this raised area is not very large so position the tap drill for the screw hole carefully so there is material all around it.

Once the unthreaded screw hole is in the lock plate, install the lock and use the hole to guide a tap drill sized bit as you drill the rough screw hole back thru the stock to the far side. Once done, enlarge the hole thru the wood so that the lock screw will fit thru it. Now, you know where the center of that "rear hole" should be.
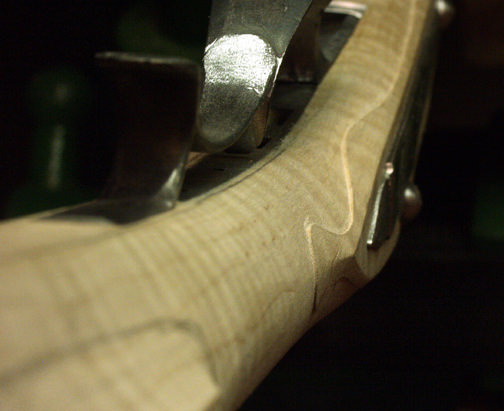
Insert a screw thru the rear hole in the sideplate and into the screw hole in the stock. Now, the rear of your sideplate is located.
I won't get into how to position the side plate for the front hole but if your going to use a real "thru screw" there, that takes more work to figure out where it should go.

When you get the sideplate positioned where you want it, I suggest using a few drops of superglue to hold it in place. Once firmly in place, use a pointed hobby knife to pierce directly down into the wood using the side of the sideplate as your guide.
 
Thanks Zonie!! That all makes good sense!! Chamfer!! That’s the word I was missing!!
 
Well it’s been a while but I finally had some time today to work on the build! I filed down the inside of the lock plate so it sat flush in the stock. Drilled my side plate and have it all sanded up. I have also been working on filing the stock down flush with the lock, barrel tang and trigger guard. I also worked on re-profiling the area around the lock.
So do I bring my lines in closer to the lock as drawn? Or leave as is for now? Looking at the opposite side, witch I haven re shaped, you can see how much I took off. How are the transitions looking between the lock area and the trigger guard?
Aaron
658BDD30-5921-4141-910A-4F8895F6392D.jpeg
CDAA6DAC-51F8-4F96-A6D5-0EFBE0A03751.jpeg
6F399CA2-2F7B-4EB8-B8EA-809B9C2DADFF.jpeg
 

Attachments

  • 2B71C6D2-0B1E-490B-A233-A255B5CCE7E6.jpeg
    2B71C6D2-0B1E-490B-A233-A255B5CCE7E6.jpeg
    99.6 KB · Views: 52
You can go even closer to the lock with your borders. Once you have the lock borders outlined trace that and transfer it to the side plate side so they are symmetrical.
 
I like skinny guns , so 3/16" lock border for me. At the curve in the lock plate in front of the bolster you might make the panel follow the lock plate a little closer. Make the transition pronounced , from flat to curve toward the stock surface. These suggestions will all change a clubby stock to be thinner looking creation...........oldwood
 
Thanks Oldwood and Rafterrob! I felt like it could go thinner but was hesitant to take to much at one time!
So here is a pic from the net. I suppose that both of these guns belong to a certain school and time. I’m looking at the transition from the lock plate flats to the trigger guard area of the stock. Is one vers then other more appropriate for a Kentucky rifle?
661BE9A8-64DA-490F-A9B6-4CAA44FAF499.jpeg
 
If you want another old codger opinion , the lock panel transition on the percussion is better than the more blocky one on the mountain rifle. If you notice the Mtn. rifle transition , it seems to cause the forearm to be square looking instead of a flowing oval shape. Hope this is helpful............oldwood
 
My question is, is the barrel secured in place by the tang screw and the pin/wedge key. if not that will change where that barrel is going to lay...
 
So here I have the lock panel penciled in a lot closer to the lock. Is that looking better?
Oldwood just wanted to clarify. You’re saying you like the slim look of the percussion compared to the flinter?
Norman I’m not sure what your driving at….. this is a traditions Kentucky long rifle kit. The barrel is held in place by a tang screw as well as 2 pens.
B50A511D-47DB-4185-81F5-C27983E021AE.jpeg
 
Loja..........I like the oval shape of the percussion rifle instead of the square look of the Mtn. rifle. A square shaped rifle stock is a glaring error . Looking at hundreds of pictures of original rifles , as well as holding guns in your hands shows no squarish looking forearms........oldwood
 
Hi,
I have a feeling you intend to use a small gouge and cut all the way around your lock following your line. I urge you not to do that. Lock panels should form naturally as you shape the wrist and lock areas. Shape those areas first before doing any cutting around the lock. Look at the photos below and you can see the contour of the lock panel is just an extension of the shaping at the wrist, barrel tang, and trigger. You can always cut a tighter radius cove if you want after the initial shaping.
DzjJYUE.jpg

ULZkeJs.jpg

VuQeWFb.jpg

The photo below shows lock molding that is a good example for your particular gun. Notice the panel only has tight radius coving at the nose and tail of the lock. Elsewhere it is blended into the contours of the stock.

dave
9n11eOV.jpg
 
Dave, that is super helpful! It’s very helpful to have it explained that way. Would you be willing to share several more pictures that show the transition from the lock panel to the underside/trigger guard area. Trying to better grasp how that should flow.
What is a common dimension for wood that is left between the bottom of the stock and your ramrod hole? The reason for the question is the more I take off the underside of the stock around the trigger guard the close I’m getting to the ramrod hole.
 
Hi,
You only need about 1/8-5/32" under the ramrod hole. The links below will show you views all around the lock panels for locks of different shapes and should give you some ideas. You'll have to scroll through them to find the right images, however, there is a lot of building information in them that you may find useful.

https://www.muzzleloadingforum.com/threads/late-flint-english-rifle-for-tony.114203/https://www.muzzleloadingforum.com/threads/making-a-1770s-british-rifled-officers-fusil.120093/https://www.muzzleloadingforum.com/threads/building-a-chambers-isaac-haines-rifle-kit.116533/https://www.muzzleloadingforum.com/threads/building-a-chambers-little-fellas-rifle.110688/https://www.muzzleloadingforum.com/threads/building-an-edward-marshall-rifle.128586/
dave
 
Thank you so much Dave. I will be reading through these later this evening. It was your comment on someone else’s build about the lock panel that got me started on thinning them down.
Any opinions on whether I need to start over on the side plate? On the top hole my drill bit snuck down on me a little bit. I now believe I also had the hole too far down to start with!:-( Dose it look wonky?
A56D4802-5621-4A89-8563-AB279E509001.jpeg
 
Back
Top