• This community needs YOUR help today. We rely 100% on Supporting Memberships to fund our efforts. With the ever increasing fees of everything, we need help. We need more Supporting Members, today. Please invest back into this community. I will ship a few decals too in addition to all the account perks you get.


    Sign up here: https://www.muzzleloadingforum.com/account/upgrades
  • Friends, our 2nd Amendment rights are always under attack and the NRA has been a constant for decades in helping fight that fight.

    We have partnered with the NRA to offer you a discount on membership and Muzzleloading Forum gets a small percentage too of each membership, so you are supporting both the NRA and us.

    Use this link to sign up please; https://membership.nra.org/recruiters/join/XR045103

French Dragoon Pistol Kit

Muzzleloading Forum

Help Support Muzzleloading Forum:

This site may earn a commission from merchant affiliate links, including eBay, Amazon, and others.
Got to inlay the sideplate and install the trigger today, with some more shaping around the butt cap. Slow going, but very enjoyable.
1639876852925.jpeg

1639876889498.jpeg
 
I found a great tutorial on You Tube of how to actually build this type of French Dragoon pistol. This should be very helpful!

Hi Bob,
I am sorry but he doesn't know anything about building one of these pistols. As with so many You Tube videos they are by people with who rarely have much knowledge about historical details.

dave
 
Hi Bob,
I am sorry but he doesn't know anything about building one of these pistols. As with so many You Tube videos they are by people with who rarely have much knowledge about historical details.

dave
Hey Dave, Yes, You Tube is like the information/misinformation buffet universe where you can choose what you like or don't, but it's all put out there. I couldn't know his aptitude in building this pistol historically correctly, because I am not certainly not qualified to say. but I think I did learn some things by watching him, which helps me.
I just wish he didn't slather all that Tru Oil over them; they look like plastic when he finished with them.
 
Well, I at least got the Butt Cap retaining pin on. I have it pretty snugly installed, and later will drill a hole for a pin. The brass looks pretty knocked-around now, which is about how it arrived, so I filed and sanded it a bit and will work on it some more.
As I was looking at the distress marks on the brass I got to thinking that I might like this pistol to look somewhat aged and lightly abused with some dents and stuff (I like that kind of thing for some reason). I'll cross that bridge later though.
1639942074694.jpeg

1639942115162.jpeg
 
Thats great- I am glad you enjoy this project. Hope I don't screw it all up somehow though 🙄
Please 🙄

First off, I doubt you will, "screw it all up somehow." You take advice and instruction well and are open to learning.
Second, we learn the most and the best from our failures and mistakes (how do you think I got so smart,,,,, lol,,,, I fail constantly, lmao). So even if you botch something up with this one, the next will be that much better for it. (Write down what you would do differently as soon as you realize you would do something differently)
 
I will always remember my biggest screw-ups- they mostly happen at the tail end of a project. I remember a 'viking funeral' I gave to one of my instruments after I destroyed a perfectly beautiful Mountain Dulcimer with a bad finish job. It made a nice fire, though....
I suppose making a blunder has a silver lining, just hard to see when your throwing a tantrum 😱
 
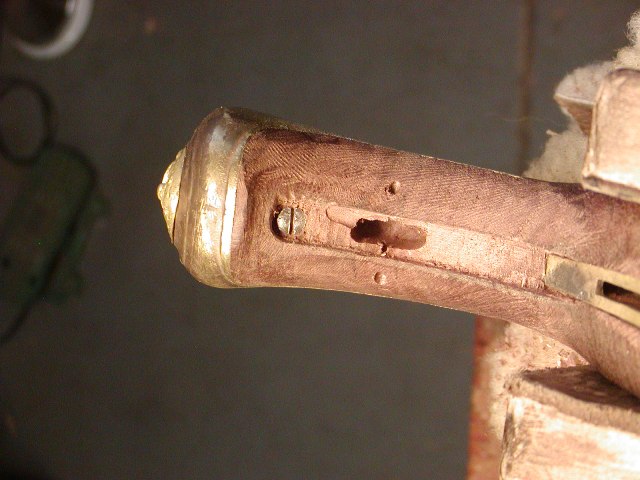
The rear entry pipe is in after a good four hours of fun LOL.
I wanted it set farther back towards the lock area than the pre-carved stock had the location cut to, because it will really accentuate the length of this barrel (15 1/2") and proportion seemed more pleasing to me.
To get the pipe lined up straight, I inserted a long dowel through it, with the long end resting in the ramrod groove. It helps me keep it in position when I do the outline cutting.
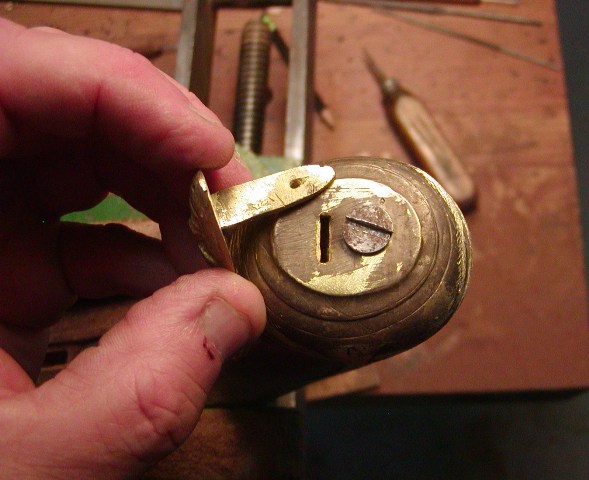
A challenge was that the flange/tail (?) of the pipe is just an eighth of an inch above the top of the pipe itself, making the part needing to be inlaid to be cut very deep, which I didn't realize at first. Thanks to my needle rasps I was able to get it down and then trim the pipe with an Exacto knife. I will shape the wood around the pipe next, then do the forward one.

1640059128904.jpeg

I moved the pipe location back about an inch from where the pre-carved stock had it designed to go.

1640059045866.jpeg

That's how I used a dowel to keep the pipe lined up right.

1640059256604.jpeg

The ramrod slides in all the way, so it's good to go. Next will be to drill and pin the pipe in place and then roughly shape this stock area. I will enjoy doing that more :)
 
The pistol is starting to look like something you can almost shoot :)
I got both Ramrod pipes in and also the barrel pinned and the tang bolt hole drilled and the trigger plate tapped. I got it done, but for goodness sake metal work makes me nervous.
I used Robert Boggs drill jig and had great results.
1640121573496.jpeg

1640121595609.jpeg

After it was assembled I took it apart and started forming the forestock with some small rasps and 80 grit sandpaper. I left it heavy so I can do more detail work later.
1640121845814.jpeg

1640121909563.jpeg

1640121932138.jpeg


The next thing to do is getting the Trigger Guard on. It looks a little delicate but hope I will succeed...
p.s., from these photos I see that the inside of the pommel really need so be worked in. Looking at pictures of a project seems to help seeing it in a different perspective.
 
Last edited:
I had a long day at the shop today, but got my 'to-do' task done. After working some more on the fore stock and the pommel area I tackled the trigger guard. (I really don't like doing trigger guards). It took about six-plus hours but it's in :) I will need to clean up some more, but I am pretty satisfied with how it came out. Thanks goes out to @dave_person who provided instructions on inlayiing a trigger guard. I did as he taught, inlaying the front end first and then working my way backward from behind the bow; it did creep as it got inset into the wood.
The next step will be the lock panels. I am not sure if I will be using the beaver-tail apron or not. I have seen them with and without. I don.t think there is much room to try and squeeze one on there, but again I will think about that later.
I am also on the fence about doing the groove above the ram rod. On the Dragoons I have seen on-line, most are not carved with that ramrod groove, or it is very basic one.

1640215219987.jpeg

1640215247166.jpeg

1640215270512.jpeg
 
Last edited:
Back
Top