• This community needs YOUR help today. We rely 100% on Supporting Memberships to fund our efforts. With the ever increasing fees of everything, we need help. We need more Supporting Members, today. Please invest back into this community. I will ship a few decals too in addition to all the account perks you get.


    Sign up here: https://www.muzzleloadingforum.com/account/upgrades
  • Friends, our 2nd Amendment rights are always under attack and the NRA has been a constant for decades in helping fight that fight.

    We have partnered with the NRA to offer you a discount on membership and Muzzleloading Forum gets a small percentage too of each membership, so you are supporting both the NRA and us.

    Use this link to sign up please; https://membership.nra.org/recruiters/join/XR045103

Complete Kibler Colonial Smoothrifle

Muzzleloading Forum

Help Support Muzzleloading Forum:

This site may earn a commission from merchant affiliate links, including eBay, Amazon, and others.
Joined
Jun 22, 2014
Messages
2,708
Reaction score
272
Location
Ohio Valley
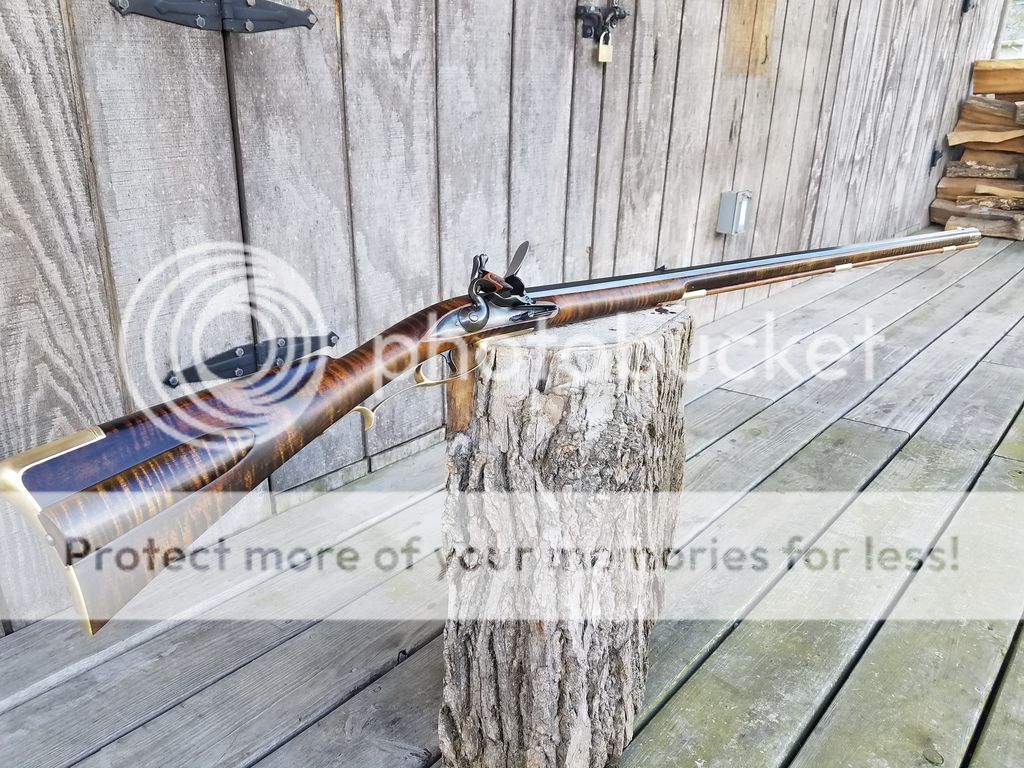
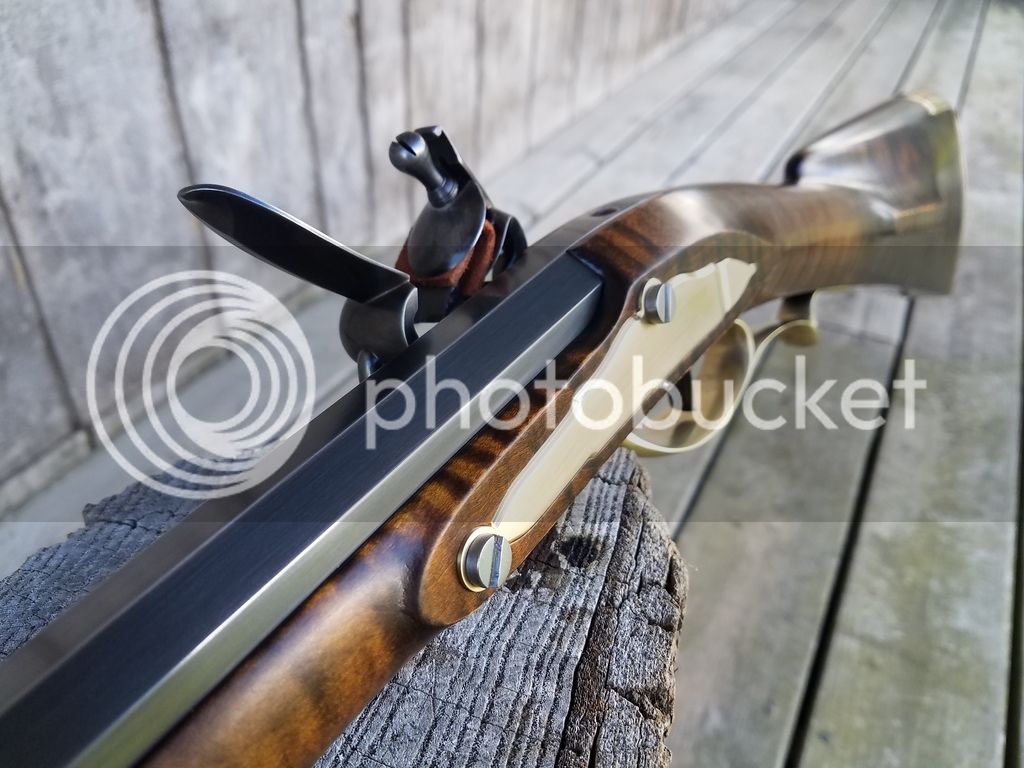
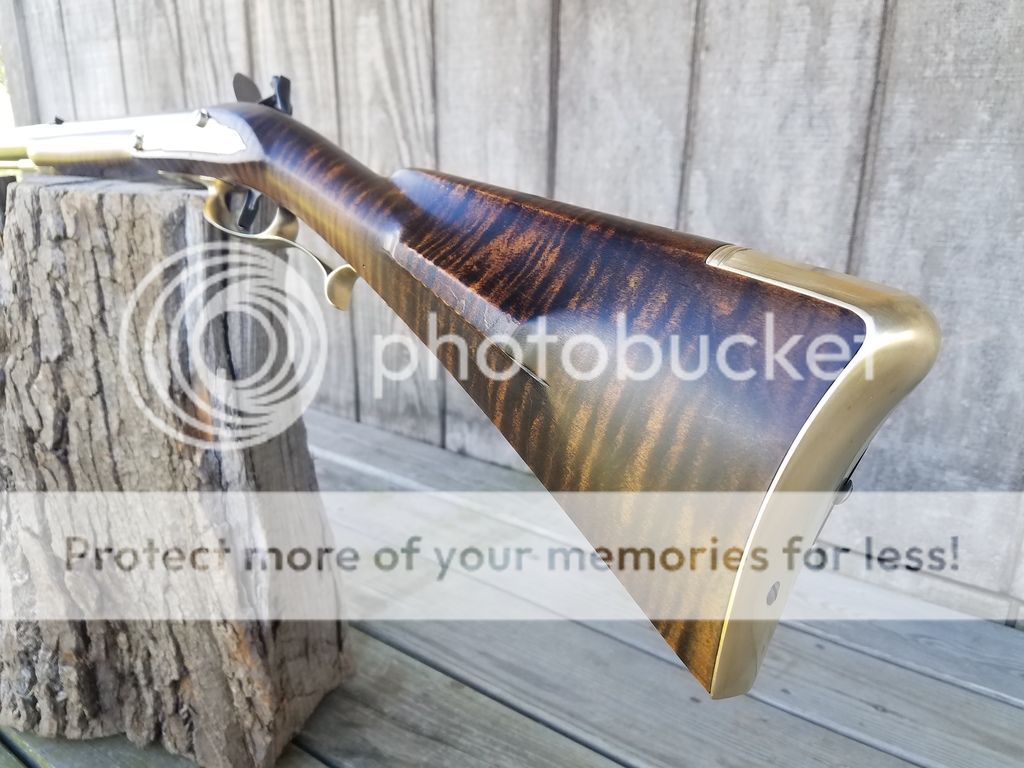
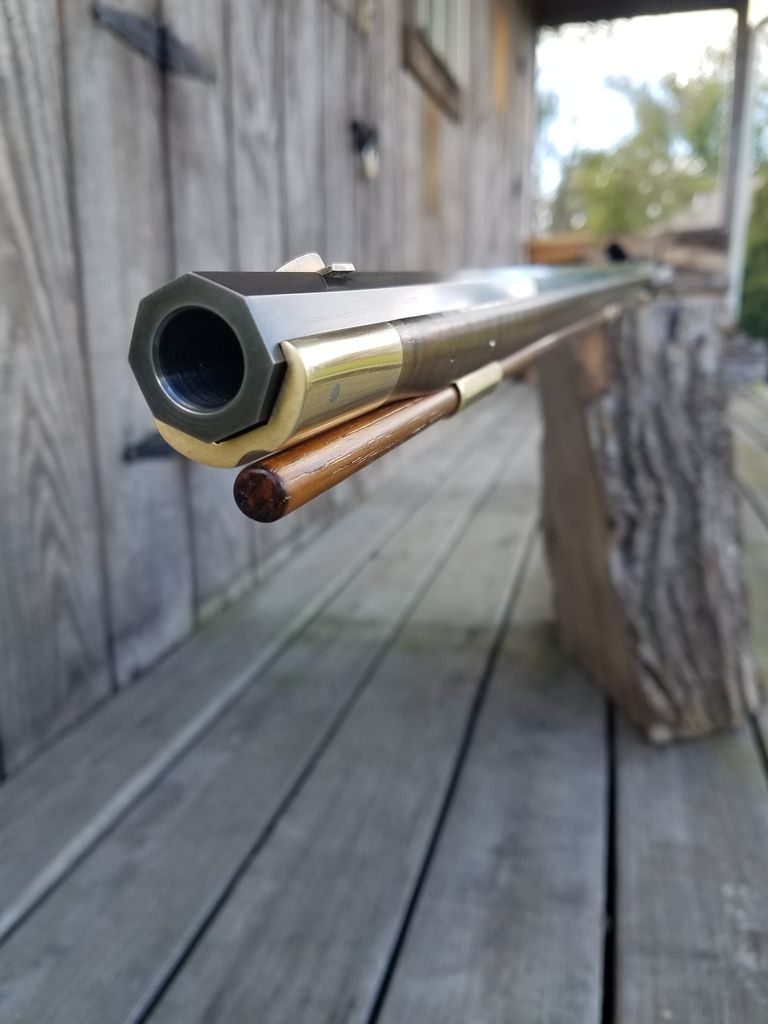
To keep things simple I decided to start a new thread for the completed rifle, if you haven't looked upon the build thread check it out detailing some of the in's and outs of building a Kibler kit from start to finish. With great excitement I'm pleased to finally show off this new baby! It's been a pleasure building such a wonderful kit, a true "kit rifle".


Beautifully finished gun. The metal-to-wood fitting is amazing. Very impressive.
 
Sorry, but WAY TO purty and nice to shoot. A true wall hanger for sure. I would not take a chance on scratch or dent. Yep over the fireplace it goes for display purposes only. Under glass is another option to keep the finger prints off of it.

Obviously VERY nice and well done.
 
Thank you kindly! 122hrs of meticulous detail work. I'm very proud of how she turned out. Jims kit rifle will yield one beautiful gun if the builder does their part!

Concerning wood to metal fit, allot of work needed done on the mountings to ensure the necessary fit. The trigger guard and buttplate especially. A good amount of wood was removed for shaping. A often overlooked area I feel indeed is the trigger guard. The wood to metal fit there is nice and appealing to the eye. The extra details put forth were extremely well worth the time.
 
Dawg, you did a spectacular job on this one. And I am just as impressed with the photos you took, as the length of these flint-era firearms makes them a real challenge to document. The only subject tougher to photograph that I can think of is a longbow.
 
A few more with the sun out of some finer details.


Notice the heel of the buttplate extends past that of the stock. The wood stands proud and a good amount of wood removal is needed. I've seen several originals were the plate extends to protect the heel of the rifle. Example was taken from Recreating the American Longrifle.


Angles of the trigger guard transitions to the underside of the lock panels, fine amount of shaping.


Same applies to the entry pipe, I had to work this area as the inlet was a tad bit off and not perfect.


Notice the wrist shape, the transition from the tang to wrist area. Allot of wood is left here to be shaped accordingly.


Cleaning up the buttplate was one tedious endeavor as with most brass mountings, however worth the time and patience.
 
Beautifully done! You should be very proud!

How does she shoot? You have had a solid weekend with her so please tell me you went & got her dirty.
 
Thank you sir, not a full weekend just yet. Finished it up Saturday evening. Judging from past experience it'll shoot like a dream come this weekend. Potentially some squirrels will be in the deep freeze!
 
Back
Top