• This community needs YOUR help today. We rely 100% on Supporting Memberships to fund our efforts. With the ever increasing fees of everything, we need help. We need more Supporting Members, today. Please invest back into this community. I will ship a few decals too in addition to all the account perks you get.


    Sign up here: https://www.muzzleloadingforum.com/account/upgrades
  • Friends, our 2nd Amendment rights are always under attack and the NRA has been a constant for decades in helping fight that fight.

    We have partnered with the NRA to offer you a discount on membership and Muzzleloading Forum gets a small percentage too of each membership, so you are supporting both the NRA and us.

    Use this link to sign up please; https://membership.nra.org/recruiters/join/XR045103

Cheek rest molding

Muzzleloading Forum

Help Support Muzzleloading Forum:

This site may earn a commission from merchant affiliate links, including eBay, Amazon, and others.
Joined
Apr 1, 2021
Messages
230
Reaction score
386
How does one go about adding the two lines on the cheek rest? What tools/techniques do you use? I’ve got a couple Kibler kits on the way and would like to add this feature.

Like in this picture (the cheek rest molding, not the lower molding on the butt stock)
 

Attachments

  • 9D463D61-1468-47D9-A8F5-686A7BFCE336.png
    9D463D61-1468-47D9-A8F5-686A7BFCE336.png
    449.6 KB · Views: 182
There are many ways. One way is to use a 3 cornered or half round file and cut the grooves then round them over to suit. A thin saw blade will work but the file will give a little more control. Also a checkering tool will cut the grooves. A scraper will work.
 
How does one go about adding the two lines on the cheek rest? What tools/techniques do you use? I’ve got a couple Kibler kits on the way and would like to add this feature.

Like in this picture (the cheek rest molding, not the lower molding on the butt stock)
1. With a mechanical 7mm pencil and straight edge place a line/lines to your liking. 2. Use a razor thin chisel, and vertically press down to make a slit on the line. The chisel I use is about 3/16" wide. 3. Once the slit is made a checking V tool will now follow in the slit. Just go deeper if you want a wider line.
This works for me.
 
This is the tool normally used to cut that type of channel as kje54 said you really need to practice on a piece of scrap before attempted a stock. In addition to that, the tool needs to be razor-sharp to keep you from having to apply too much force and having it jump out of the track.
 

Attachments

  • IMGP0723.JPG
    IMGP0723.JPG
    152.6 KB · Views: 83
  • IMGP0724.JPG
    IMGP0724.JPG
    142.4 KB · Views: 89
  • IMGP0725.JPG
    IMGP0725.JPG
    63.2 KB · Views: 90
  • IMGP0726.JPG
    IMGP0726.JPG
    151 KB · Views: 85
I also checker. For straight lines that do not parallel a ledge, I use Dymo label tape. Dymo tape is thick and sturdy. I follow the edge of the tape with a single line checkering too. It is the same as master line when checkering. I hate v-tools for this. They always leave a wavy ragged line in my hands.

For a parallel line to a ledge, like the barrel channel, I use a marking gauge that has a cutter installed.
Not sharp enough?, they will cut a nice smooth line if sharp and you have a steady hand.
 
Because my cheek piece moldings vary a lot, the tools also vary. I cut right angles w/ an Exacto knife, "V" grooves w/ a "V" chisel and radiused grooves w/ a gouge. Needle files are also used. .....Fred

aaj-998_9[1].jpg
P1010005.JPG
 

Attachments

  • Lancaster-IH 022.jpg
    Lancaster-IH 022.jpg
    198 KB · Views: 79
Because they are relatively long and straight, after the initial location is established with small tools like push gouges, (just cut the line in very shallowly) something with a long and straight cutting surface or sole (to deepen it) helps keep things straight and even. I think things like files (of various shapes) are ideal. They won't waver up and down with the hard and soft spots in the wood along the span of the cut the way something like a scraper (with its' short cutting bearing point) would be prone to do.
 
Last edited:
Start with a pencil !! There are very few parallel lines in Longrifle architecture.
There’s room for 2 lines/beads on that cheek piece. The bottom one can be parallel to the lower edge but top should be a little bit wider to the rear, to my eye.
But draw and look before cutting.
I do them the way Col Batguano does, for the same reasons.
 
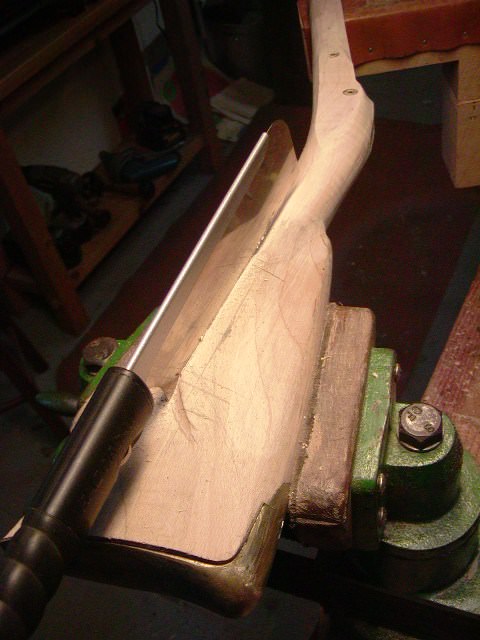
One thing about laying out your lines. As BadDaiitood said, there are very few parallel lines in LR's. But one thing to think about is the fact that those extended lines will theoretically converge out toward the breech area.

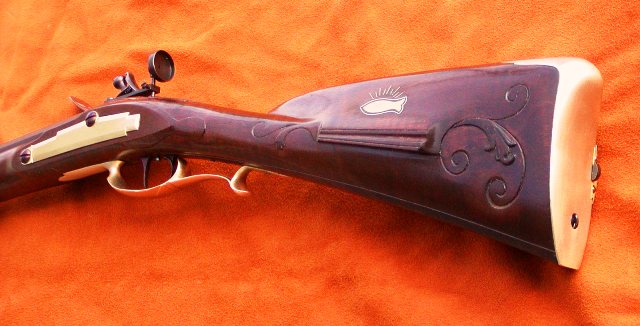
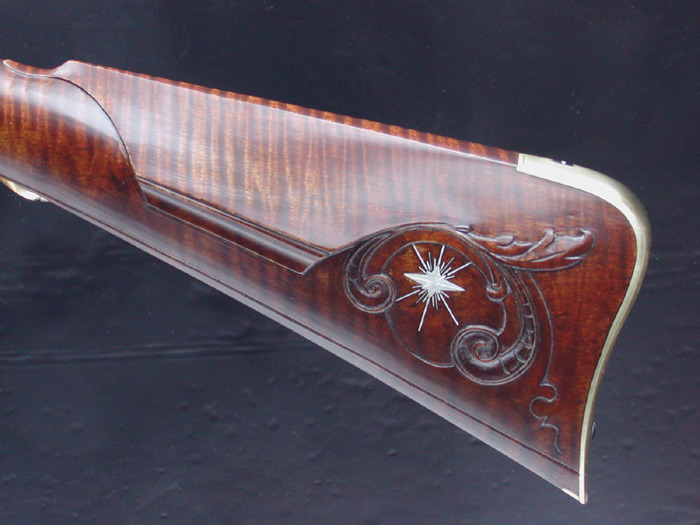
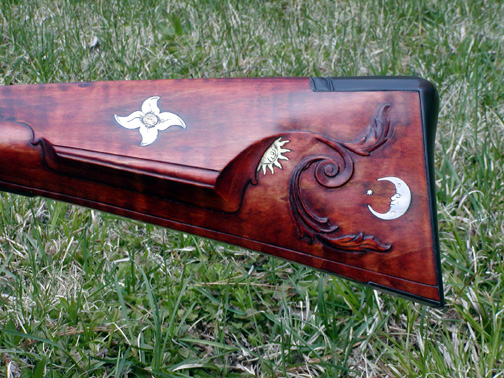
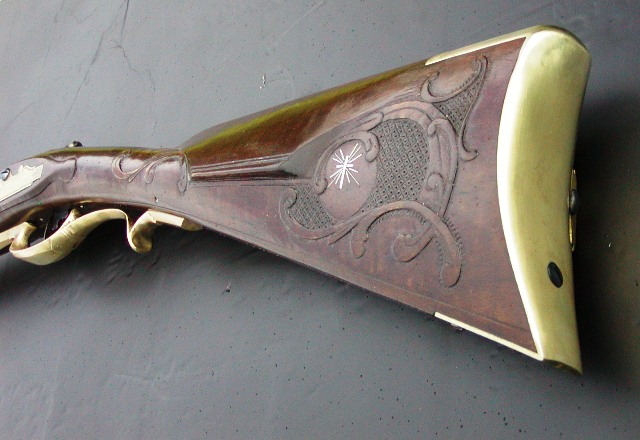
You ought to give some thought as to where that point is. For instance, if you have 2 lines going, you actually have 4 to 7 to think about. You have the comb line, the toe or belly line, the base of your cheek piece, the part of the cheek piece that starts to dish, and probably a rib line inside the toe line. And, for every concave cut there is a convex one too. Where would they converge? Do you want to "aim" them at the trigger, bottom of the wrist, middle of the wrist, or the top of the wrist? Remember, those lines serve not only as decoration, but to direct the viewer's eye along the butt stock in creating an appealing visual "flow" to the piece.

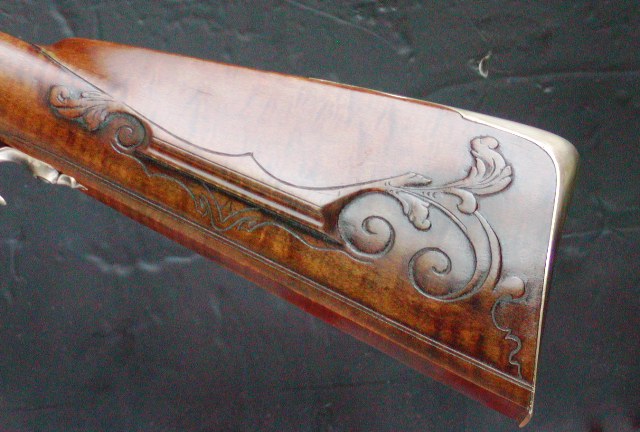
Where in space they converge (and they don't all have to be precise that way, and can sort of "roll" in that direction in their convergence) is a matter of which school of gun you are building.

Another little thing you can do is put an ever so slight taper to the width and / or depth of them. That again will contribute to the general slimming nature of the butt stock as it moves from the butt toward the wrist.
 
Last edited:
I use a fine tooth dovetail saw to establish the lines...this way I know they are perfectly straight. Depending on the profile of the molding I then use them as guides for v or u gouges.
 
Hi,
I do the same as rchas but substitute a fine Japanese saw that cuts on the pull stroke. Then I widen the cut with a checkering tool. Because many rifles have straight bottoms on their cheek pieces, I often cut away the bottom also using my Japanese saw.
fCS0r9v.jpg


Some examples done that way.
omDXFsy.jpg

dgntHRT.jpg

DCV3NvC.jpg

Ni07lE1.jpg

jJtRGZ1.jpg

60ZnRw8.jpg


dave
 
Dave....you create such beautiful rifles....but the cheek on the 3rd photo down really has appeal because of the integrated carving......Fred
 
I draw on my line with a pencil and ruler, cut a very shallow crude line with a V chisel and use a 10" knife edge file to deepen the guide line and shape everything up to be neat, tidy and very straight.

I do the same with buttstock and forestock moldings, this rifle has both, you can see the buttstock molding in this picture. A long knife edge file lines everything up to be very straight.

squirrel rifle done 005.JPG
 
Last edited:
Back
Top