• This community needs YOUR help today. We rely 100% on Supporting Memberships to fund our efforts. With the ever increasing fees of everything, we need help. We need more Supporting Members, today. Please invest back into this community. I will ship a few decals too in addition to all the account perks you get.


    Sign up here: https://www.muzzleloadingforum.com/account/upgrades
  • Friends, our 2nd Amendment rights are always under attack and the NRA has been a constant for decades in helping fight that fight.

    We have partnered with the NRA to offer you a discount on membership and Muzzleloading Forum gets a small percentage too of each membership, so you are supporting both the NRA and us.

    Use this link to sign up please; https://membership.nra.org/recruiters/join/XR045103

Building a Chambers Isaac Haines rifle kit

Muzzleloading Forum

Help Support Muzzleloading Forum:

This site may earn a commission from merchant affiliate links, including eBay, Amazon, and others.
Just Beautiful workmanship and design in this rifle. I take my hat off to you for your skill and workmanship on this rifle.
 
Hi Buckskinn,
He does not have it yet. I am still making sure the finish is cured. Our weather extremes from 40s and rain to 0 and dry within 24 hours is making that process difficult. I had places where the final finish clouded indicating it was not bonding with the previous coat. I had to clean off that layer and do it again. Right now the stock is just sitting and curing until I am certain the finish is done. I had the same problem with Rifleman1776's Little fella's rifle last year at this time. The constant extreme roller coaster weather during the last 3 winters has been a real pain.

dave
 
Hi,
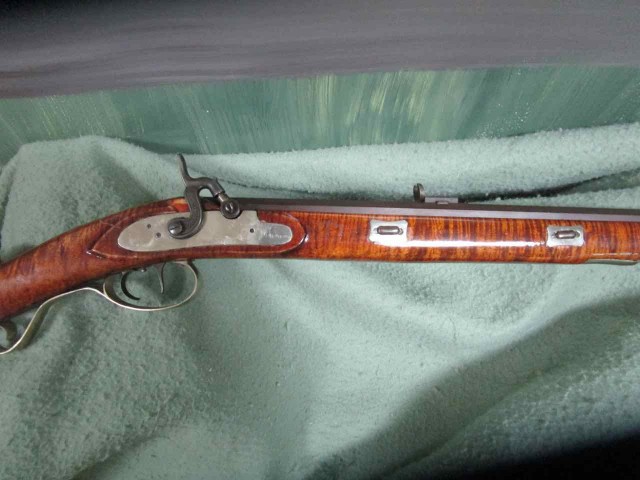
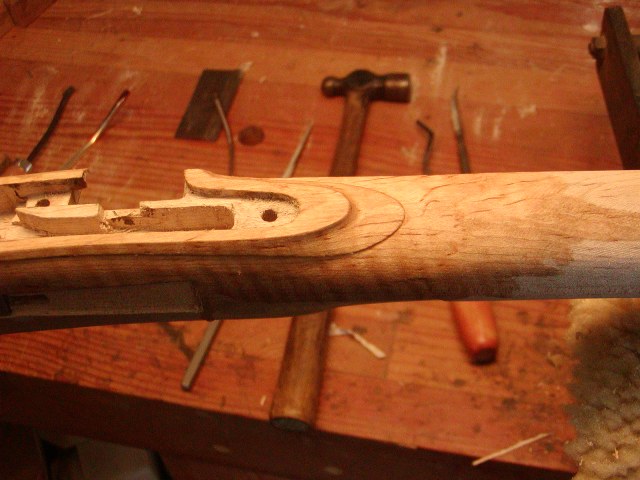
Thanks for looking folks and the comments. I have a lot of stuff to post soon. I cut the lock moldings today. Many new makers cut moldings around their locks and side plates before they fully shaped the wrist, barrel tang, lock, and trigger areas. That is a big mistake and the end result is often like the guns pictured.
RxJw5tT.jpg

IqPaxIz.jpg

jLPDtfk.jpg

Kind of slab sided and the moldings not conforming to the stock contours at all. Often the flats are much too wide as on the third gun pictured above.

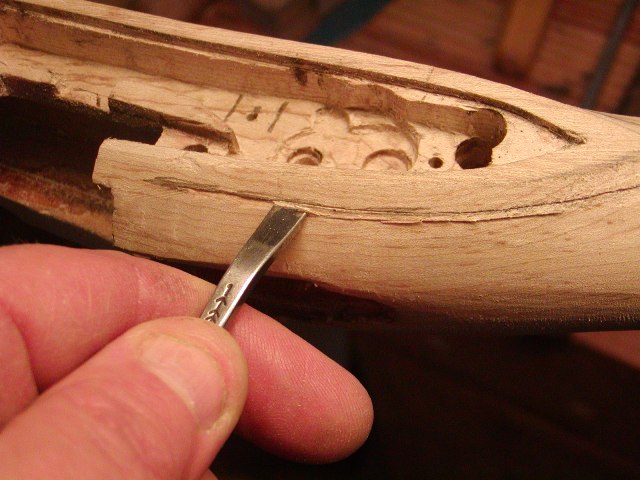
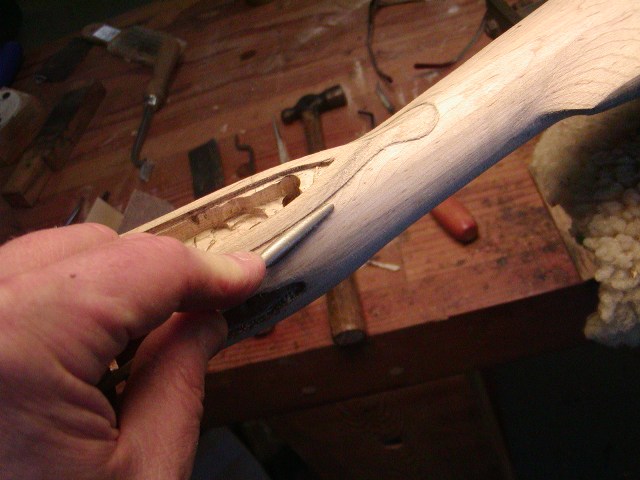
The trick is to fully shape the areas with rasps, scrapers, and files and let the lock and side plate panels form naturally as you round the wrist, top and bottom. The only place to cut in with a gouge or use a rat tailed rasp is around the nose of the panels and then be careful not to cut too tight a radius cove in the molding. Once the lock and wrist areas are shaped and smoothed almost to finished surface, then and only then, consider cutting moldings.

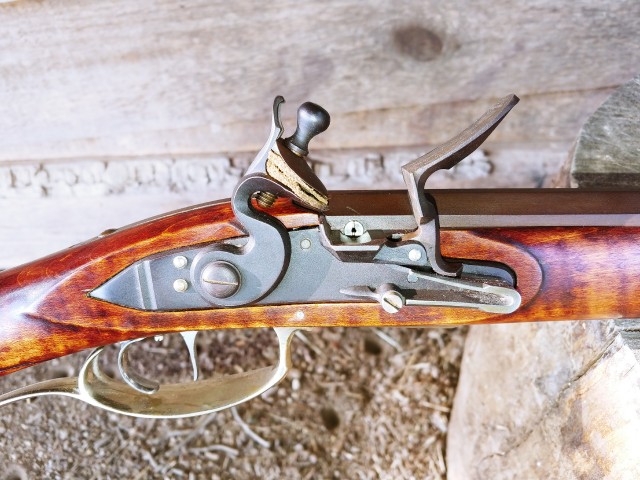
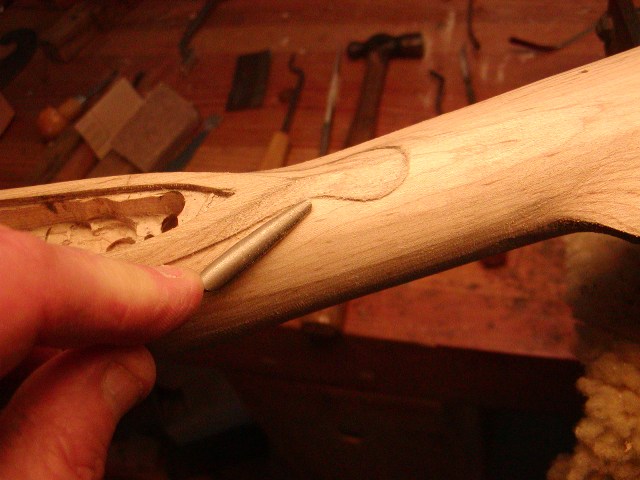
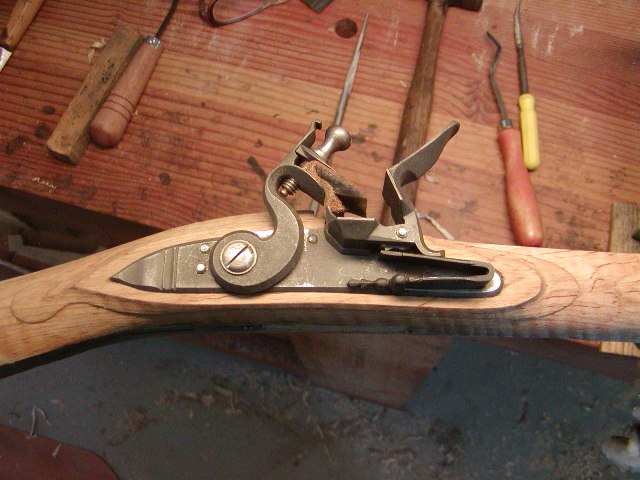
I don't fuss much with this task. I draw the edge of the molding on stock freehand and cut it. On this particular rifle, Haines cut fairly deep coves in the tails of the moldings and created a ridge that extends in to beaver tail. The front molding extends almost as a straight line down from the top of the lock plate and then forms a rounded arrow head shape. On the bottom, the molding has a slight swell forward of the beaver tail and then a gradual arc swelling again to meet the front molding. The lock panels widen at the front of the lock and at the pointed rear but remain fairly even around the rest of the lock. It is a nice and effective design. I changed the beaver tail design from the original making it more like some other Haines guns rather this particular rifle because both the eventual owner and I prefer that. The original tail is very short and closely fitted around the tail of the lock panel.
20QnLhu.jpg

Ioue9Q7.jpg

x9Cwy9r.jpg

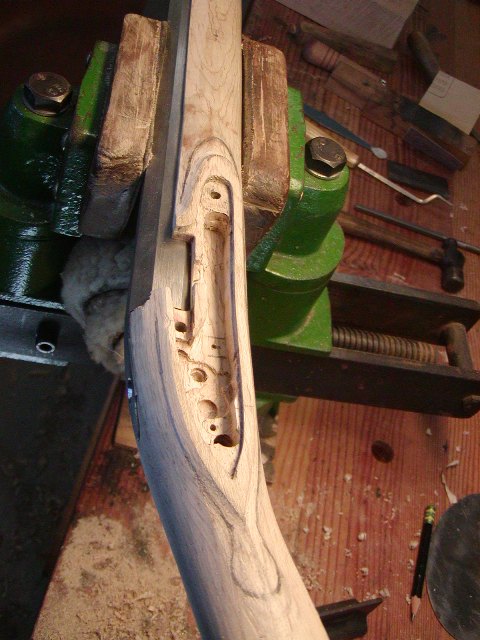
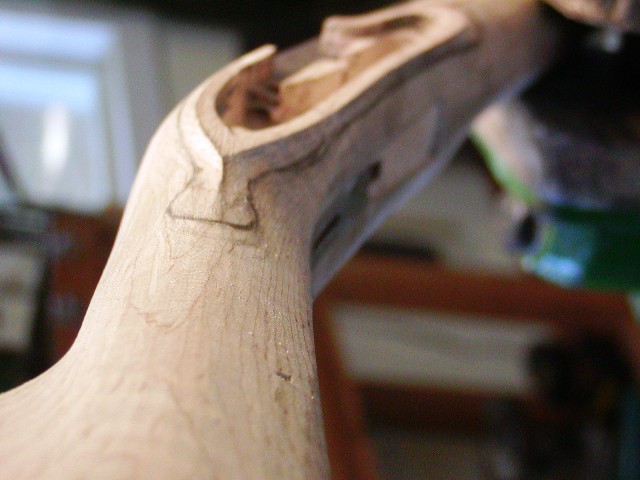
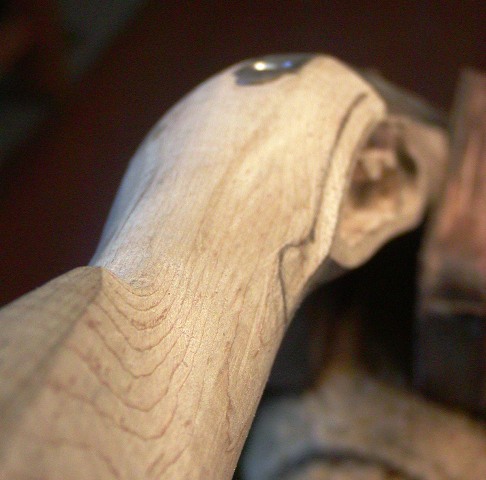
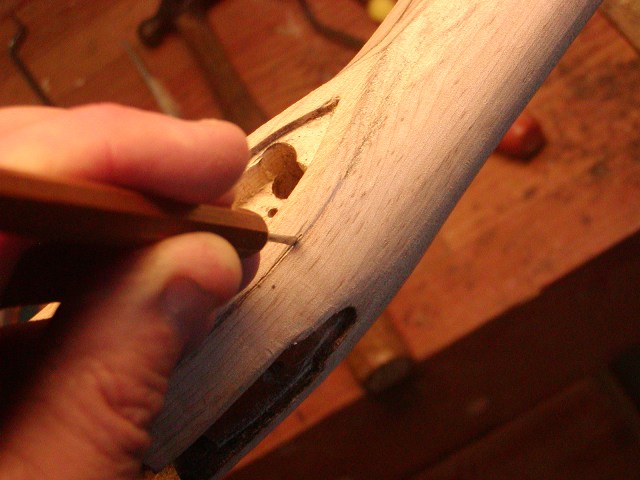
After drawing the design on the wood, I stab in the line using a tiny flat chisel. I walk the chisel completely around the molding edge and then back cut it using a small skew chisel. I level up the back ground with the skew and then use a small rifler file on which I ground the ends round. It smooths the background along the edge of the molding and the rounded end fits nicely into the curves of the design.
gPr5Eqw.jpg

outCadm.jpg

fkcgjAK.jpg

CGe3bHV.jpg

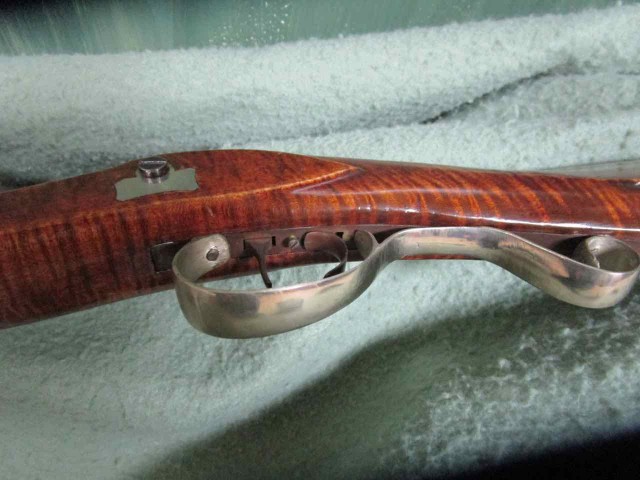
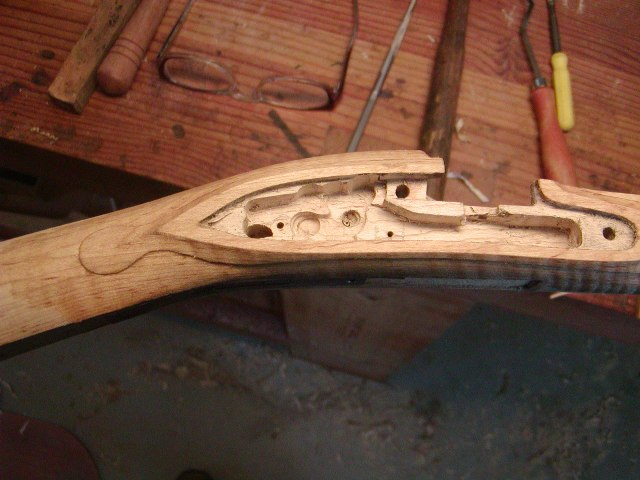
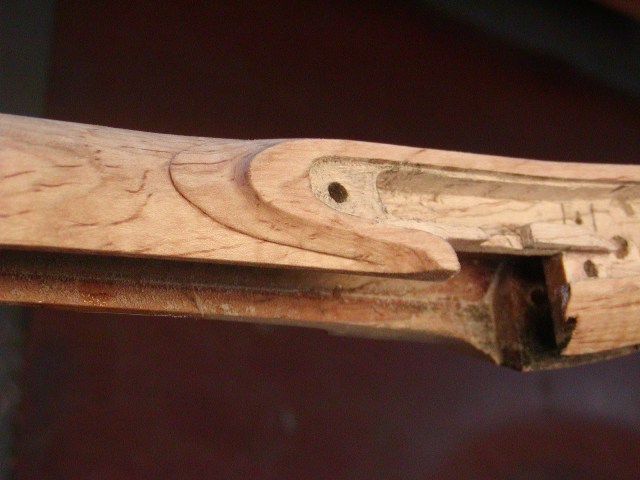
That completes the job for now until I final finish the gun before staining. Notice on the completed side that the bottom of the stock around the front of the trigger guard is not flat. It should never be flat. It is curved and that curve flows into the curved bottom of the fore stock.
uq2uFlf.jpg

LSJn6ke.jpg

crXyfEG.jpg

CxILHR1.jpg

More tomorrow.
dave
Hi Dave, wish I had seen this tutorial of yours before my last rifle. I'm building another Kibler rifle, I've built 5 rifles (kits) in my life but over many years, hopefully after seeing this I'll do better! I'm going to put a brass patch box in, Isaac Berlin, wish me luck!
As an aside, I'm from the slatebelt area of Northampton Co. and worked for years at the local power co. and I remember a fellow named Muschlitz from Nazareth who also worked there, I believe his family had an excavating co.
 
Hi Dave....I like Chambers' kits....not w/o errors but all are repairable. My 2 Chambers kits were both early Lancasters and one is shown below. Learned a lot about building LRs and that's the reason early on that I chose those from Chambers. Looking forward to the Haines w/ your artistic additions. ....Fred
Copy of Copy of SLanIIIRS.jpg
 
Hi Dave....I like Chambers' kits....not w/o errors but all are repairable. My 2 Chambers kits were both early Lancasters and one is shown below. Learned a lot about building LRs and that's the reason early on that I chose those from Chambers. Looking forward to the Haines w/ your artistic additions. ....FredView attachment 105168
Hi Fred,
This was an old thread that another member resurrected. The finished rifle is shown posts above on page 7. Nice rifle, Fred!

dave
 
Hello Dave, another great tutorial & beautiful rifle. I'm glade this was resurrected from the archives. Great reading & informative. I noticed the picture of how you engraved teeth into the flint jaws to keep it firmly held. For the last week I've been cursing my flint always falling out of it's jaws and I'm not even finished building the rifle yet, Ha. Honestly I don't know how to properly set the flint. I believe would be a nice fix for me to do. My question is--- are the teeth pointing in the correct direction? ...................Thanks Labrat
 
Hi Labrat,
They are cut from the front and as long as you raise enough burr, they hold leather wrapped flints very well. Make sure your flint is not too large or fat.

dave
 
Dave, thank you so much for this wonderful tutorial. That rifle is the most beautiful gun I have ever seen. Absolutely breath-taking.
 
I know this thread is a few years old, but I was shooting this rifle at a friend's place and he took a short video showing the lock speed. Thought you all might enjoy it.

Not sure a flintlock can go off much faster than this, thanks to the good bones of a Chambers lock and Dave's exceptional skill and methods in tuning. In addition, it is a tack driver. .530 ball, .018 pillow tick lightly lubed with Track's mink oil, pushed by 90 grs of 2Fg black.

 
Hi Mike,
Thanks for posting that. Chambers are good locks. My only complaint is sometimes the springs are too strong. The locks work just fine but the main and feather springs just don't need as strong as they often are so I usually lighten them a little. A little polishing and lube is basically all you need to do.

dave
 
I know this thread is a few years old, but I was shooting this rifle at a friend's place and he took a short video showing the lock speed. Thought you all might enjoy it.

Not sure a flintlock can go off much faster than this, thanks to the good bones of a Chambers lock and Dave's exceptional skill and methods in tuning. In addition, it is a tack driver. .530 ball, .018 pillow tick lightly lubed with Track's mink oil, pushed by 90 grs of 2Fg black.

View attachment 255586
Only 90 grains! That’s smoken! Very cool!
 
Back
Top