


I haven't had a small game rifle for quite a while and decided it would be a good addition to the "herd." I wasn't going to have a lot of time to do a build and with all the good reports on the Kibler kits, I decided on the Kibler SMR in .36. I got really lucky because when I called Jim about a three weeks ago and told him what I wanted, which included the stock to be hard sugar maple (I learned most of his stocks are "soft" maple) it turned out that he had a .36 kit in stock with the Rice barrel and a hard sugar maple stock. I was looking for a bit of a "plainer" stock, but this one was the one-notch-up upgrade and was offered at the regular price, so I took it. It has Jim's own branded lock. New versions will also have his barrel.
I used Klein's Reddish-Brown alcohol stain, Laurel Mountain Forge Permalyn Sealer and Stock Finish, Birchwood-Casey Perma Blue, and a Patchbox kit from Muzzleloader Builder Supply (made my own catch as the one in the kit is junk).
My experience with the kit was not too dissimilar to what many others here have reported. The barrel and tang were a snap fit and required zero additional inletting work. The lock inlet was about 98%. I used a bent scraper, mostly. The trigger inlet required a little light work with chisels. Lock finishing was pretty easy with no work on internals what-so-ever and only normal sanding and polishing of the externals. The trigger guard required filing, sanding, and polishing. The barrel received a draw filing on the visible five flats. I had the basic assembly done in a couple of evenings and a Saturday afternoon. Of course the patchbox needed to be inlet, the cavity drilled (forstner bit) and chiseled out, the lid spring installed and a catch made and installed. There is really not much wood to be removed...a little on the buttstock via sanding.
There was an issue with the lock in that if a properly sized flint was installed squarely in the jaws, it would miss about a 1/4+ of the right side of the frizzen and was sticking over to the left enough that it would strike the barrel. While I could set the flint well out to the right side of the jaws and cock it to get it to hit squarely, it was an UGLY thing and I didn't like it. One call to Jim and he had me send it back, he repaired it the day it arrived, and sent it right back.
Here's a picture of how cock-eyed the flint would have had to have been to have it hit squarely on the frizzen:
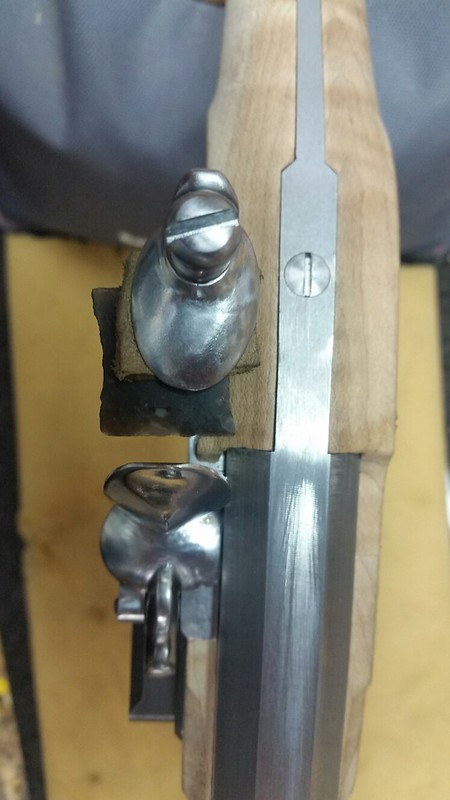
It appeared the cock was leaning in toward the stock. Anyway, like I said, it was taken care of quickly by Jim and now the flint can sit nicely in the jaws as it should and hit the frizzen squarely. It sparks very well.
I did get a few shots off today with it. While I have a bit more work to do, it seems right now as if the load will be 30 gr 3F Swiss, a .018 pillow tick patch lubed with Track's Mink Oil, and a .350 round ball. The balance is phenomenal! Weight came in at 7.2#.
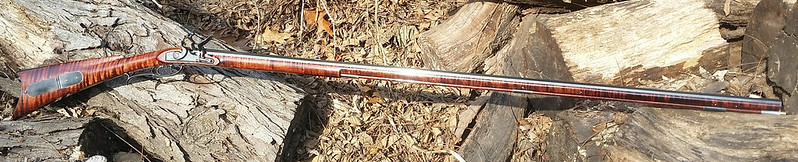
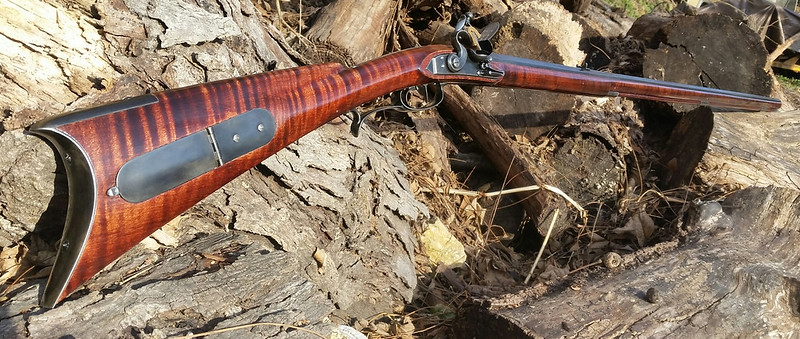
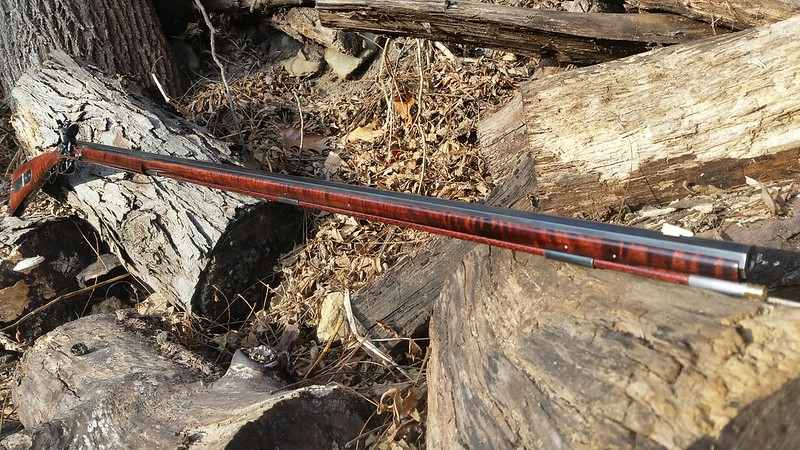
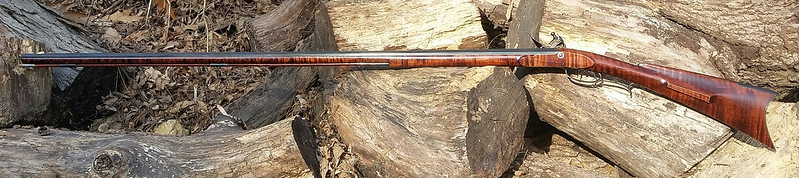
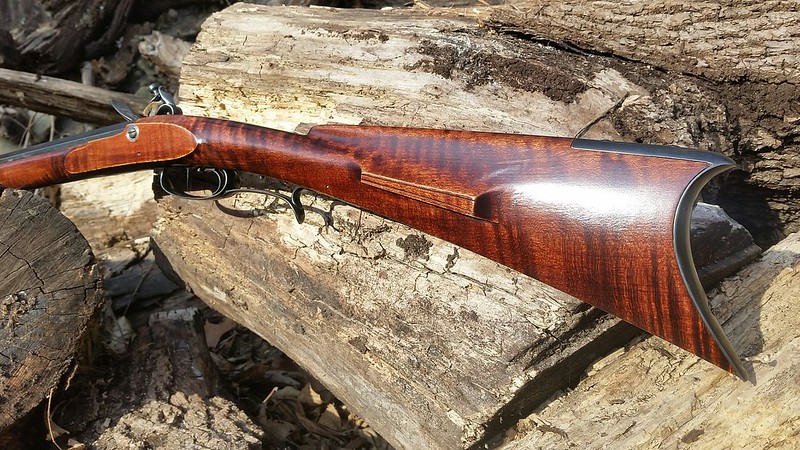
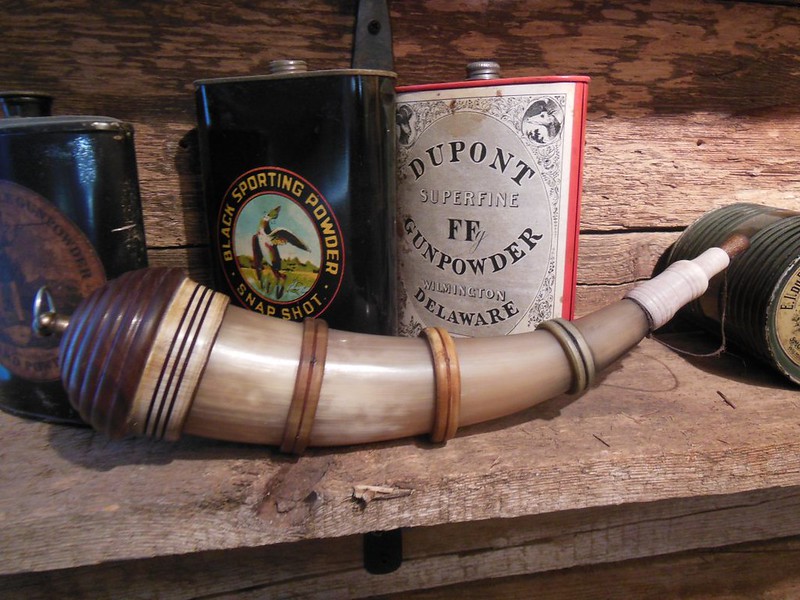
Here's the finished SMR. Also including a picture of the beautiful Southern Banded Horn that Ames made for me to go with this Southern Mountain Rifle. I can't wait to finish up the load and sight work and get after the late season squirrels!
Thanks for looking!
Mike
I used Klein's Reddish-Brown alcohol stain, Laurel Mountain Forge Permalyn Sealer and Stock Finish, Birchwood-Casey Perma Blue, and a Patchbox kit from Muzzleloader Builder Supply (made my own catch as the one in the kit is junk).
My experience with the kit was not too dissimilar to what many others here have reported. The barrel and tang were a snap fit and required zero additional inletting work. The lock inlet was about 98%. I used a bent scraper, mostly. The trigger inlet required a little light work with chisels. Lock finishing was pretty easy with no work on internals what-so-ever and only normal sanding and polishing of the externals. The trigger guard required filing, sanding, and polishing. The barrel received a draw filing on the visible five flats. I had the basic assembly done in a couple of evenings and a Saturday afternoon. Of course the patchbox needed to be inlet, the cavity drilled (forstner bit) and chiseled out, the lid spring installed and a catch made and installed. There is really not much wood to be removed...a little on the buttstock via sanding.
There was an issue with the lock in that if a properly sized flint was installed squarely in the jaws, it would miss about a 1/4+ of the right side of the frizzen and was sticking over to the left enough that it would strike the barrel. While I could set the flint well out to the right side of the jaws and cock it to get it to hit squarely, it was an UGLY thing and I didn't like it. One call to Jim and he had me send it back, he repaired it the day it arrived, and sent it right back.
Here's a picture of how cock-eyed the flint would have had to have been to have it hit squarely on the frizzen:
It appeared the cock was leaning in toward the stock. Anyway, like I said, it was taken care of quickly by Jim and now the flint can sit nicely in the jaws as it should and hit the frizzen squarely. It sparks very well.
I did get a few shots off today with it. While I have a bit more work to do, it seems right now as if the load will be 30 gr 3F Swiss, a .018 pillow tick patch lubed with Track's Mink Oil, and a .350 round ball. The balance is phenomenal! Weight came in at 7.2#.
Here's the finished SMR. Also including a picture of the beautiful Southern Banded Horn that Ames made for me to go with this Southern Mountain Rifle. I can't wait to finish up the load and sight work and get after the late season squirrels!
Thanks for looking!
Mike

