• This community needs YOUR help today. We rely 100% on Supporting Memberships to fund our efforts. With the ever increasing fees of everything, we need help. We need more Supporting Members, today. Please invest back into this community. I will ship a few decals too in addition to all the account perks you get.


    Sign up here: https://www.muzzleloadingforum.com/account/upgrades
  • Friends, our 2nd Amendment rights are always under attack and the NRA has been a constant for decades in helping fight that fight.

    We have partnered with the NRA to offer you a discount on membership and Muzzleloading Forum gets a small percentage too of each membership, so you are supporting both the NRA and us.

    Use this link to sign up please; https://membership.nra.org/recruiters/join/XR045103

A Tale of Two Little Rifles

Muzzleloading Forum

Help Support Muzzleloading Forum:

This site may earn a commission from merchant affiliate links, including eBay, Amazon, and others.
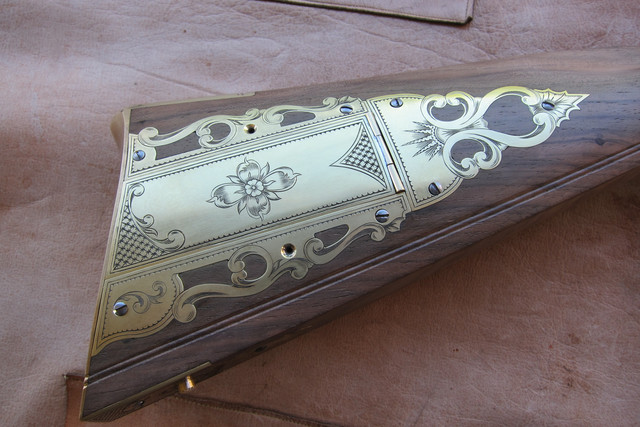
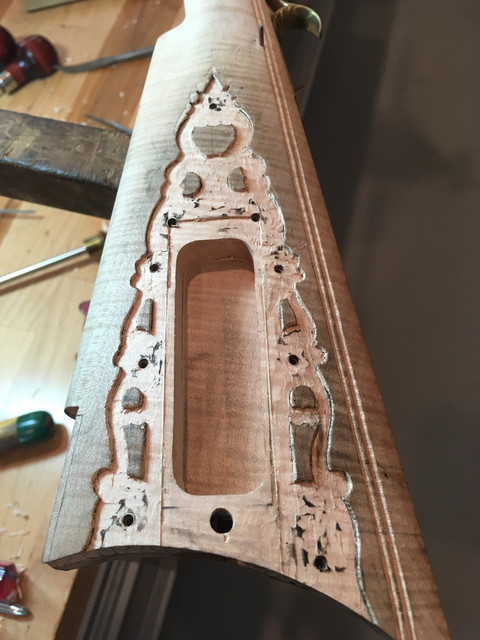
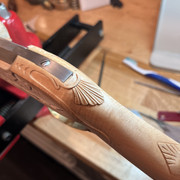
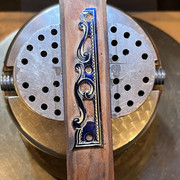
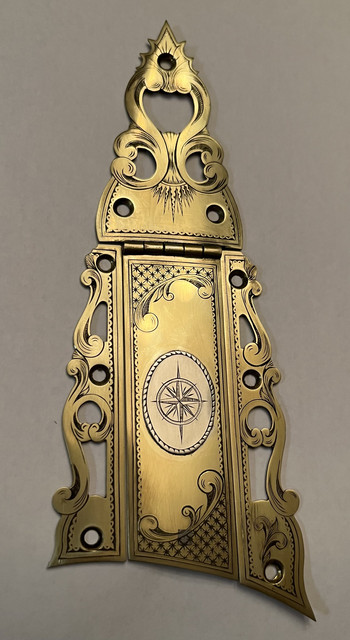
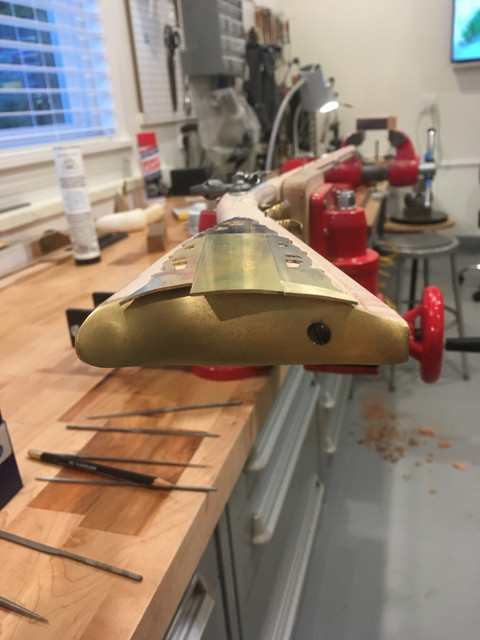
Made a set of form blocks and contoured the brass pieces of the patch box to conform to the stock shape.


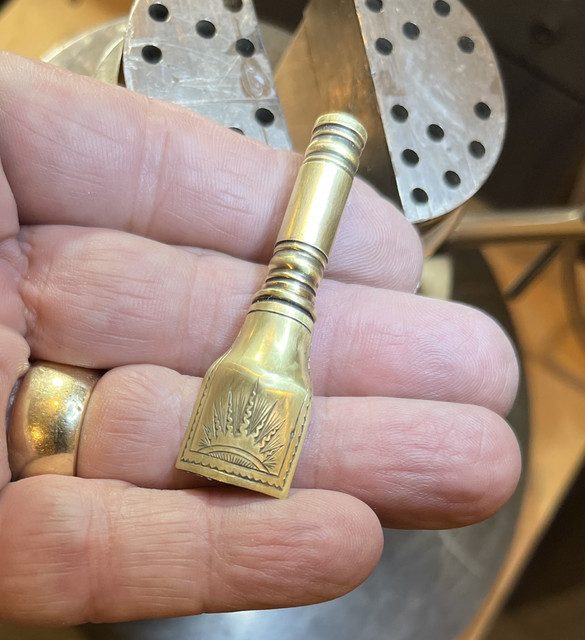
Making a patch box hinge for a normal size box is, if done in the traditional way, fairly time consuming and a little complicated. Several years ago I made a hinge by a different method and silver brazed it to the box parts. Although not formed from the parent material of the box lid and finial, it looks to me a lot like some box hinges that were separate and then riveted to the box parts on some original rifles. Be that as it all may, I decided to do the brazed method on this little box.

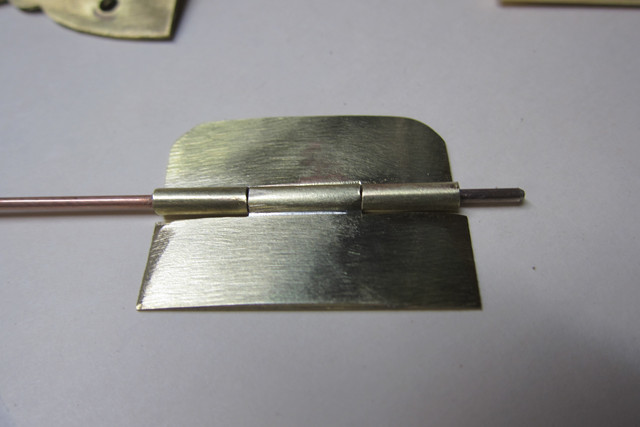
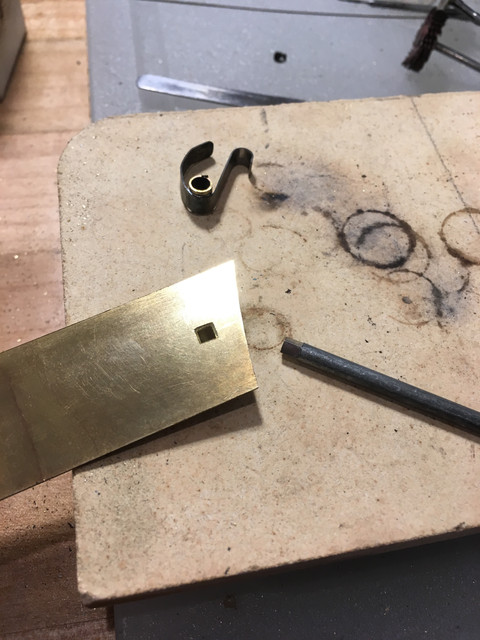
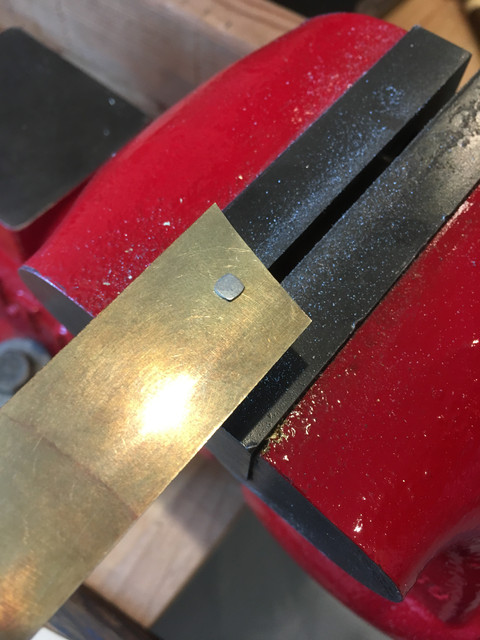
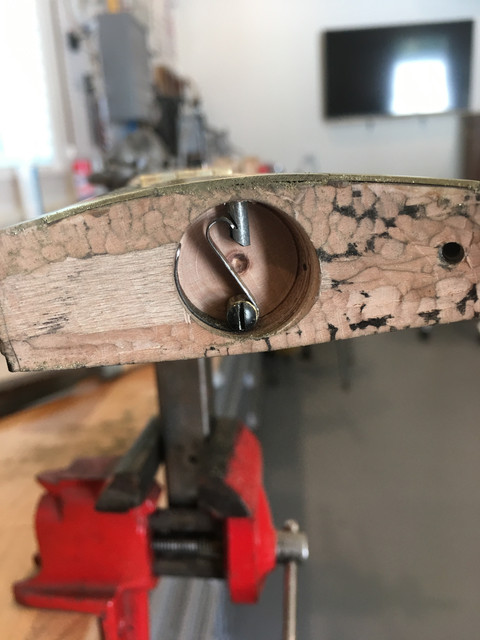
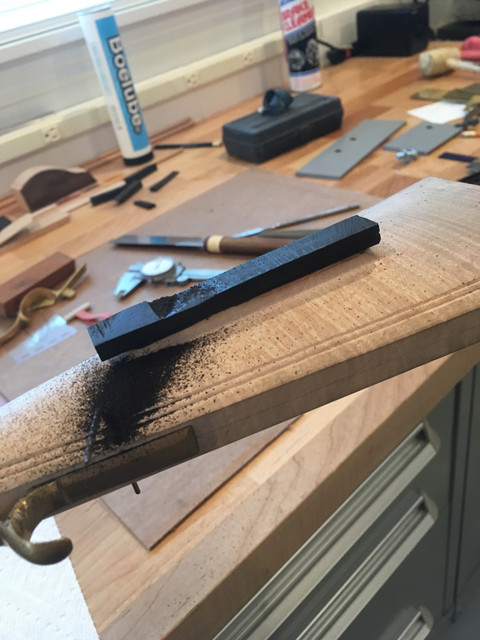
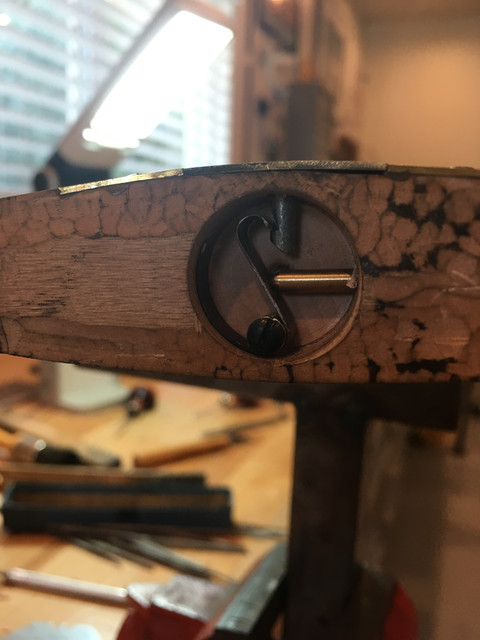
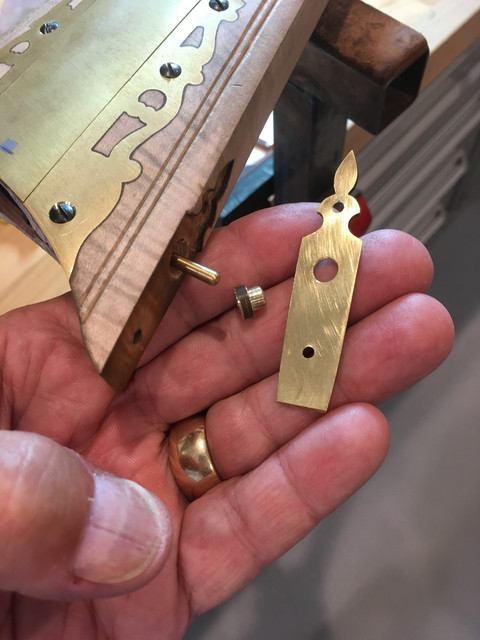
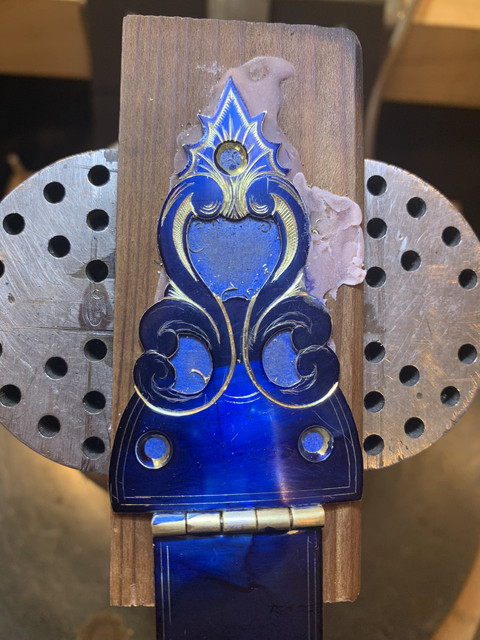
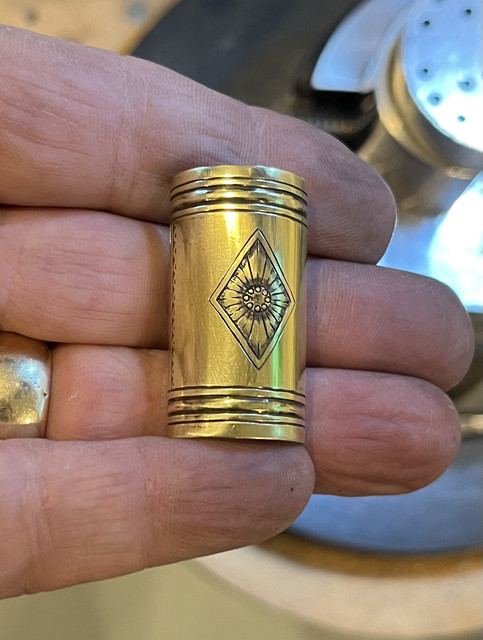
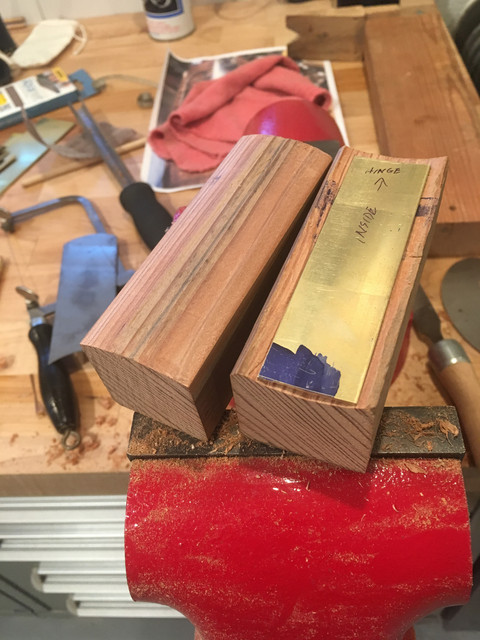
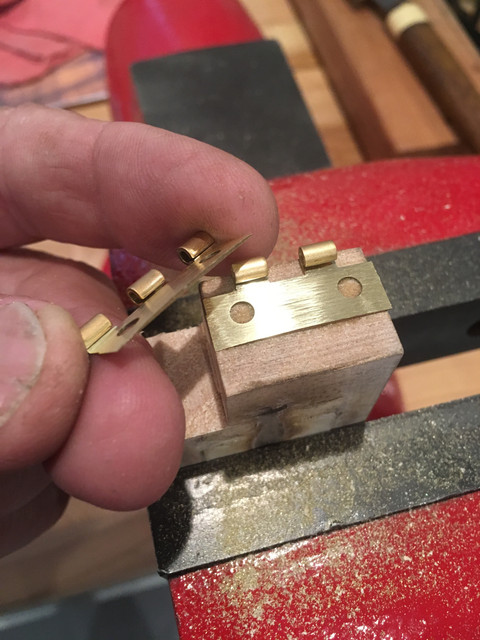
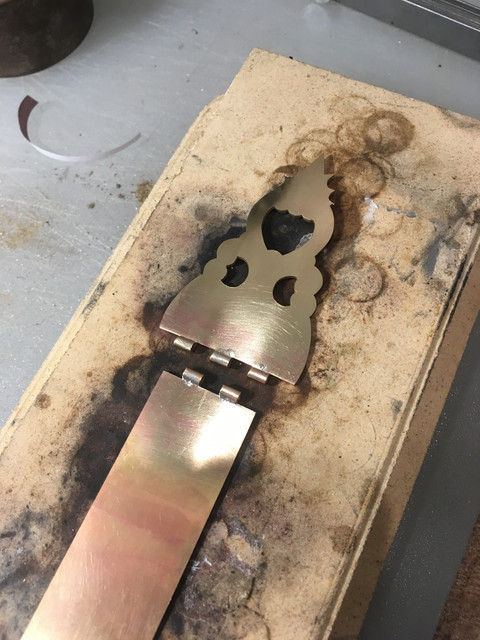
The lid is 1 inch wide and I had a small brass hinge just that wide as well. To insure that the lid and the finial are just as strong as if made from the parent material, I elected to hard silver braze the pieces and also make sure that there was an excellent fit between the hinge halves and their respective box pieces. Since both the box lid and finial had been contoured to fit the shape of the stock, the hinge had to be shaped to match the curve in order to get a tight braze joint. Here is a shaped half of the hinge and a photo showing the tight fit up to the box lid......(When I have to shape small parts like this with a file, I usually super glue the part to a small block of wood to do the work as in the picture here. Once the file work is finished, heating gently with a torch easily releases the part. I do the same thing for a lot of my engraving.)


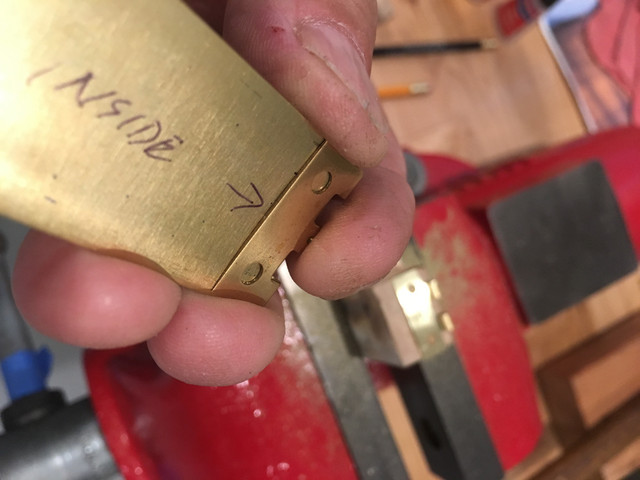
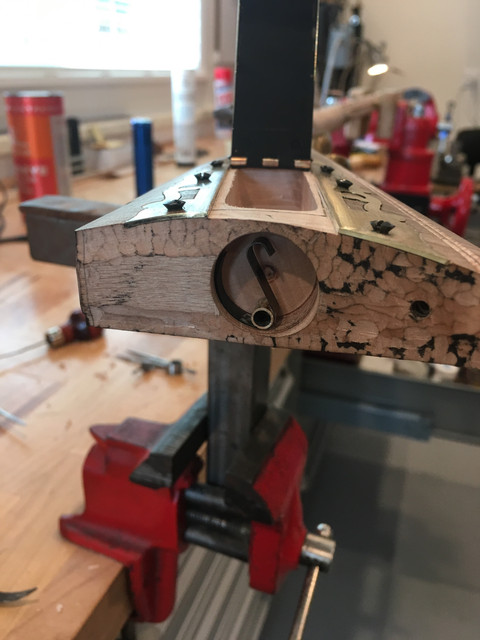
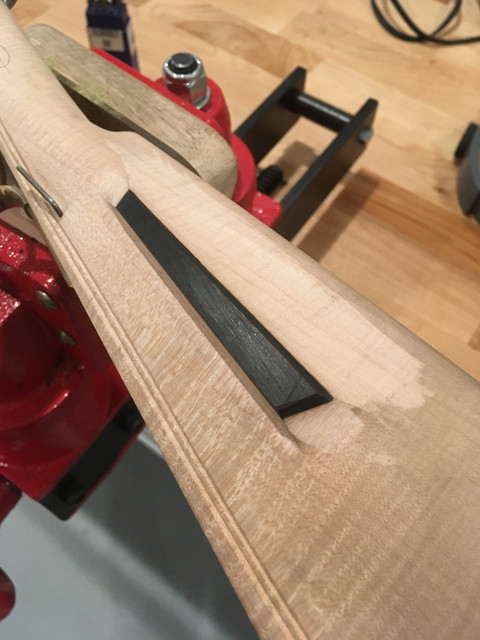
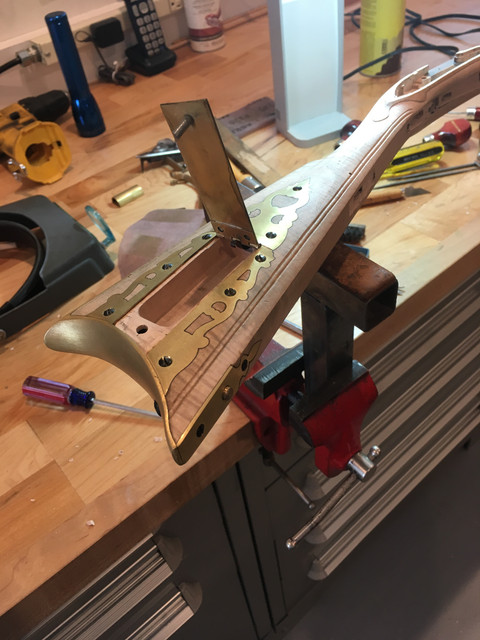
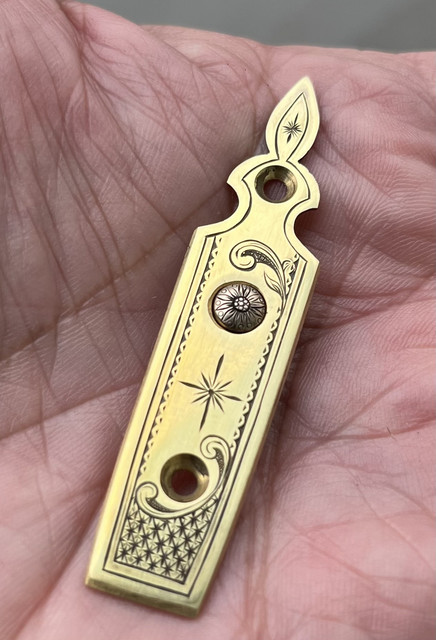
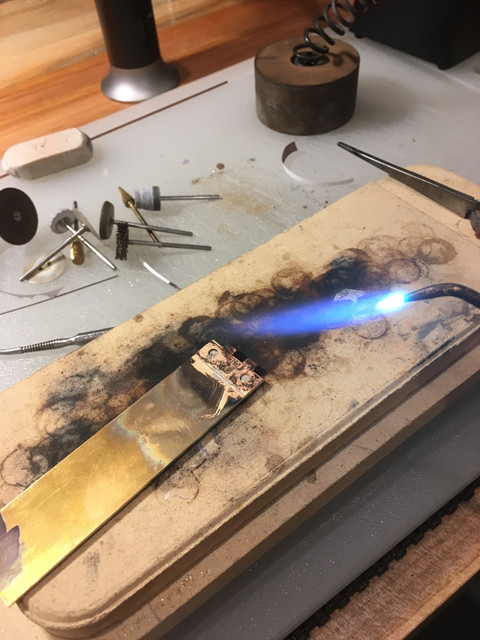
Then the hinge halves are silver brazed to their respective parts.....


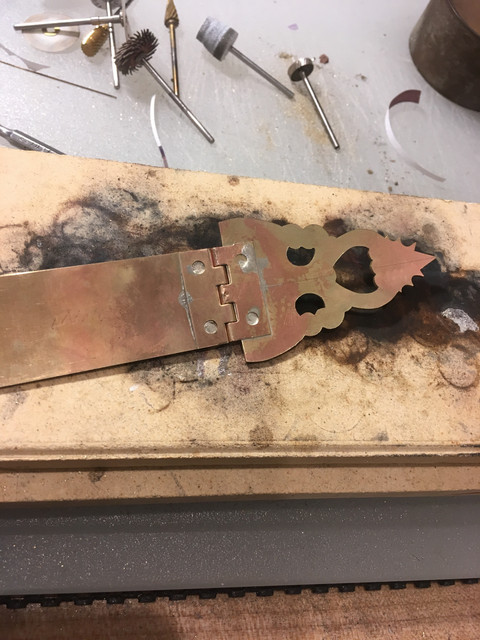
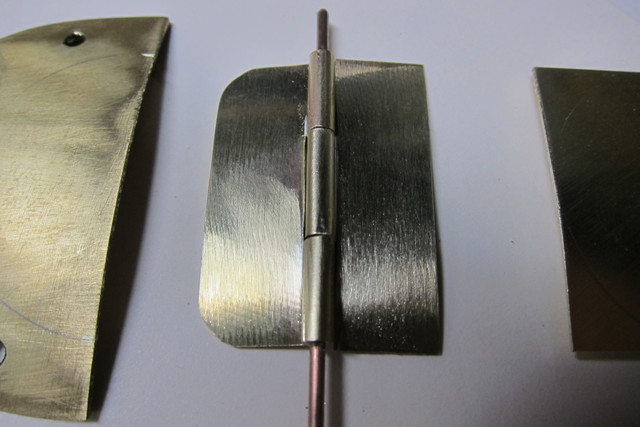
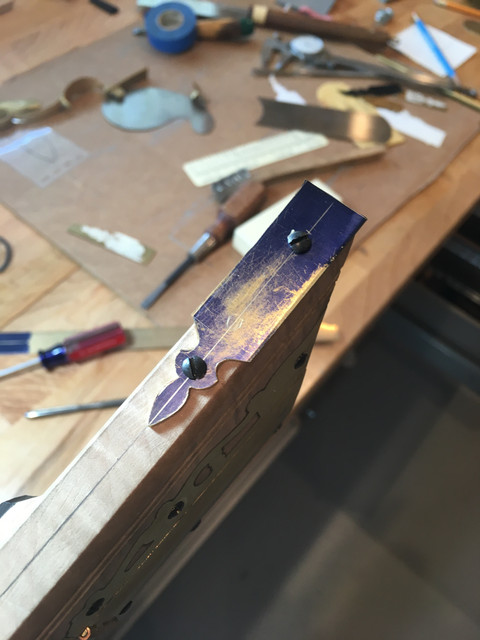
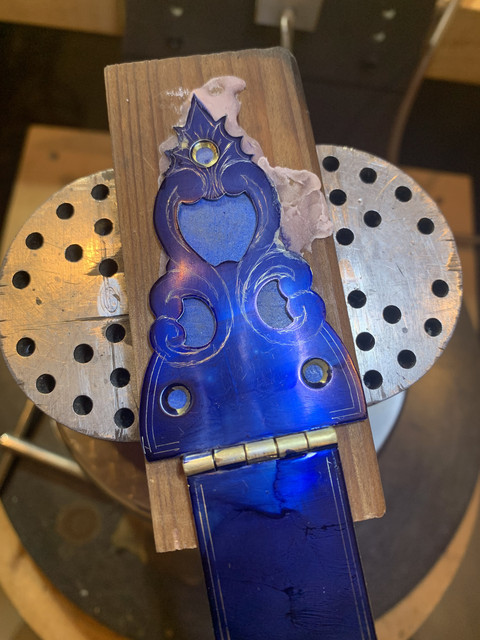
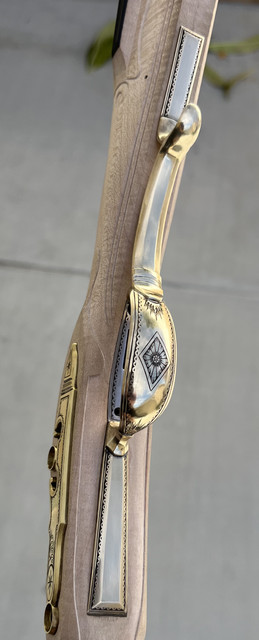
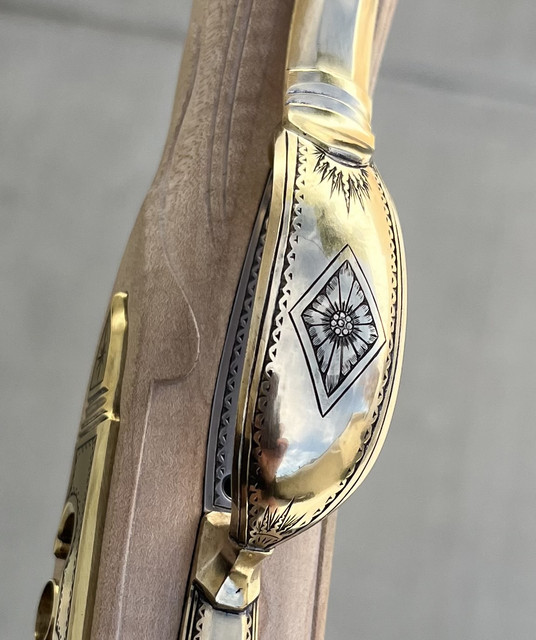
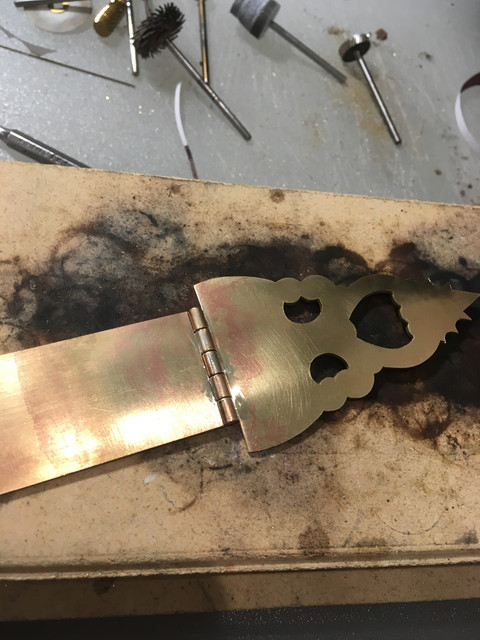
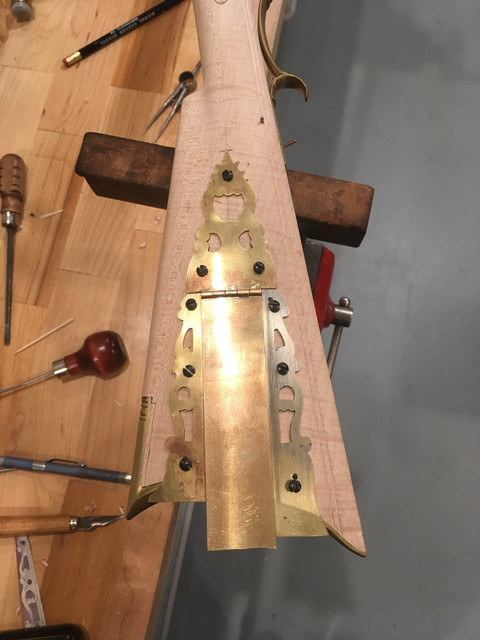
The box lid and finial are reassembled with the hinge pin.......


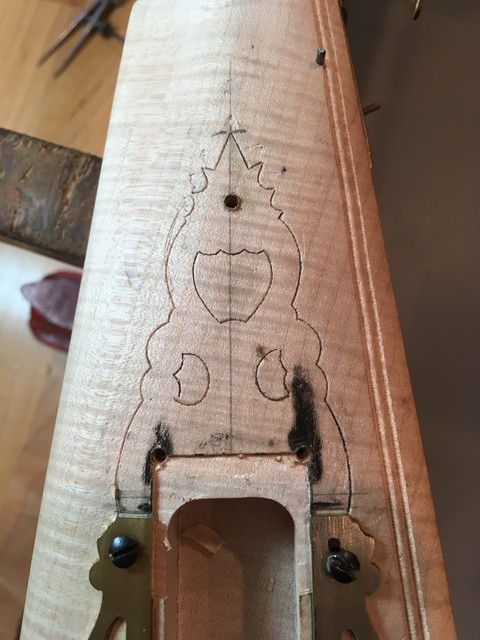
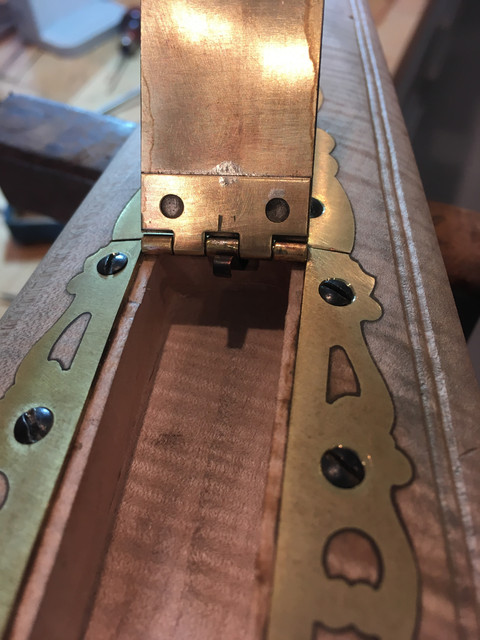
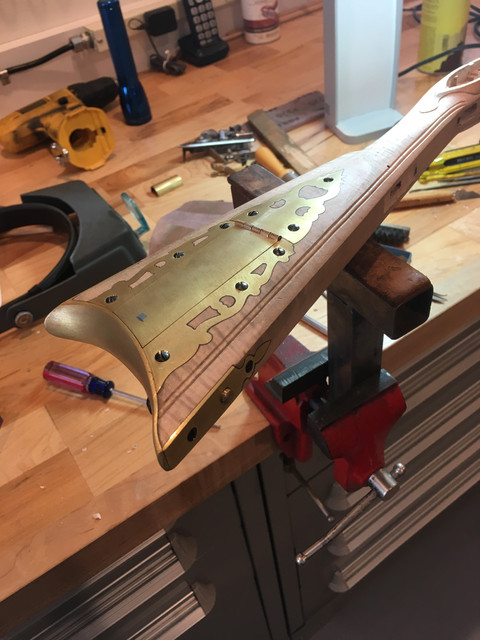
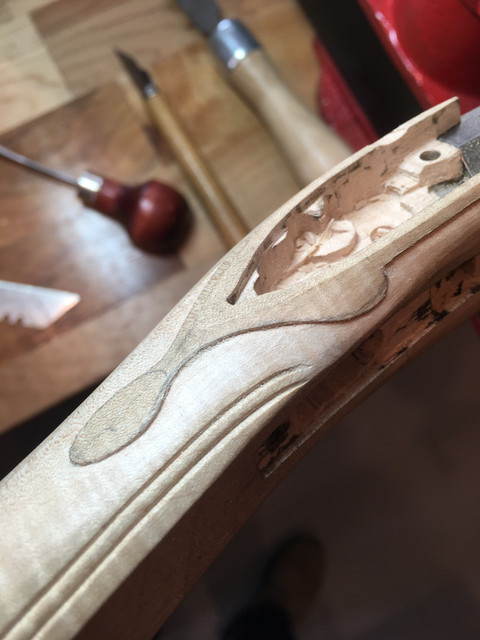
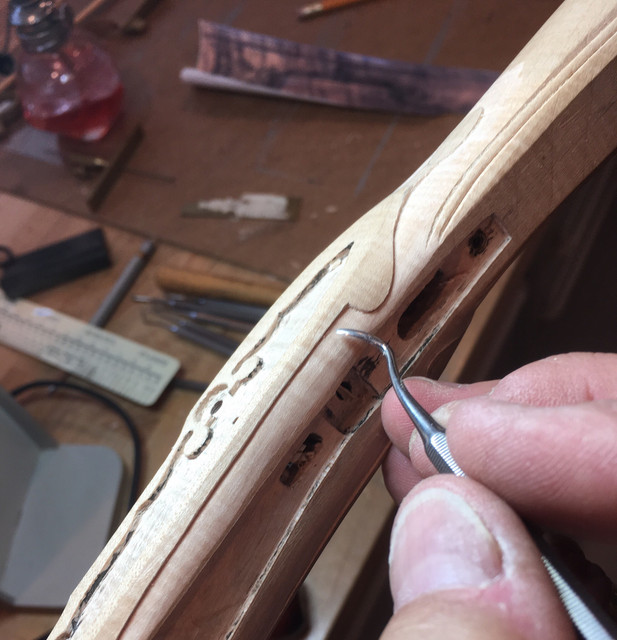
The box parts are drilled for the attaching screws and mounted in place for the start of the inletting......

 
For anyone interested, here is a re-post from an old thread on patch boxes from 4 years ago....it is easier to see how I do this on a full scale patch box rather than on the half scale one....(Original thread First Patchbox, need some help re: bending etc updated with progress )

"My personal take is that the guys who built these things 200 years ago were....a) very clever.....and b) made their guns the best way they knew how. I try to do the same while keeping within the framework of building an 18th century rifle. As for patch box hinges, I have bent them, but only at the edges....I always keep the center / working part of the hinge straight. The following has become my favorite way to do this after seeing a photo of an original with a separate riveted on hinge.

I make the hinge (as wide as the patch box door) from two pieces of 1/16 inch thick brass plate and two lengths of 3/16 inch (or even smaller) diameter brass rod, each the full width of the hinge. I put both pieces of brass rod in the lathe in turn and drill a 1/16 inch hole through them lengthwise for the hinge pin. I then silver solder the two rods to the two pieces of brass plate. Then I cut away alternate pieces of the brass rod to form the hinge knuckles. All of these parts are nice and straight, so this work is easy to do.

Independently, I bend both the patch box finial and the door to match the contour of the stock as closely as I can. Now, I file the plates on the hinge sides to match the contour of the underside of the door and the finial. The hinge looks like this at that point......


At this point, the hinge halves can either be soldered to the door and the finial or they can be riveted. Both are traditional methods. Now I have a door and a finial that are curved to the stock but a perfectly straight hinge. But it looks like its curved somewhat because the surrounding brass is. If you want the hinge to look even more like it is curved, file off a little of the brass hinge knuckles on both ends. Here it is just before assembly......


And here is the finished patch box......"

 
More patch box work......with the box parts made and contoured I started in on the tedious job of inletting. First I inlet led the hinge so the box door and finial sat flat on the stock. Then I screwed down the finial and side plates where I wanted them and started the cutting in around the parts.


With all the parts inlet, I wanted to get the door latch made. I cut the standard square hole in the end of the door and made a latch post from an 8 penny nail. With the latch post peened in place, I drilled out the mortice for the catch spring and made up the spring with a brazed on screw tube to hold it in place under the butt plate.


The last post showed part of the patch box latch and spring. Here is the complete assembly. I will install a push rod from a button in the toe plate.


I also decided to add an ebony face onto the cheek piece as I did on the copy of a Jim Chambers rifle I built a few years ago. It looks weird now but the other rifle looked fine after the maple was stained to its final color.


PS....Here is how the copy of Jim's rifle came out with the ebony face on the cheek piece.

https://americanlongrifles.org/forum/index.php?topic=37186.75
 
I finished the toe plate, push rod, button mechanism to release the patch box lid. Also made up the door spring and got it installed. The door snaps closed nicely and pops open with a satisfactory spring up. Done with that. Next step on the patch box is to pull it off the stock and engrave it.


And then I started the carving.......


I have had the time, but not the inspiration to continue work on this little rifle. I suppose it is the gunmaker's equivalent of "writers block".....when you know you want to do something but your not quite sure where to begin. I did not know what I wanted to carve on this small rifle...or what I want to engrave. So I have waited until the spirit moved me.

After many sketches (and subsequent erasures) on the stock, I came up with a theme I have used before, modified some for the reduced scale of this rifle......The start of the carving....


The execution thus far....not complete but well on the way. Good or bad, I'm committed now (.....or perhaps I should be "committed")


Started the engraving. As usual, it takes me a while to get back into engraving when I have not done it for a while. I start with the parts that are most easily re-worked or replaced so if I mess them up completely I can redo them without a lot of difficulty......Started with the trigger, trigger plate, and side plate.


Was confident enough to go on to the rear ram rod pipe......


Toe plate and patch box button engraving.......

 
Absolutely beautiful work! Wow. I am new to the forum and this thread, and having just completed my first build.... I now see how far one can take the art of this incredible skillset!
 
Thank you all for the kind words.....just don't blow the engraving up too far on the computer. It looks best at arms length... :eek:

I managed to finish the engraving on the trigger guard and muzzle cap. The center of the design on the muzzle cap is where the copper rivet will go to secure the cap to the stock....


Could you show us your engraving process? I have never attempted it, and this is amazing work! Perfectly tasteful and appropriate. I love it.
 

Latest posts

Back
Top