- Joined
- Mar 7, 2007
- Messages
- 648
- Reaction score
- 2,003
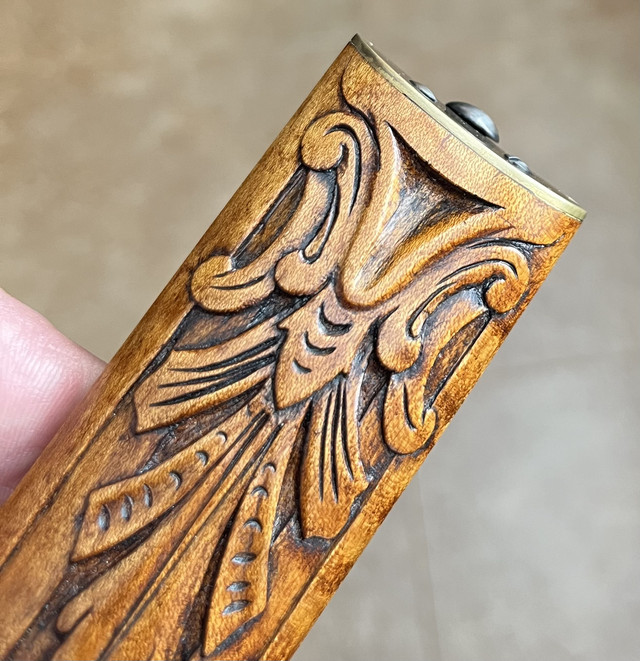
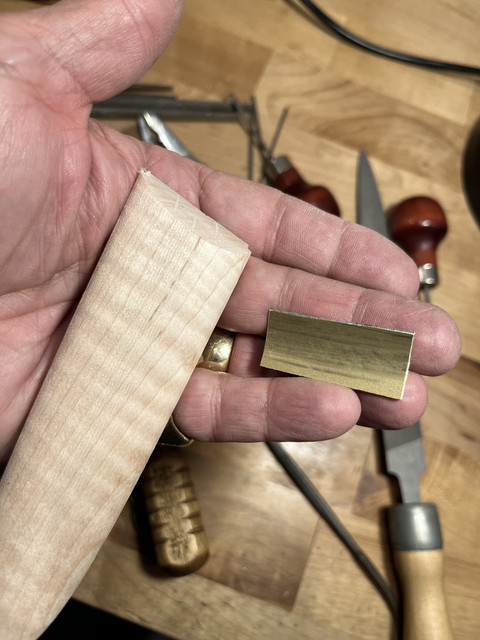
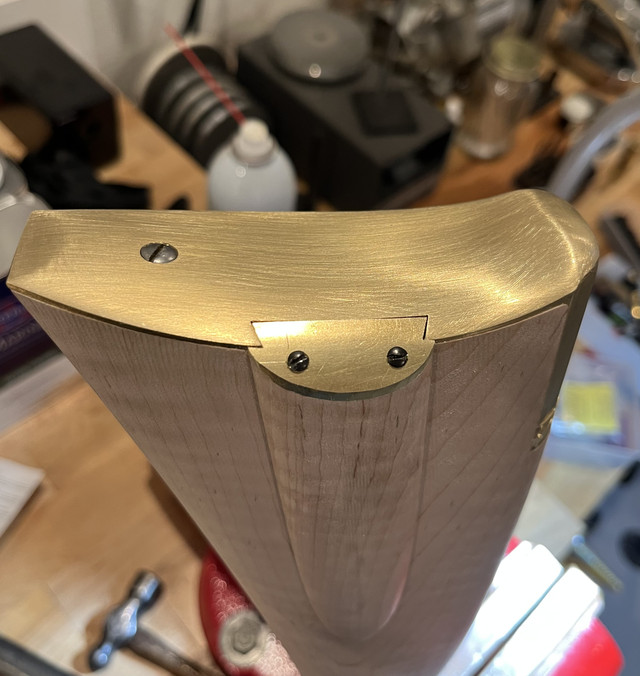
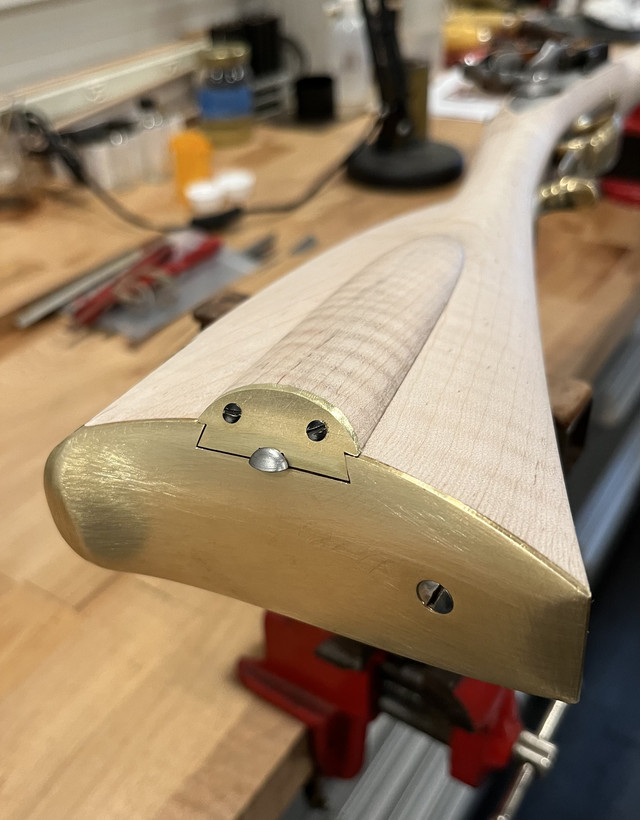
OK....having enjoyed assembling and decorating one of Jim's outstanding Colonial rifles back in late 2019, (Kibler Colonial Kit Assembled), I ordered a Woodsrunner last October. It showed up a couple of weeks ago, and since I am up to my neck in work and other projects that I have left hanging, I took it out of the box and put it aside. However, while looking at it on my work bench the other day, I noticed that Jim had included a small piece of 1/16" thick brass roughly cut into a rectangle. In the moment I wasn't sure what that was for.....until I looked at the sliding wood patch box....and realized that it was included in case you wanted to go to the trouble of putting a brass shoe on the end of the patch box. I really didn't intend to but thought, "How would I do that.....if I wanted to?" Well, an hour later I noticed that I had almost finished the task. I don't have time to finish the rifle now (although I am engraving the lock for another Woodsrunner for a fellow ALR member  ) but I thought some of you might be interested in putting a brass end plate on a wood patch box lid.
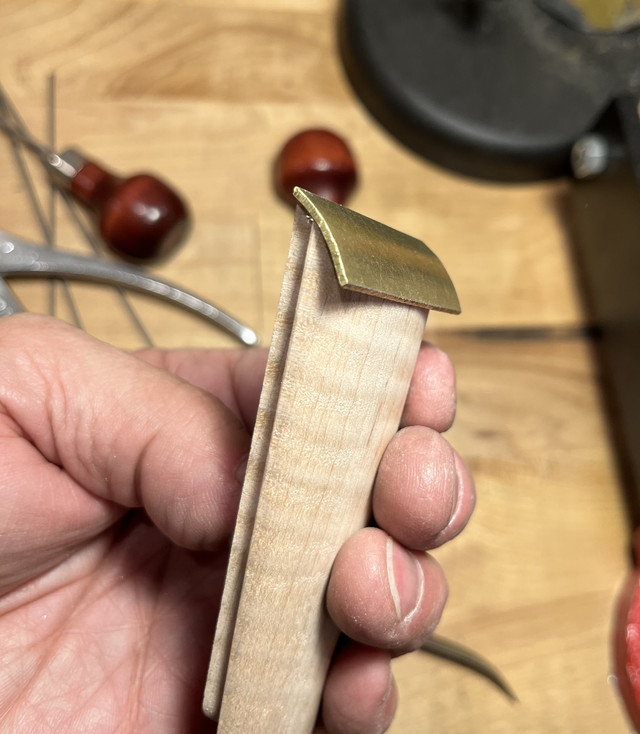
The piece of brass plate Jim sent with the kit is flat. The perfectly fitted wood patch box lid has a very smoothly curved end that blends nicely into the butt plate. So to use the 1/16" material, and keep the same nice contour, it would need to be curved to match the wood. And the wood would need to be shortened by a little less than the 1/16" thickness of the brass to leave enough material to blend.
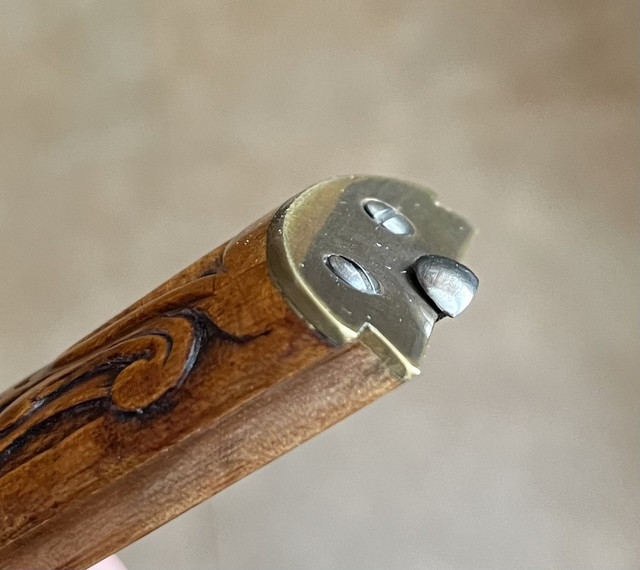
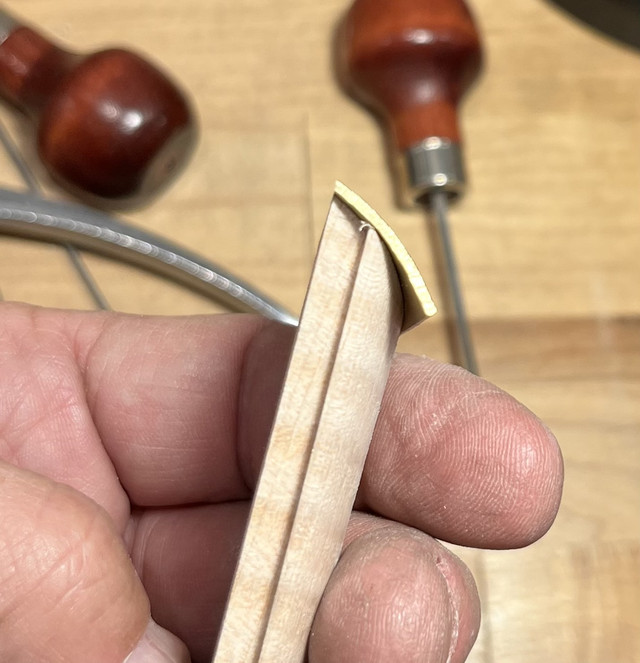
So, the first thing I did was to use a round piece of steel bar stock, about 3/4 inch in diameter, and a lead block to hammer a matching curve in the brass plate. It took a bit of trial and error to get it to match the CNC'd curve at the end of the patch box lid, but in short order the brass fit the contour nicely. Once it did, I roughly cut away a lot of the excess brass material with a jeweler's saw with the intent that I would file the final matching contour once the brass was firmly mounted to the box lid.
To shorten the wood, while keeping the curved convex contour, I used a hack saw blade (removed from its frame) to cut four or five parallel grooves (top surface to bottom surface) a little less that 1/16 inch deep. Then I filed the wood surface down until the grooves disappeared. With a few more strokes of the file, I got the wood back to matching the curvature of the brass.
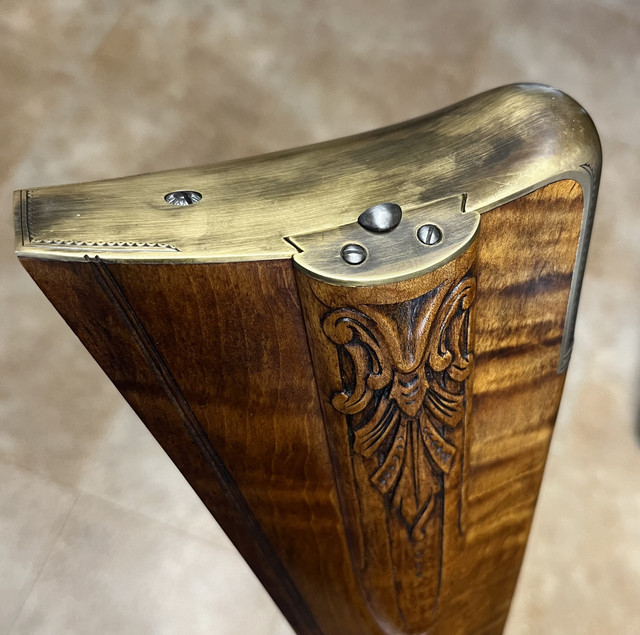
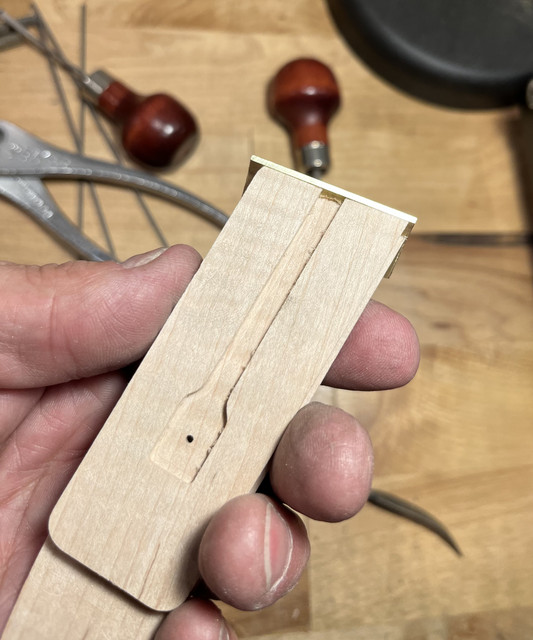
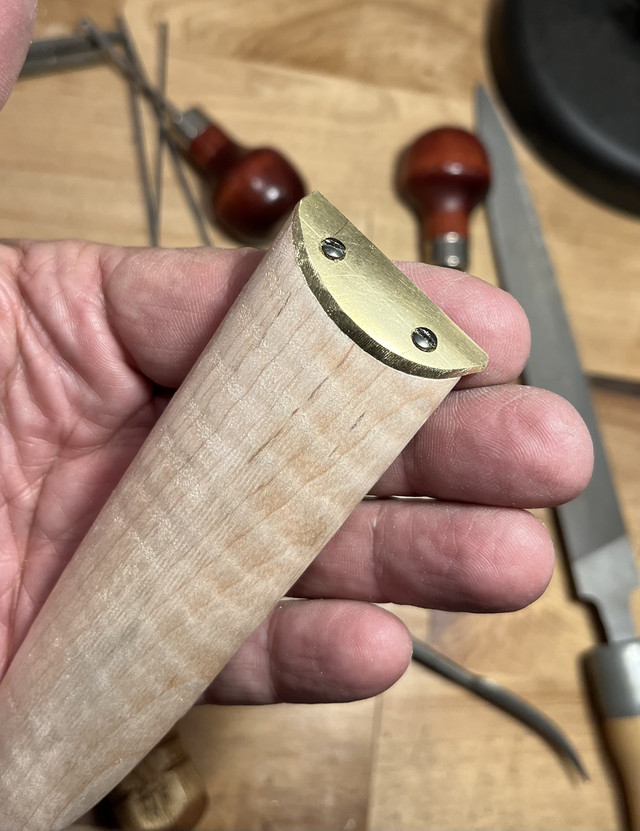
From prior experience I knew that I wanted to mount the plate to the lid with small wood screws. Drilling and installing the tiny screws with a loose plate and on a thin wood lid was a bit of a challenge that I knew would be much easier if the plate was not loose to begin with. So.....carefully avoiding any excess glue that would mess up future staining...I super glued the brass to the wood. Once the brass was firmly glued in place, I drilled and counter sunk for the small screws and firmly attached the brass plate. Now it was a fairly simple task to carefully file the contour of the brass shoe to match the wood and then make sure it still fit the dovetail on the stock and butt plate. When it did, I filed the necessary very slightly concave surface required to get a perfect match with the butt plate contour. With that all done, I cut the notch for the catch and mounted the catch. A few file strokes on the catch and the box lid, with its new brass shoe, worked perfectly.
) but I thought some of you might be interested in putting a brass end plate on a wood patch box lid.The piece of brass plate Jim sent with the kit is flat. The perfectly fitted wood patch box lid has a very smoothly curved end that blends nicely into the butt plate. So to use the 1/16" material, and keep the same nice contour, it would need to be curved to match the wood. And the wood would need to be shortened by a little less than the 1/16" thickness of the brass to leave enough material to blend.
So, the first thing I did was to use a round piece of steel bar stock, about 3/4 inch in diameter, and a lead block to hammer a matching curve in the brass plate. It took a bit of trial and error to get it to match the CNC'd curve at the end of the patch box lid, but in short order the brass fit the contour nicely. Once it did, I roughly cut away a lot of the excess brass material with a jeweler's saw with the intent that I would file the final matching contour once the brass was firmly mounted to the box lid.
To shorten the wood, while keeping the curved convex contour, I used a hack saw blade (removed from its frame) to cut four or five parallel grooves (top surface to bottom surface) a little less that 1/16 inch deep. Then I filed the wood surface down until the grooves disappeared. With a few more strokes of the file, I got the wood back to matching the curvature of the brass.
From prior experience I knew that I wanted to mount the plate to the lid with small wood screws. Drilling and installing the tiny screws with a loose plate and on a thin wood lid was a bit of a challenge that I knew would be much easier if the plate was not loose to begin with. So.....carefully avoiding any excess glue that would mess up future staining...I super glued the brass to the wood. Once the brass was firmly glued in place, I drilled and counter sunk for the small screws and firmly attached the brass plate. Now it was a fairly simple task to carefully file the contour of the brass shoe to match the wood and then make sure it still fit the dovetail on the stock and butt plate. When it did, I filed the necessary very slightly concave surface required to get a perfect match with the butt plate contour. With that all done, I cut the notch for the catch and mounted the catch. A few file strokes on the catch and the box lid, with its new brass shoe, worked perfectly.