


I've been building this rifle for quite some time. It all goes to show me that if I keep at it and make use of the support of some members of my gun club, I can actually finish this rifle.
The rifle was purchased as a Track of the Wolf Special Projects kit. Translation is that this is a set of Rifle Shoppe parts sold as a Track of the Wolf kit. I did buy the assembled lock directly from the Rifle Shoppe. A major set back was when I realized that the precarved stock put the touch hole at a location that interfered with the breech plug. I talked to several builders who had handled many original rifles with the same problem. My instructions were to go ahead and create a cavity in the breech plug. So it was get out the drill press and that most vile of tools, my Dremel tool to create the cavity just under bore size down to the the touch hole. We drilled a 1/16" touch hole. Once again I used the Dremel to work out a bit of an internal cone.
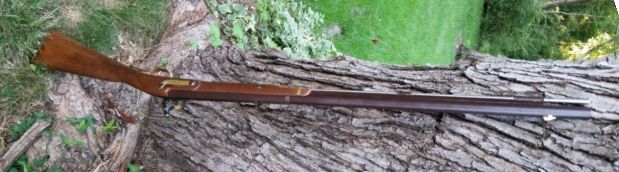
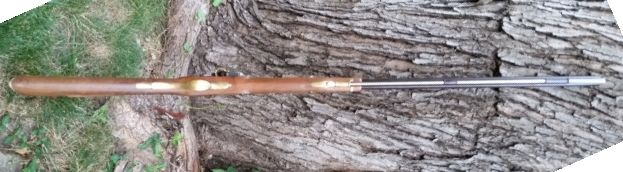
The next decision was whether I would test fire the rifle or go ahead and finish it. I decided to finish it. The barrel is browned with Wahkon Bay True Brown. My van furnished the browning and humidity chamber. The remaining steel parts were blued as called for in the Harpers Ferry specifications for the rifle.
I think it turned out well.

Time to shoot it. An 80 grain 3fg blank load was flawless. It was one of the fastest flintlocks if not the fastest I have fired. Now it was time to put a ball on top of the powder. A 0.535 cast ball was wrapped with a 0.017 cotton pocket drill patched moistened with (the old formula 7 water to one part) NAPA water soluble oil. I did have to recall my advice to set up the patch ball combination for a new rifle. Measure the bore first. My first measurement was with the 0.535 ball. I needed a mallet to get the patch and ball started. I think I may need a 0.526 ball and 0.025 patch.That ball was soon sent down range. By this time members of the club were gathering since most knew my history with my lengthy build so the expectation to see what would happen on target.
Five shots later this is what I had on my 25 yard target.
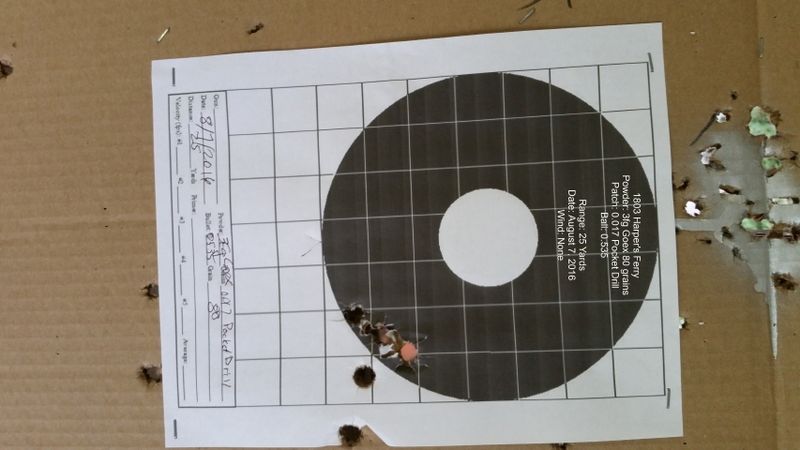
I'm pretty happy with the results.
The rifle was purchased as a Track of the Wolf Special Projects kit. Translation is that this is a set of Rifle Shoppe parts sold as a Track of the Wolf kit. I did buy the assembled lock directly from the Rifle Shoppe. A major set back was when I realized that the precarved stock put the touch hole at a location that interfered with the breech plug. I talked to several builders who had handled many original rifles with the same problem. My instructions were to go ahead and create a cavity in the breech plug. So it was get out the drill press and that most vile of tools, my Dremel tool to create the cavity just under bore size down to the the touch hole. We drilled a 1/16" touch hole. Once again I used the Dremel to work out a bit of an internal cone.
The next decision was whether I would test fire the rifle or go ahead and finish it. I decided to finish it. The barrel is browned with Wahkon Bay True Brown. My van furnished the browning and humidity chamber. The remaining steel parts were blued as called for in the Harpers Ferry specifications for the rifle.
I think it turned out well.
Time to shoot it. An 80 grain 3fg blank load was flawless. It was one of the fastest flintlocks if not the fastest I have fired. Now it was time to put a ball on top of the powder. A 0.535 cast ball was wrapped with a 0.017 cotton pocket drill patched moistened with (the old formula 7 water to one part) NAPA water soluble oil. I did have to recall my advice to set up the patch ball combination for a new rifle. Measure the bore first. My first measurement was with the 0.535 ball. I needed a mallet to get the patch and ball started. I think I may need a 0.526 ball and 0.025 patch.That ball was soon sent down range. By this time members of the club were gathering since most knew my history with my lengthy build so the expectation to see what would happen on target.
Five shots later this is what I had on my 25 yard target.
I'm pretty happy with the results.
