• This community needs YOUR help today. We rely 100% on Supporting Memberships to fund our efforts. With the ever increasing fees of everything, we need help. We need more Supporting Members, today. Please invest back into this community. I will ship a few decals too in addition to all the account perks you get.


    Sign up here: https://www.muzzleloadingforum.com/account/upgrades
  • Friends, our 2nd Amendment rights are always under attack and the NRA has been a constant for decades in helping fight that fight.

    We have partnered with the NRA to offer you a discount on membership and Muzzleloading Forum gets a small percentage too of each membership, so you are supporting both the NRA and us.

    Use this link to sign up please; https://membership.nra.org/recruiters/join/XR045103

Navy 1851 Holster TIGHT Slim Jim

Muzzleloading Forum

Help Support Muzzleloading Forum:

This site may earn a commission from merchant affiliate links, including eBay, Amazon, and others.

deanscamaro

45 Cal.
Joined
Mar 13, 2008
Messages
735
Reaction score
2
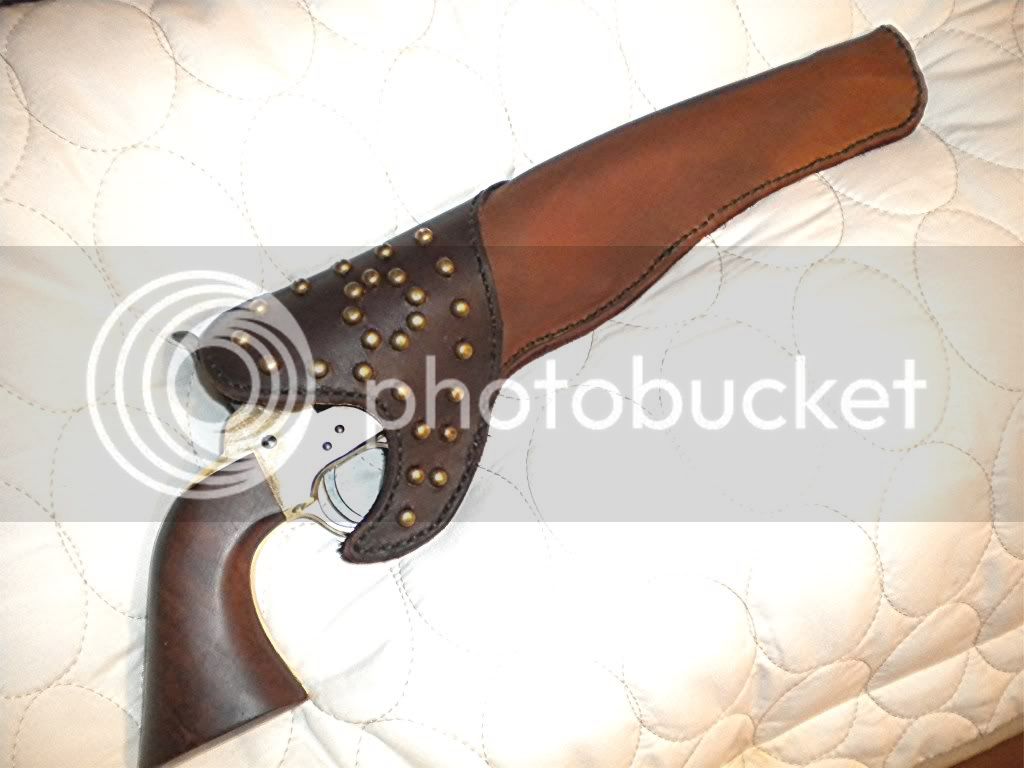
Well, I ventured into some new areas, with help from Swampy. Here was the criteria I was going after:
1. Make my own pattern
2. Do one out of oil tanned leather; i.e. a soft holster
3. Make it look older
4. Use some spots
5. Make it a Slim Jim style

OilTanHolster1.jpg


OilTanHolster2.jpg


Assessment:
1. Even taking Swampy's advice for the amount of space to allow around the gun tracing, it still ended up a little tight. In the future, Swampy, I will allow 1". I am going to put a leg tie on it and I think it will draw alright :idunno:
2. I do like the oil tanned leather. I used an over-layer of burgundy colored leather on brown. I like the contrast. :grin:
2. I also like the use of spots. :grin:
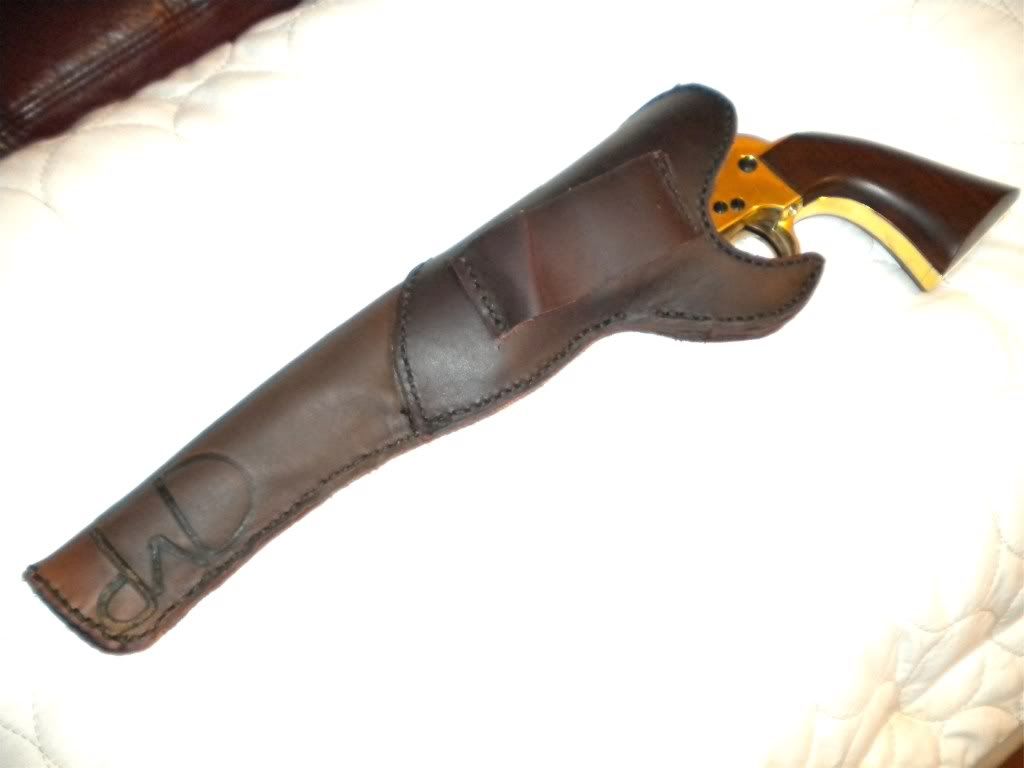
3. I had a custom signature branding iron made at the SASS Winter Range and it turned out too large, as you can see. Have to get another. :barf:
4. Using a little neatsfoot oil on the brown leather helped darken it and make it look used. :hmm:
5 I put a slight forward tilt to the 2 1/2" belt look. :grin:

I have a lot of things I need to improve on, but I am pretty satisfied with it. I have too many 1851 Navy holsters and need to figure out what to do with them. I only have one revolver, so all holsters get made to that. :rotf: :rotf:
 
Looking good! I know what you are going through when developing your own patterns...it isn't all that easy to have everything come out the way you thought it should. Sometimes too tight, sometimes too loose. :rotf:
 
I don't know if this would help anyone else, but... I managed to get my hands on a bunch of used rubber roof sheeting last year. It's about the thickness and flexibility of medium weight leather, and it's turned out to be a great way to test out leather patterns for cheap. Especially when I use a stapler to simulate lines of stitching!
 
If it's too tight there's a good chance you can "retro" it to fit. I built cases for a couple of Kindles including pockets for cords. Put in a lot of effort to make them look really good. And then we could barely get the Kindles out once they were in. Just nothing to grab onto with those flat little things.

Here's the fix. I wrapped the Kindles in plastic wrap, then cotton cord, then more plastic wrap. Dipped the cases in water for 30 seconds or so, let them sit for about 5 minutes to soften the leather completely, then pushed in the Kindles and let them dry.

Still a grunt to get them out once the leather dried, but after removing the twine the Kindles fit just fine now.

Good work, by the way, and definitely worth the extra effort now to make it fit right! :thumbsup:
 
Sometimes (but not always) you can make the fit looser by wetting the holster, then jamming the pistol wrapped in plastic wrap or plastic bag(s). Being wet makes the leather more flexible and when it dries, it may have stretched. Be sure to coat the pistol with rust inhibitor before you try this.

This scheme works OK on veg tanned. Tried it a few times on oil tanned but without as good a result.

I've put the wet holster between two full 25# shot bags, which act like a press and conforms to the pistol's shape. Let sit for a few hours, remove from shot bags, pull the pistol and add more rust inhibitor to the exterior as something always seems to leak. You shoould get a holster that conforms well on both sides.
 
I have to agree with you Willie....oil tanned leather doesn't work the same after wetting as chrome tanned leather does. I added a leg tie to this holster and it really isn't as tight as it was to start with. It just takes a small amount of hold-down now for an easy draw. I guess I am happy with the tightness now (it won't fall out if inverted) and it comes out okay. I've learned a lot with the result of this pattern development and "overlay" design.
:thumbsup: :grin:
 

Latest posts

Back
Top