• This community needs YOUR help today. We rely 100% on Supporting Memberships to fund our efforts. With the ever increasing fees of everything, we need help. We need more Supporting Members, today. Please invest back into this community. I will ship a few decals too in addition to all the account perks you get.


    Sign up here: https://www.muzzleloadingforum.com/account/upgrades
  • Friends, our 2nd Amendment rights are always under attack and the NRA has been a constant for decades in helping fight that fight.

    We have partnered with the NRA to offer you a discount on membership and Muzzleloading Forum gets a small percentage too of each membership, so you are supporting both the NRA and us.

    Use this link to sign up please; https://membership.nra.org/recruiters/join/XR045103

scrimshaw work

Muzzleloading Forum

Help Support Muzzleloading Forum:

This site may earn a commission from merchant affiliate links, including eBay, Amazon, and others.

Sydney

32 Cal.
Joined
Oct 17, 2008
Messages
31
Reaction score
0
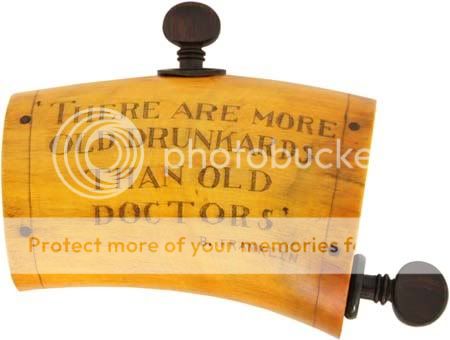
Ok, I have my horn all ready to scrimshaw, and I started in on it. What a mess of it I made. So I ended up taking a file to the horn and cleaned all of the cuts off. So my question is. My "scrimshaw" looked like a bunch of jagged cuts than some of the nice smooth lines that I've seen on horns. I think, my main problem was that I was pressing to hard with my knife and cutting too deep. Am I right in thinking that I should be etching with about the same pressure as writing with a pencil ? I haven't started on my new design yet until I'm sure of the way I should be etching the designs in. I'm useing an Xacto knife for the most part.
 
:v I have my best luck with a carbide needle or a small scratch awl---I have never found a knife suitable for my scrim work.... :thumbsup:
 
I have started to try my hand at scrim also. I have found that and old dentist tool, the kind they scrape your teeth with sharpened to a point works best for me. I also take multiple lights passes rather than one deep cut. My curves and lines have gotten better. Good luck and as I have found it takes practice. But take your time and don't get in a hurry. When I find that I am wanting to get in a hurry to get it done, I have found that it is time to put it down and take a break. Good luck and have fun
 
Also, make sure that the horn is smooth and highly polished before you start otherwise any scratch, file mark or blemish will pick up the ink.

Eric
 
Eric is right, smooth and polished is the way to go. Sharp tools are a big help too. I use mostly knives to do my scrim, but am practicing using some gravers as well. Been doin' with knives for so long it may take awhile for this old timer to learn a new method. Here's a sample:
Rums1.jpg
 
I use xacto knife for my scrimshaw work. The horn is sanded smooth and polished before I start. It will take somewhat of a learning curve to get the hang of it. I'm still learning. :grin:
You are going find that the horn will have hard and soft areas. You are also going to be making cuts with the grain and across the grain. Best to make a series of cuts progressively deepening the cut rather than one cut. This is especially true around sharp curves. Take it slow and light at first with a sharp knife until you learn what to expect from the horn. You are going to make mistakes, but don't feel too bad about it. If you examine original scrimshaw horns you will see the same mistakes. Good luck and post some pics when you get done.
Scott
 
Thanks guts for the reply. Eagleeye, that's some fine work there. I realize now one of the problems is my horn isn't smooth enough. Fortunately it's thick enough to rework where I've messed up. I will defiantly post a pic or two when I'm done. Unless I'm too embarrassed by it.
 
Don't fret about embarassment, you should see the very first horn I did. Talk about mixing styles and such. It is one ugly duckling. I keep it around to remind me of what not to do. So keep scraping and have patience.
Happy horning.
Gary
 
Back
Top