• This community needs YOUR help today. We rely 100% on Supporting Memberships to fund our efforts. With the ever increasing fees of everything, we need help. We need more Supporting Members, today. Please invest back into this community. I will ship a few decals too in addition to all the account perks you get.


    Sign up here: https://www.muzzleloadingforum.com/account/upgrades
  • Friends, our 2nd Amendment rights are always under attack and the NRA has been a constant for decades in helping fight that fight.

    We have partnered with the NRA to offer you a discount on membership and Muzzleloading Forum gets a small percentage too of each membership, so you are supporting both the NRA and us.

    Use this link to sign up please; https://membership.nra.org/recruiters/join/XR045103

My Apprentice and Her English Fowler

Muzzleloading Forum

Help Support Muzzleloading Forum:

This site may earn a commission from merchant affiliate links, including eBay, Amazon, and others.
Thumbs up, high fives, and a big "Atta Boy' to ya Dave for taking the time to teach Maria the art of MZ making. God's Blessings to ya. I was going to start doing MZ building back in my early 20's but never got started, Always a 'Wish I Hada'! Involved in alot of black powder shooting (TC capper, percussion and conversion revolvers), but never a flint or a build. Right now I'm hoping to finish a old CVA flint pistol kit I bought back in around '77 but never finished, think I paid around $50 new for it.. Get that done and gonna start on a Kibler SMR 36er. I'm 74 now, never too old to get started, still have the skills, health, and drive. Wish I lived near ya, I'd volunteer to be yer next apprentice, I'd even furnish beans and hot dogs for lunch every day. 😅 Iowa is a bit far though I guess 🙂 Look forward to new posts. Very good work Maria 👍👍
 
I’ll be watching this build with delight!

While I’m at it, since she’s doing the work while you provide the space, tools, pictures, etc., does she have a way of raising money for that history degree? I’d throw in some pesos if so! That’s worth it to me!
 

Attachments

  • 1673213424996.png
    1673213424996.png
    5.7 KB · Views: 3
I’ll be watching this build with delight!

While I’m at it, since she’s doing the work while you provide the space, tools, pictures, etc., does she have a way of raising money for that history degree? I’d throw in some pesos if so! That’s worth it to me!
This is a good idea. I wonder if there is an organization of like minds and interests to ours that could sponsor a scholarship for kids like Maria.
 
Hi folks,
Maria and I thank you all for your encouragement. This project is going well. Today's lesson was fitting a standing or "break off" breech, which many of you call "hook breech and tang". For those of you intending to build English fowlers this post contains a lot of information you will not find anywhere else other than my tutorials on English fowlers posted on the ALR site.

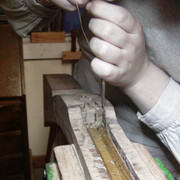
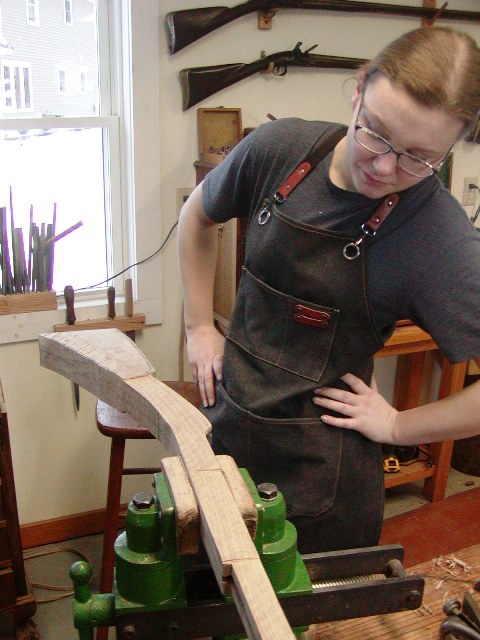
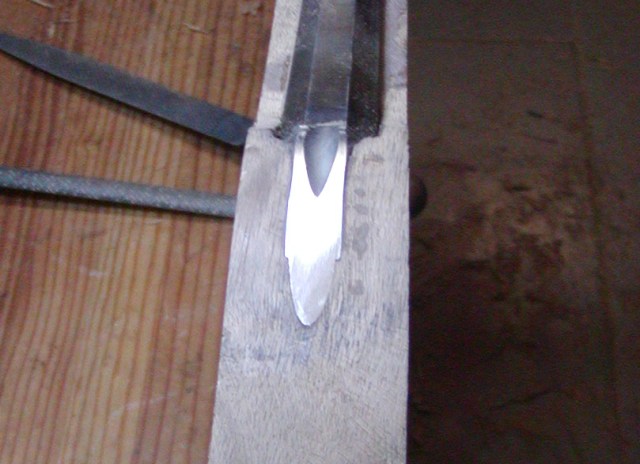
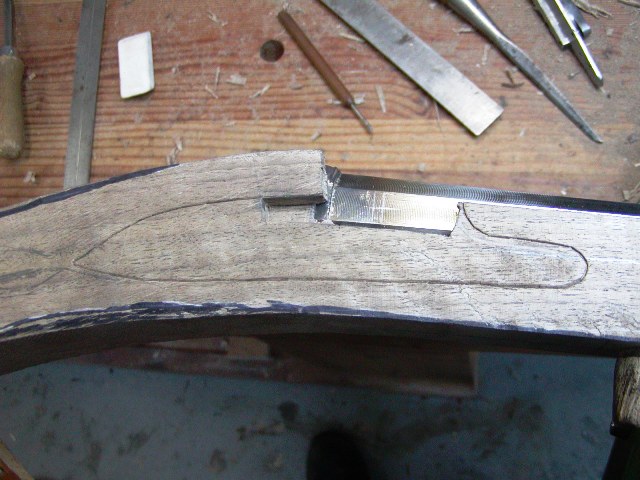
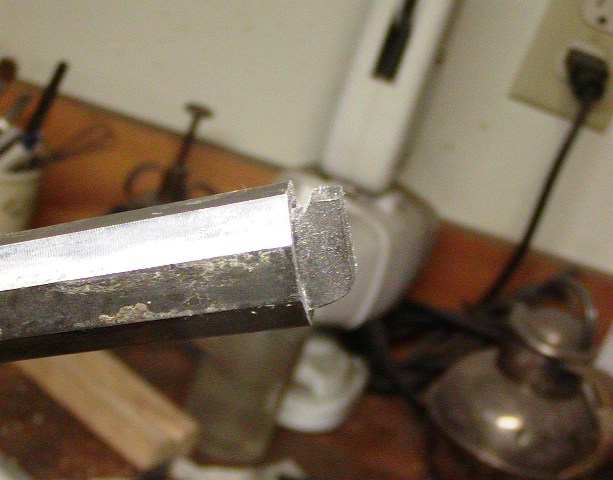
Rice provided a standing breech that was beautifully machined but the tang was way too short. It is perfect for a pistol but not a long gun. Maria will save the finely made breech for her eventual pistol. I have cast standing breeches from TRS and a standard breech plug with tang that fit her barrel. So our first job was to fit the new breech plug. This is a basic skill to learn and our new plug needed to turn 180 degrees further to seal against the shoulder in the barrel and line up with the top and bottom flats on the barrel. So Maria had to file the bolster of the plug and face to make the fit. We used Magic Marker on the face to test for fit to the shoulder.


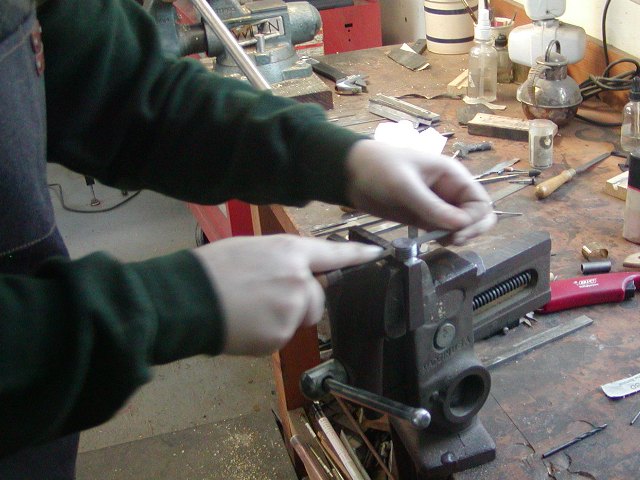
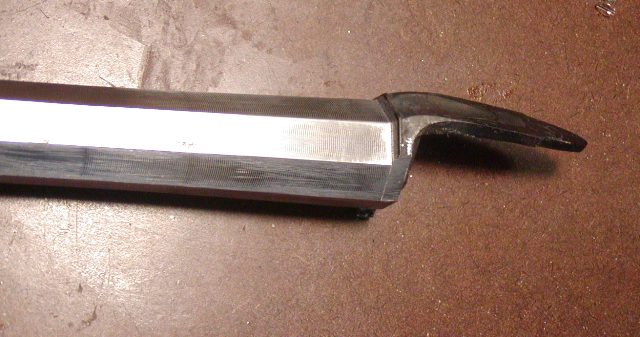
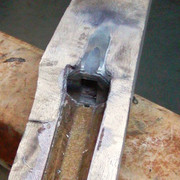
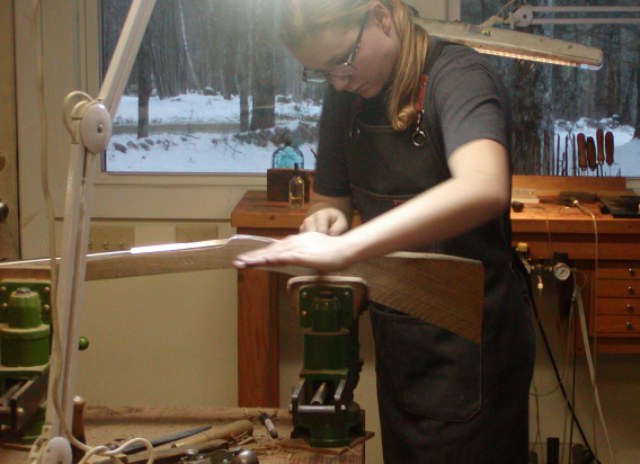
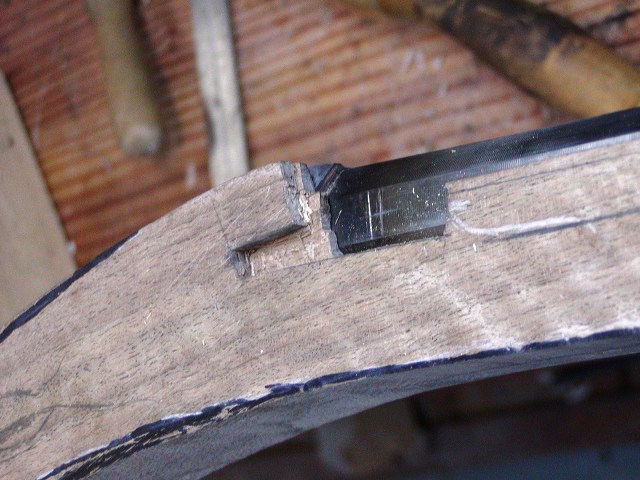
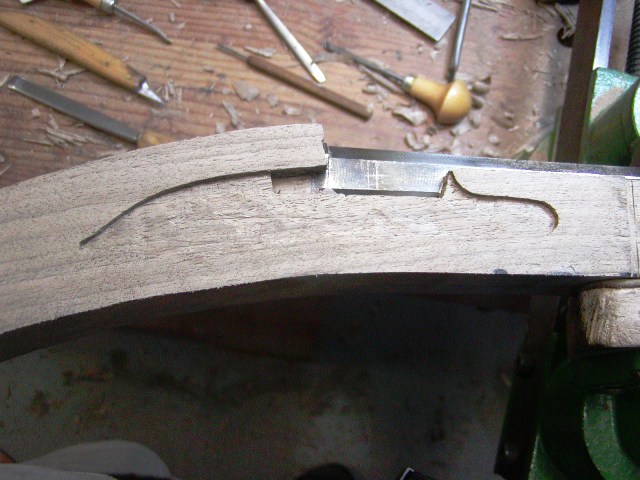
Next, we cut off the tang and shape the bolster into the proper hook. On original 18th century English guns, the hook is tapered such that it is a little narrower at the top than the bottom. So is the slot in the standing breech. That is so the hook snugs tighter into the breech as it is fully engaged. No modern commercial makers of these breeches do this.


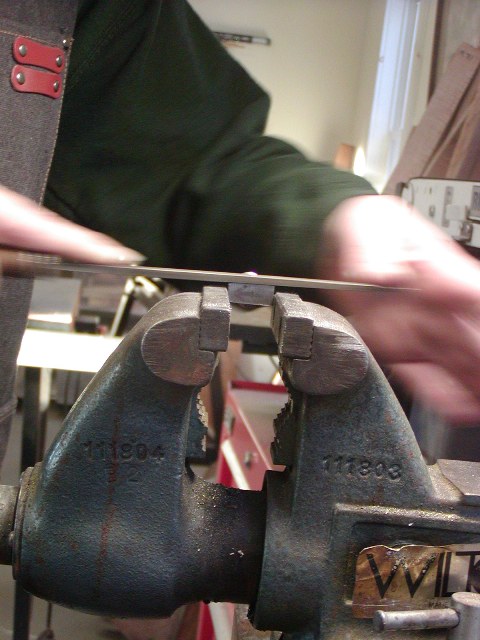
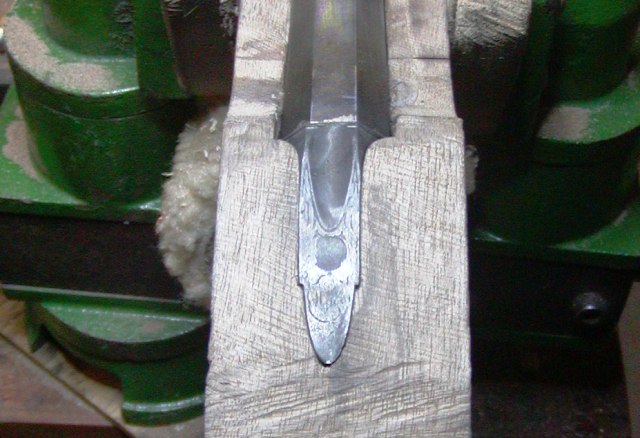
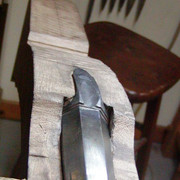
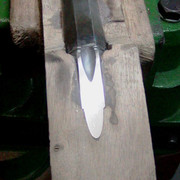
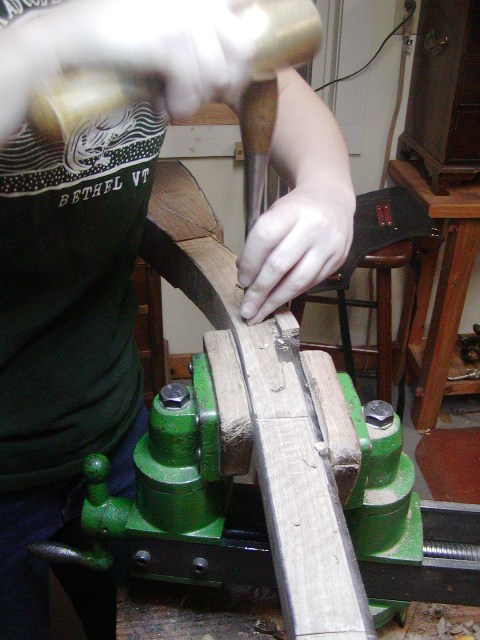
After filing the sides of the hook so they fit the slot in the standing breech, we cleaned up the cast standing breech, made sure the face was filed true and flat and the slot clean and crisp. Then we started to shape the hook, working both top and bottom until it began to slide in place. When close, we installed the plug in the barrel and continued filing until the hook smoothly slid into place. The result was a nice firm fit.


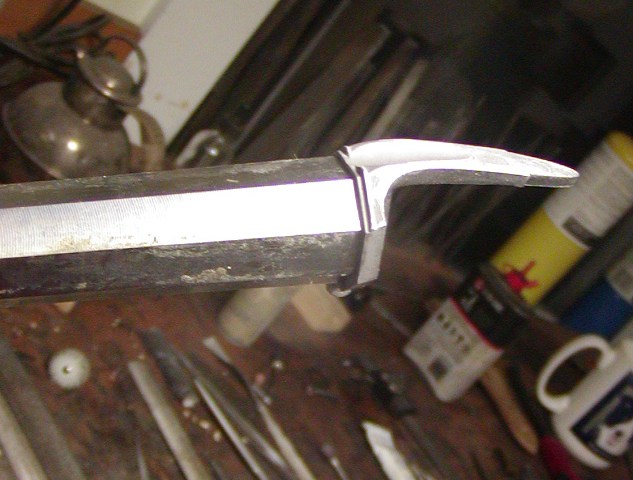
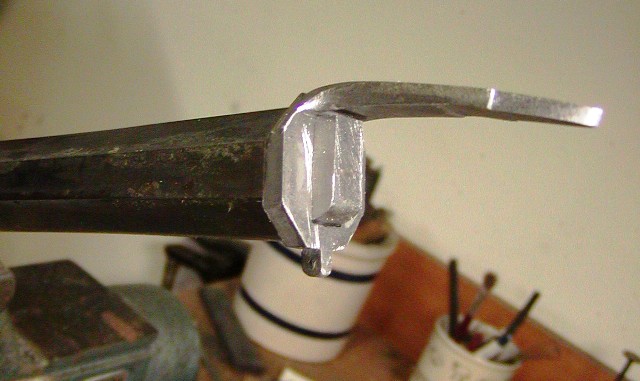
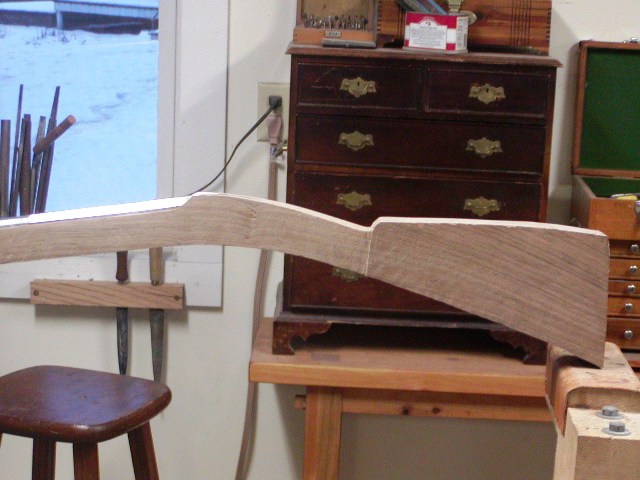
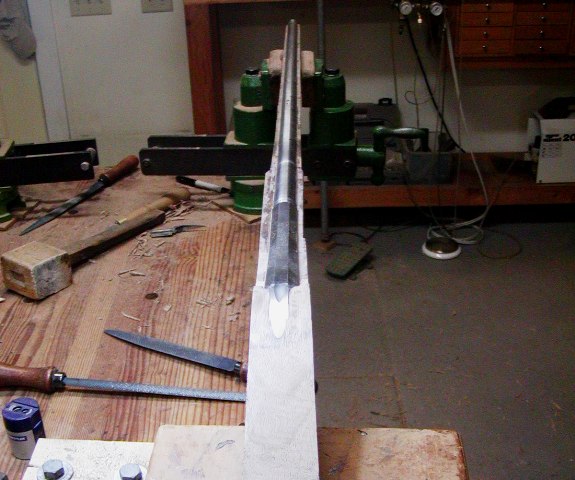
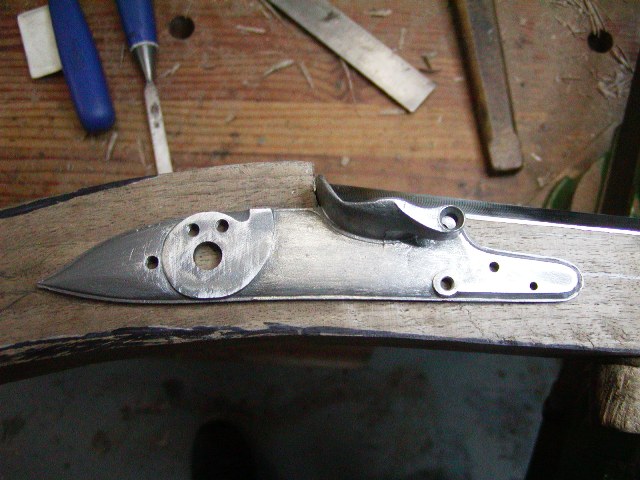
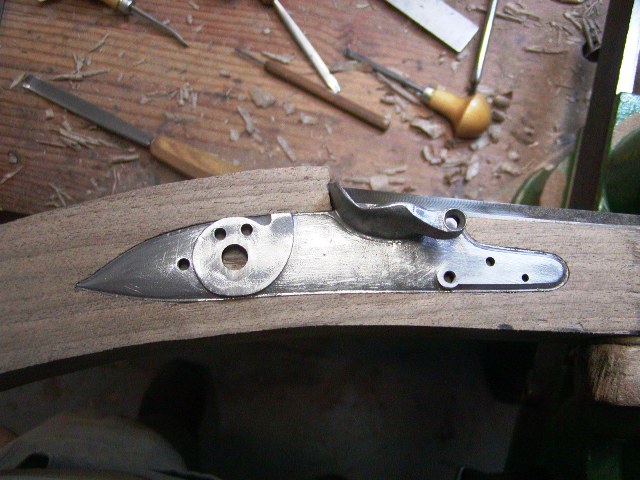
The standing breech is oversize and will be filed down flush with the barrel flats, except the top 3 flats. Those will have a step above the barrel as were the originals. The standing breech has a hump and is exactly correct for the time period this gun is supposed to represent. Moreover, you can see the lug on the bottom of the standing breech. That is for a cross pin to anchor the bottom of the breech. Unless you buy castings from TRS or Blackley, you will never get that feature nor the hump. The commercially made stuff is very deficient and historically inaccurate.

dave
 
Hi,
We inlet the standing breech today. It still needs a little tweaking but it is essentially done. We solder the standing breech to the hook and barrel using Eutectic TIX solder. I like solder not glue because it cleans up easily and you can pop the breech off by heating it to check the inletting fit of the standing breech without the barrel and then simply reheat the barrel and breech to solder it back together.


After soldering, Maria filed the bottom 5 flats of the breech flush with the barrel. Then she inlet a space in the stock for the hook bolster. Next she inlet the frame of the breech and the bottom lug.


The she started to fit the tang working slowly backward.


Finally, it all slips into place.


dave
 
This really needs to be published.
So much information to share and educate those interested in the historically correct methods you are teaching Maria and us. (Not to mention the beautiful outcome we are anticipating!)

This really needs to be published.
Agreed. But, I almost feel Maria should be the one writing a paper/thesis on this and possibly submitting it for publication.
I would really love to read this from her perspective.
You and others here have built guns before, some of you many guns, amd a few folks some really fantastic guns, I have not (and don't really plan to). As someone who hasn't but really respects and admires the work Dave puts into his builds, and his posts, and the final outcomes, I would love to read all this from the perspective of someone who has never built a gun and is now building their 1st one under his master tutelage.
 
Hi,
Thank you guys. Maria is going to write a paper on her experience as well as give a presentation to her school. Maybe I will encourage her to write a condensed version for publication in Muzleblasts, Muzzleloading, or Black Powder magazines. Boy, Maria has sharpening chisels and knives down pat. She gets them scary sharp every time.

dave
Fine idea Dave. It would be great to see this published in one of the magazines.
 
Hi,
Thank you guys. Maria is going to write a paper on her experience as well as give a presentation to her school. Maybe I will encourage her to write a condensed version for publication in Muzleblasts, Muzzleloading, or Black Powder magazines. Boy, Maria has sharpening chisels and knives down pat. She gets them scary sharp every time.

dave
If Maria is going for a bachelor's degree in History, could she do her Master's thesis on the build?

Gus
 
Hi folks and thanks for your comments and support,

We are moving forward. The standing breech is well fitted and works. We filed a bit off the tang and vacuumed the dust but then I wet the wood and created that gray stain from the metal. It easily scrapes off but I failed to clean it all up before taking the photo. In the second photo you can clearly see the mortise for the bottom lug on the standing breech.


Next up was to trim off excess wood, true the sides by planing, and rasp the rough blank close to the final profile. Even still squared up, the blank shows the elegant lines and truth of the design as representing a mid-18th century English fowler.


Maria mentioned that her aspiration to become a hand model is now ruined. ;D


dave
 
Tell Maria that her hand modeling career May have taken a hit but her smile will get her a multi-million dollar contract with Crest toothpaste any ol’ time she wants.

Dave, question on the original fowlers, did the forearms tend to fracture easily? It would seem that sans Some kind of reinforcement (I.e. acra glass), they would have been awfully fragile.
 
Hats off to both Maria and yourself Dave.
You are giving the girl a fantastic start!

TG,
I can't answer for Dave, but without the barrel the fore-ends are terrifyingly thin!
For this reason many came to be divided in the fore-end, so that most of the fore-end remained with the barrel if taken down for cleaning.
 
Hi,
Lock inletting time. Maria filed draft on the lock plate and we positioned it based on our plans. Then she inlet the bolster first so she could lay the lock plate flat on the stock.


Keep in mind, we trimmed off wood from the sides of the lock panel so we only had 1/16" extra above the final depth of the plate. It is stupid to try and inlet a lock plate through a lot of excess wood. You cannot see how well you are cutting the mortise and you risk chipping out a lot of wood every time you remove the plate. Once the plate was down on the stock, she traced the outline with a sharp carving knife.


Next, she stabbed the outline in deeper and back cut the edges to remove wood along the edges of the mortise. Then she used shallow sweeps to remove wood from the center of the mortise. The sweeps allow cutting with and across the grain to hog out wood. Eventually, she had the mortise cut for the lock plate with no gaps.


Then I had her inlet the internals one at a time by drilling holes for the bridle, sear, and sear spring holes to their proper depth and diameter and then using those holes to align and trace the individual parts. Here is where she is at the end of the afternoon.


Tomorrow, we finish inletting the lock, make, install and inlet the barrel lugs and hopefully, inlet the barrel keys. It may take 2 sessions to accomplish that.

dave
 
Back
Top