• This community needs YOUR help today. We rely 100% on Supporting Memberships to fund our efforts. With the ever increasing fees of everything, we need help. We need more Supporting Members, today. Please invest back into this community. I will ship a few decals too in addition to all the account perks you get.


    Sign up here: https://www.muzzleloadingforum.com/account/upgrades
  • Friends, our 2nd Amendment rights are always under attack and the NRA has been a constant for decades in helping fight that fight.

    We have partnered with the NRA to offer you a discount on membership and Muzzleloading Forum gets a small percentage too of each membership, so you are supporting both the NRA and us.

    Use this link to sign up please; https://membership.nra.org/recruiters/join/XR045103

Wood margin around lock and side plate?

Muzzleloading Forum

Help Support Muzzleloading Forum:

This site may earn a commission from merchant affiliate links, including eBay, Amazon, and others.
Hi,
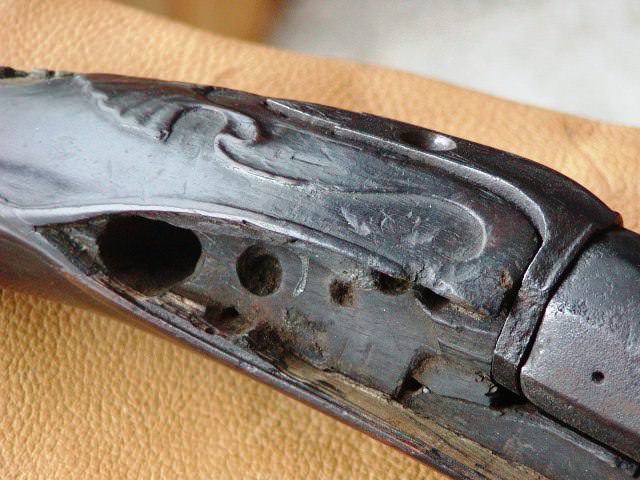
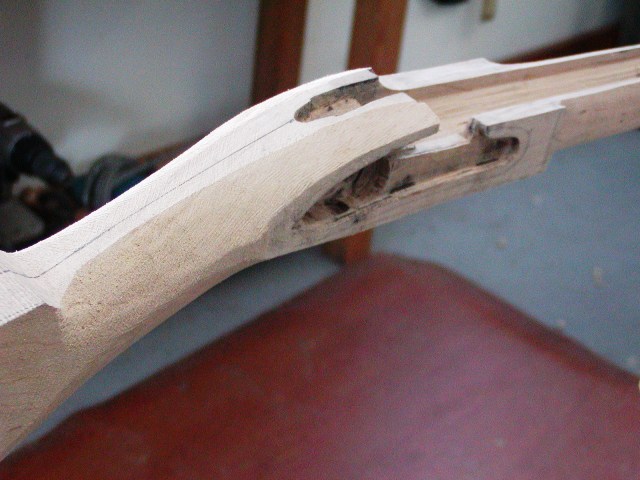
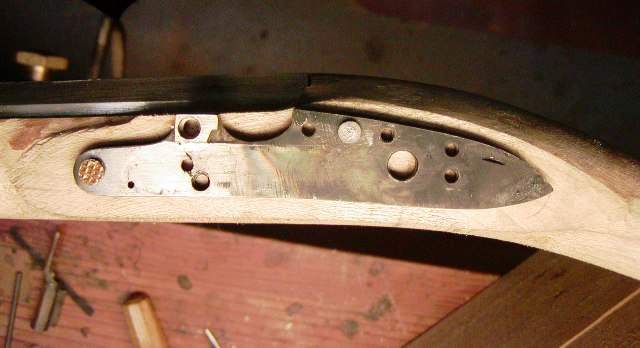
Yes, I agree with Buckskinn. I don't think you've screwed the pooch at all. I think you still have sufficient extra wood to work and I think you are beginning to get the idea. Look closely at my photos and don't worry if the flat along the top of the lock gets thin. That is OK. Also the edge of the flat can come down close to the lobe of the side plate for the rear bolt. Look how close the edge of the panel comes to the lobe on this Brown Bess.
VnJek9l.jpg


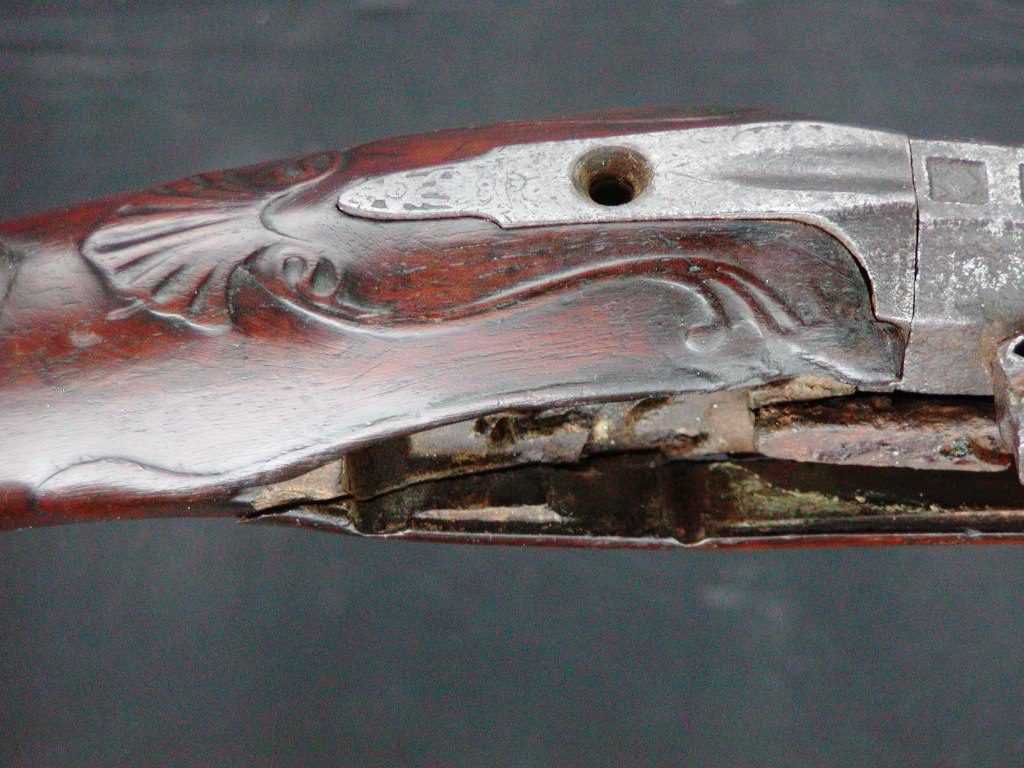
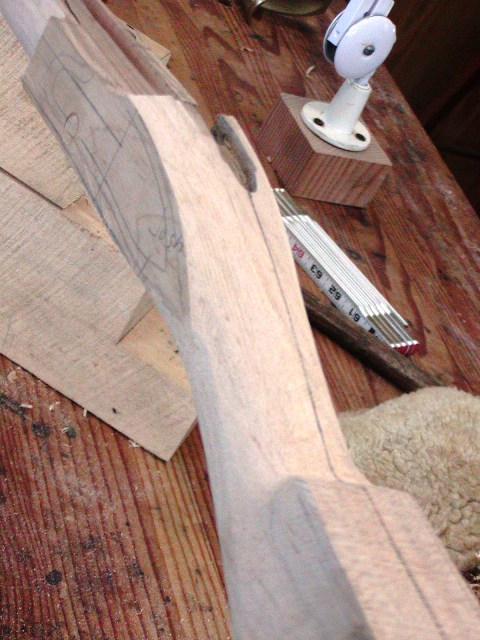
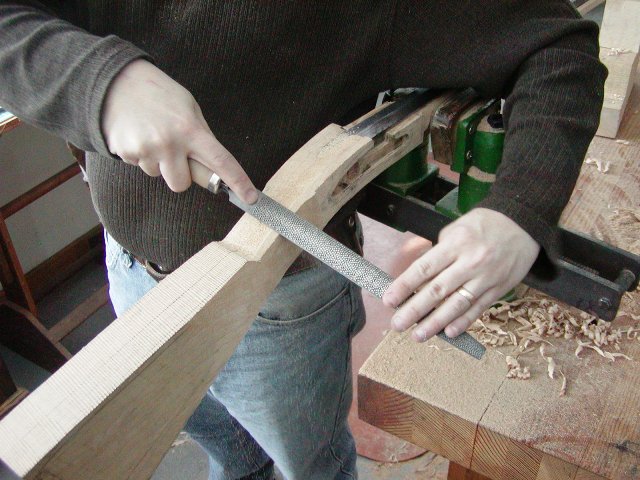
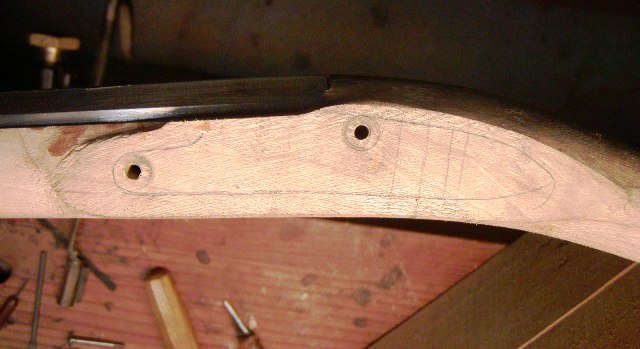
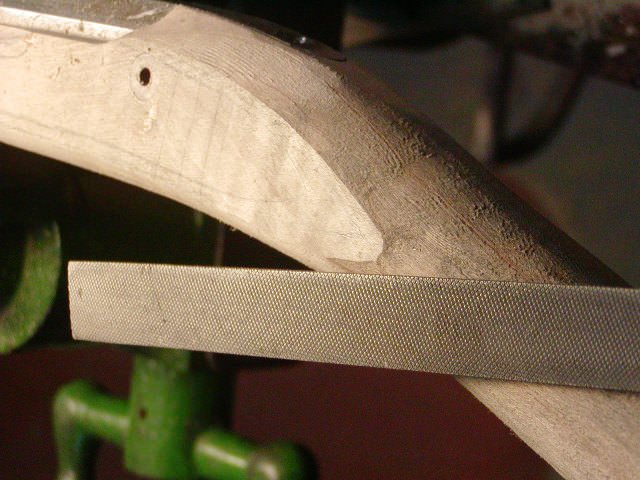
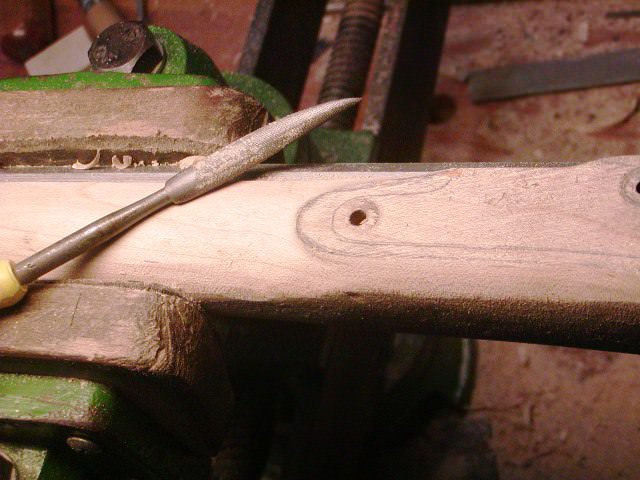
I believe you can take a 8" half round file and using the round side gently file away at the shoulder you created until it disappears and blends with the contour of the stock coming down from the barrel tang. Here are some more photos that may help. This rifle was mostly shaped by a young blind guy under my supervision.
l700Z3F.jpg

y1JpKra.jpg

43IGTWS.jpg

SOEhsNA.jpg

fstM1BI.jpg

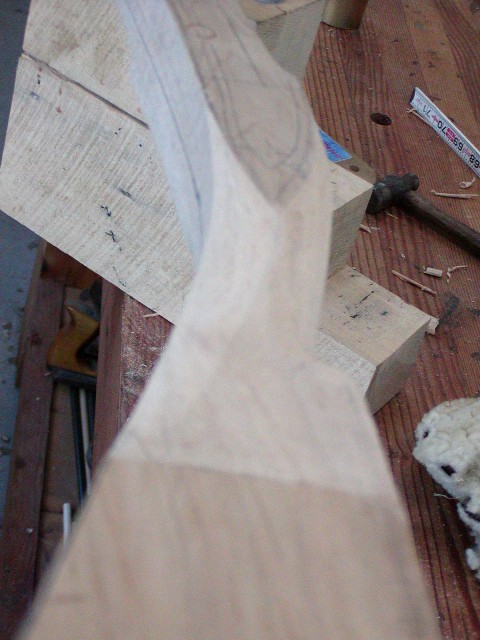
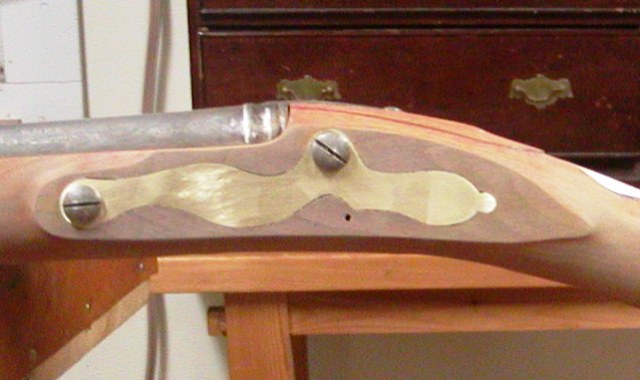
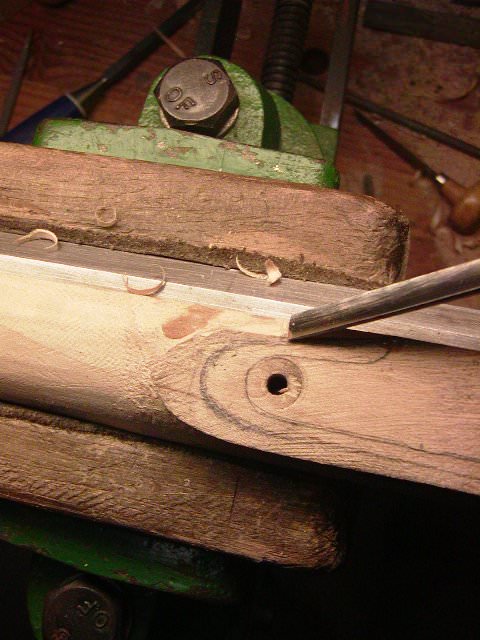
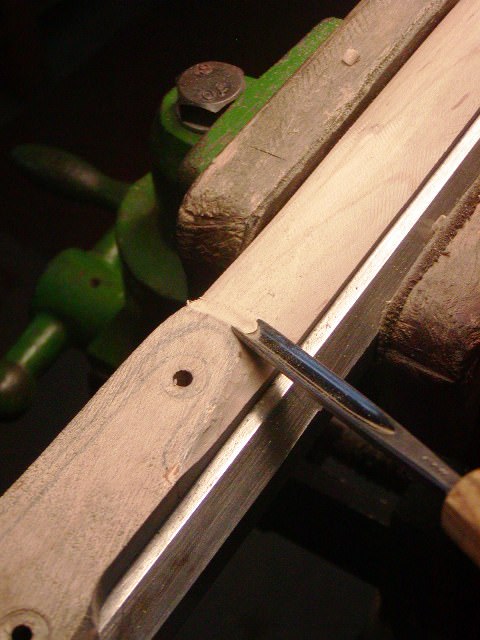
Here is another example forming the panels, this time on the side plate side.
f27rinR.jpg

VybTx07.jpg

fYGkSNo.jpg

qpIxwQL.jpg

6gvO2AI.jpg

Tz8e71v.jpg

BwCEM5h.jpg


dave
 
Why would you say that? You have a lot of wood to work with there and can certainly shape it as to what Dave is suggesting.
If you look at the last photo I posted you can see the shoulders. I don’t have enough material left to remove them.
 
Hi Justin,
On some early 18th century style guns I've made, I brought the stock contour right up to the edge of the lock mortise. No flat area left at all, and then at the very last when finishing the stock, I wrapped 220 grit sandpaper around a flat block of wood and in a couple of gentle swipes on top of the lock mortise, created a tiny, almost invisible flat. Look how thin the flats are around these original English fowlers from the 1760s.
hzbFBrH.jpg

r12wKPg.jpg


Anyway, Justin, do what you are comfortable with but I believe you still have room to maneuver.

dave
 
Thanks Dave. I'll look at it again this afternoon. Been busy with other stuff all day and still have some more to do. I'll probably set the mill up this afternoon late and cut the dovetail for the front sight too.
 
Hi Justin,
I would probably just take a half round file or even sandpaper wrapped around 1/2" dowel of wood, and gently file or sand the remaining notched area into a slight concave surface until it disappears but don't create a distinct shoulder at the edge of the lock panel. Just create as smooth a concave surface as you can extending from the edge to the barrel tang. On some guns, the maker cut or filed a half moon shaped facet there that removes the little step up from the barrel dips down to meet the barrel. However, I think you can remove the notches by just smoothing the stock into a nice gentle concave profile.

dave

Dave
That was pretty much my thoughts too, just a wide, gentle radius to get rid of the little troughs.

My hat is off to you and the other here that have the vision and skills to build those beautiful rifles.

Thank you for taking the time to share your knowledge and pointing me in the right direction, it is much appreciated.

Justin
 
Where did you get the yellow handle riffler file Dave? I bought two of them, round and square from a duck carving supply house in 85 back when carving ducks was my thing, they are made in England. I still have the round one but the square one broke the tip off when I tried to gently pry something with it (dumb). These are very good rifflers but I have never been able to find them for sale again, just cheap Chinese stuff.
 
Okay guys, this is what I came up with at about 0230 this AM. Having brought covid home with us from our vacation last week the wife and I haven't been sleeping well due to the meds. So, I was awake at 0215 rolling around in bed and my little mind took off and this what my two remaining brain cells came up with.

The little cove I put around the ends of the reliefs of the lock and side plate will roll up on top and blend into the flat. Ideal? Probably not, but in my little mind it made the most sense. If it's awful, I blame it on covid. LOL

Thanks, Justin

View attachment 142653View attachment 142654View attachment 142655
You have a valid excuse put away until you are 100 percent though I understand it’s hard to not want to work on it. COVID does affect your nervous system. Feel better soon!
 
This has been a learning experience for sure. The stock was inletted to a point, but every inlet has required quiet a bit of work. If I ever do another one it'll start from a blank, I honestly believe there'll be less anxiety knowing I can put everything exactly where it should go.

On to the next fire!

Justin
 

Latest posts

Back
Top