Take wood off, take more wood off, do it again … and then when you think you’ve finally ruined it … you’re done.
-
This community needs YOUR help today. We rely 100% on Supporting Memberships to fund our efforts. With the ever increasing fees of everything, we need help. We need more Supporting Members, today. Please invest back into this community. I will ship a few decals too in addition to all the account perks you get.

Sign up here: https://www.muzzleloadingforum.com/account/upgrades -
Friends, our 2nd Amendment rights are always under attack and the NRA has been a constant for decades in helping fight that fight.
We have partnered with the NRA to offer you a discount on membership and Muzzleloading Forum gets a small percentage too of each membership, so you are supporting both the NRA and us.
Use this link to sign up please; https://membership.nra.org/recruiters/join/XR045103
You are using an out of date browser. It may not display this or other websites correctly.
You should upgrade or use an alternative browser.
You should upgrade or use an alternative browser.
Wood margin around lock and side plate?
- Thread starter 1BadDart
- Start date

Help Support Muzzleloading Forum:
This site may earn a commission from merchant affiliate
links, including eBay, Amazon, and others.
Ignore that hole and keep going, you don't want it to look like a side slab of a 2x4. On another note, what's the deal with that touch hole insert? That looks like it might be too deep.
It is, new ones with a shoulder are ordered.
That’s what I doI finish my lock molding and make a pattern to the sideplate side by rubbing a pencil over the paper, the lock bolt gives me a reference for placing the pattern on the lock plate side.
View attachment 142383View attachment 142384
- Joined
- Nov 26, 2005
- Messages
- 5,010
- Reaction score
- 9,945
Hi,
I sketched in probably how I would shape your lock panel given what you have.
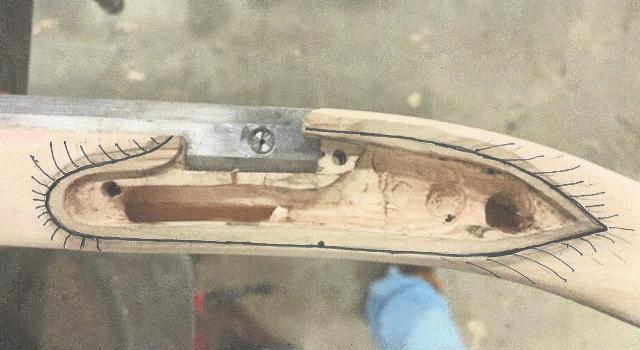
The curved contour lines are meant to show how I tight I would make the cove radius forming the panel at different locations around the panel. Note the flat surround is not even, which is fine. Having a wider flat along the bottom than top of the lock is actually a good thing because it balances the sense of mass. There is a lot more mass at the top of a lock with the cock or hammer than the bottom and even flats all the way around actually look top heavy and clumsy. The edge of the flat should not be a sharp cut in shoulder, rather the contour of the stock forming the flat panel. These images of a Kibler kit may help illustrate what I am describing.
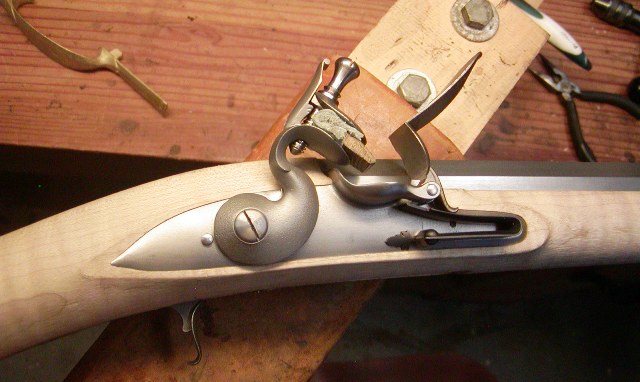
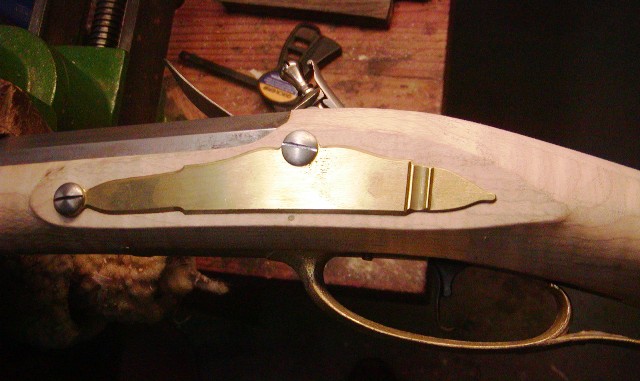

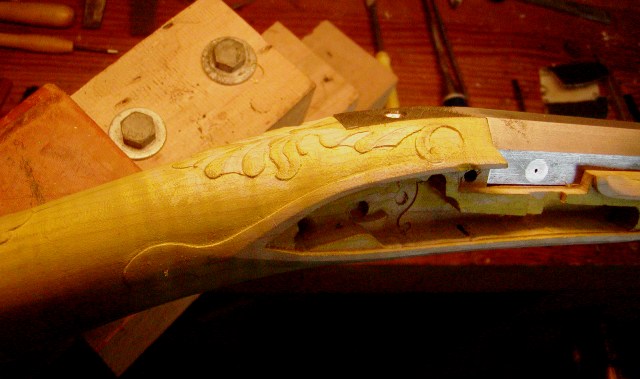
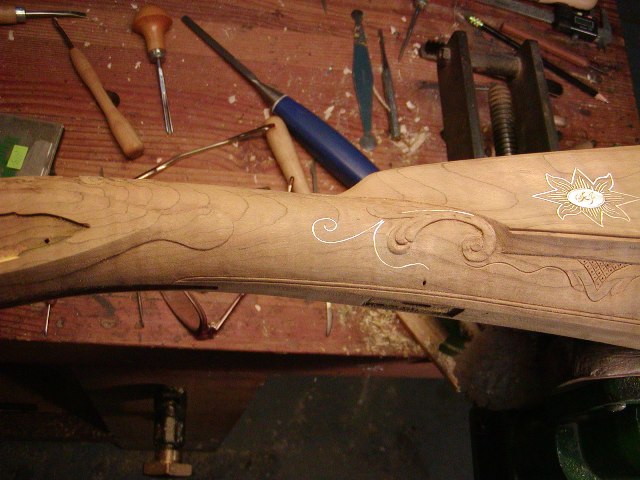
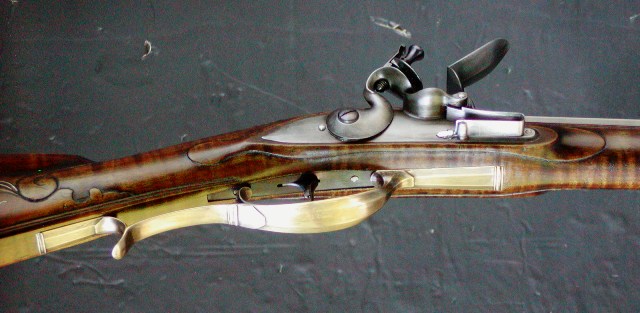
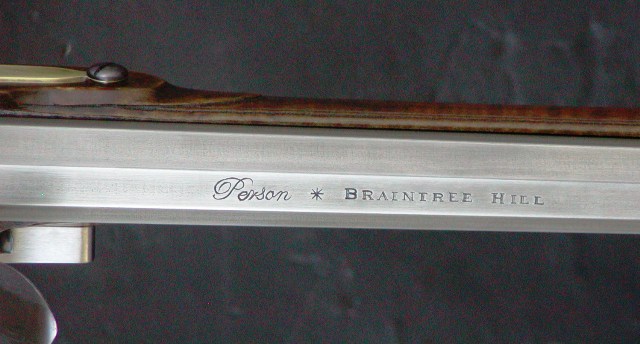
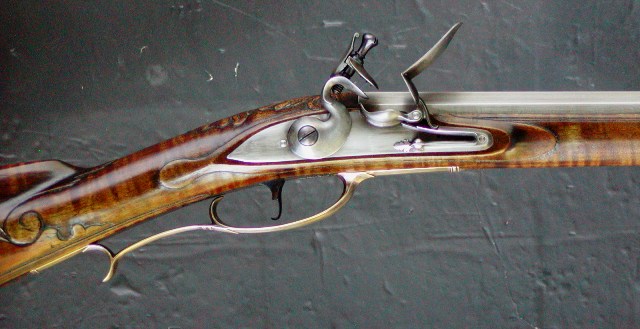
Ignore the carving and carved molding and beaver tails. They are decoration added after I shaped the flats as a natural outcome of shaping the wrist and lock area.
dave
I sketched in probably how I would shape your lock panel given what you have.

The curved contour lines are meant to show how I tight I would make the cove radius forming the panel at different locations around the panel. Note the flat surround is not even, which is fine. Having a wider flat along the bottom than top of the lock is actually a good thing because it balances the sense of mass. There is a lot more mass at the top of a lock with the cock or hammer than the bottom and even flats all the way around actually look top heavy and clumsy. The edge of the flat should not be a sharp cut in shoulder, rather the contour of the stock forming the flat panel. These images of a Kibler kit may help illustrate what I am describing.


Ignore the carving and carved molding and beaver tails. They are decoration added after I shaped the flats as a natural outcome of shaping the wrist and lock area.
dave
Thanks Dave!
Do you just roll the top down from the tang to the lock plate relief? Then do the same on the plate side for symmetry?
I've been tinkering with it this AM, haven't really changed the margins from the photos I posted yesterday afternoon, But I have put a small radius around the relief on the ends, also thinking of doing one along the bottom. When this is finished I'd like the reliefs to be subtle.
Thanks, Justin
You are going to have a nice gun by following Dave’s guidance. Can’t get much better than that. And it’s free 
- Joined
- Sep 18, 2013
- Messages
- 1,857
- Reaction score
- 2,368
For a better look the top line of the panel should line up with the corner of the side flat of the barrel.
Phil Coffins
69 Cal.
The “ small radius “ is where you missed Dave’s advice.
The “ small radius “ is where you missed Dave’s advice.
No sir, I understood, it's just that I like the small radius.
- Joined
- Nov 26, 2005
- Messages
- 5,010
- Reaction score
- 9,945
Hi,
That looks much better. Now consider one more thing. Ideally, the top of the stock should be shaped so it is close to being flush with the barrel flats. So I would take a half round file, using the round side, and make the surface between the barrel tang and lock panels slightly convex or a sloping flat so it more closely conforms with the barrel flats. Don't do anything that you are uncomfortable with but that is my advice. Look at the photo below.
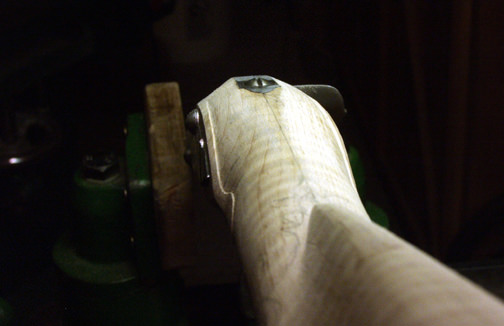
I wish I was there because I could guide you to a result that I am sure you would really like. It is hard to do this on the internet. Regardless, you are doing well and I like the changes.
dave
That looks much better. Now consider one more thing. Ideally, the top of the stock should be shaped so it is close to being flush with the barrel flats. So I would take a half round file, using the round side, and make the surface between the barrel tang and lock panels slightly convex or a sloping flat so it more closely conforms with the barrel flats. Don't do anything that you are uncomfortable with but that is my advice. Look at the photo below.

I wish I was there because I could guide you to a result that I am sure you would really like. It is hard to do this on the internet. Regardless, you are doing well and I like the changes.
dave
After the molding around the lock is done, the lock bolt holes are "spotted" on a clamped 1/8" thick brass plate and the 2 radii are drawn using dividers and the 2 bolt clearance holes drilled through, The remainder of the sideplate is then drawn and the outline is cut and the chamfer is filed. The side below the chamfer that will be inletted has a slight draft filed on. The 2 lock bolts hold the sideplate against the stock and an exacto knife w/ the blade tip slightly rounded is used to outline the sideplate's contour onto the wood and the inletting is then completed.
The "nose" and "tail" moldings are cut in as per the lock and the 2 moldings are then connected.
So that there's no semblance of a "hump" to the rear of the breech, I bring the tang curve past the breech end approx. 1" to 1-1/4" onto the top flat of the bbl which then has a taper....so the oblique flats on both sides of the top flat have to be "faked " so the top bbl flat has parallel sides and is the same width as the tang. ....Fred
Attachments
Last edited:
Okay guys, this is what I came up with at about 0230 this AM. Having brought covid home with us from our vacation last week the wife and I haven't been sleeping well due to the meds. So, I was awake at 0215 rolling around in bed and my little mind took off and this what my two remaining brain cells came up with.
The little cove I put around the ends of the reliefs of the lock and side plate will roll up on top and blend into the flat. Ideal? Probably not, but in my little mind it made the most sense. If it's awful, I blame it on covid. LOL
Thanks, Justin


The little cove I put around the ends of the reliefs of the lock and side plate will roll up on top and blend into the flat. Ideal? Probably not, but in my little mind it made the most sense. If it's awful, I blame it on covid. LOL
Thanks, Justin


- Joined
- Nov 26, 2005
- Messages
- 5,010
- Reaction score
- 9,945
Hi,
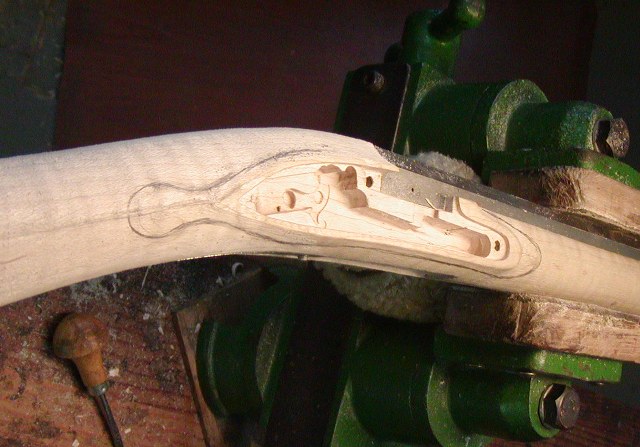
This is a gun I am actively working on and roughing out the lock and side plate panels. Hopefully the images will help.
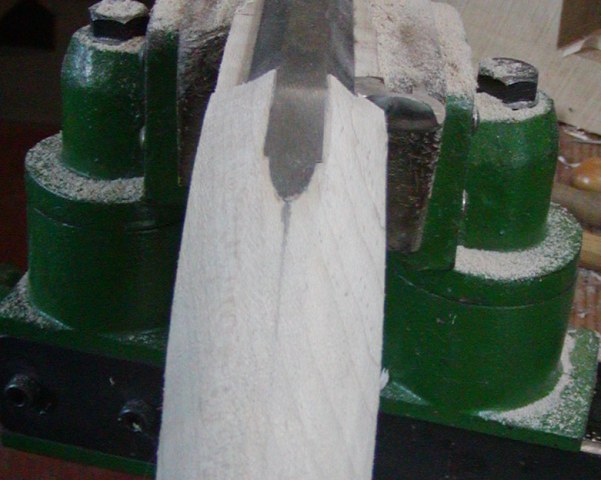
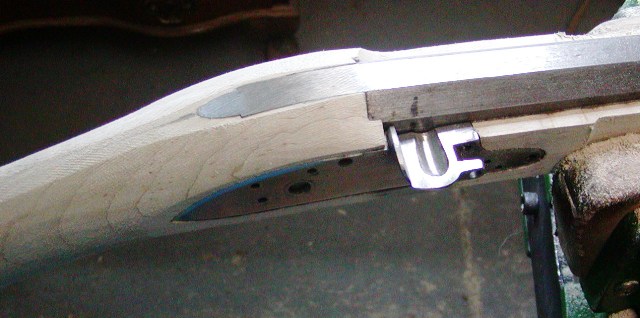
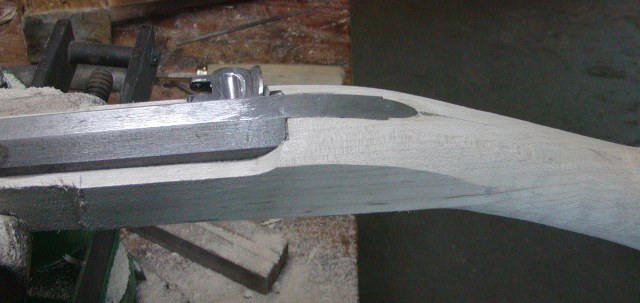
There is no shoulder around the lock or sideplate flat, just a gentle curve at the end of which is the edge of the flat. The stock at the breech does not have to be flush with the barrel but it looks best if it is close leaving only a small step if any.
dave
This is a gun I am actively working on and roughing out the lock and side plate panels. Hopefully the images will help.


There is no shoulder around the lock or sideplate flat, just a gentle curve at the end of which is the edge of the flat. The stock at the breech does not have to be flush with the barrel but it looks best if it is close leaving only a small step if any.
dave
Good question for us new builders. Thanks Dave, your input has been really helpful to me, especially the clear explanation and pics how the tail of the panels blend in smoothly to the wrist. I messed that up on my first plank build, and might have done it again.... I treated the back of the panels similar to the front, and it flattened out my wrist awkwardly. If I wasn't tech handicapped, I'd post a picture as an example. Thanks to Vaino too, for help in just easing out any "humpiness". You guys have really taken the time to help, and carefully explain with words and pictures, and it is much appreciated. R Mann
Buckskinn
45 Cal.
Why would you say that? You have a lot of wood to work with there and can certainly shape it as to what Dave is suggesting.Thanks Dave. I guess I've kinda screwed the pooch here. Oh well, I've said from the beginning it wasn't being built to be period correct.
I appreciate everyone's help and suggestions.
Justin
Similar threads
- Replies
- 1
- Views
- 275
- Replies
- 112
- Views
- 5K
- Replies
- 46
- Views
- 4K


