• This community needs YOUR help today. We rely 100% on Supporting Memberships to fund our efforts. With the ever increasing fees of everything, we need help. We need more Supporting Members, today. Please invest back into this community. I will ship a few decals too in addition to all the account perks you get.


    Sign up here: https://www.muzzleloadingforum.com/account/upgrades
  • Friends, our 2nd Amendment rights are always under attack and the NRA has been a constant for decades in helping fight that fight.

    We have partnered with the NRA to offer you a discount on membership and Muzzleloading Forum gets a small percentage too of each membership, so you are supporting both the NRA and us.

    Use this link to sign up please; https://membership.nra.org/recruiters/join/XR045103

First Build and questions.

Muzzleloading Forum

Help Support Muzzleloading Forum:

This site may earn a commission from merchant affiliate links, including eBay, Amazon, and others.
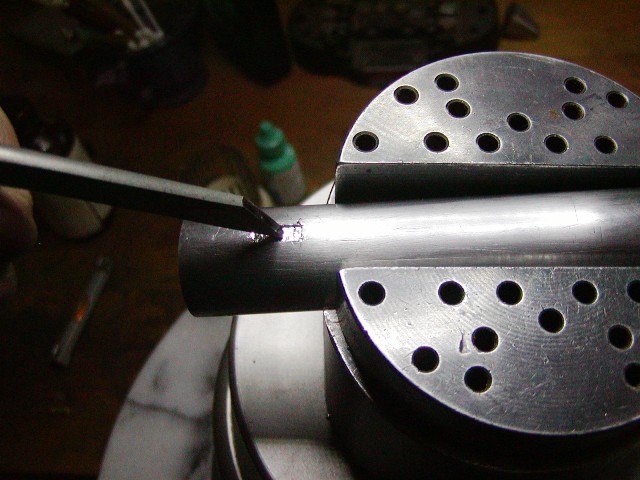
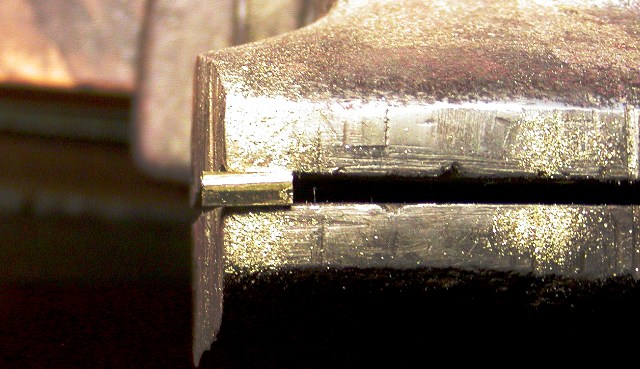
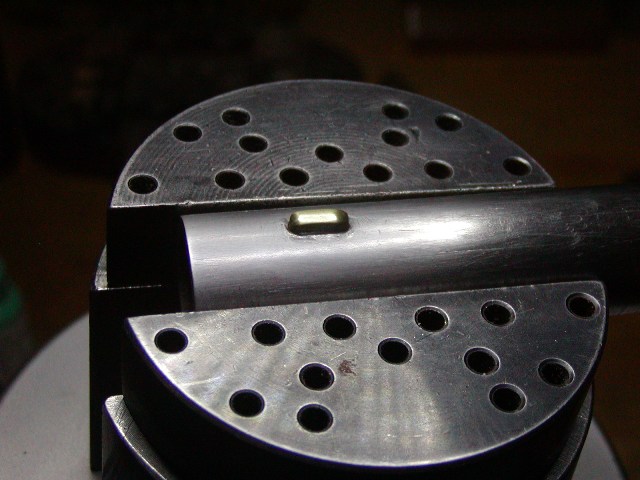
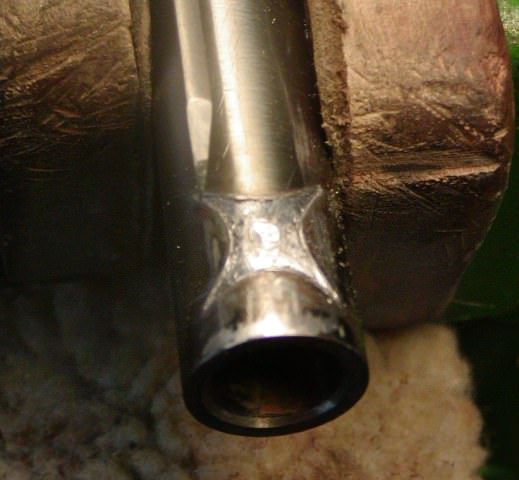
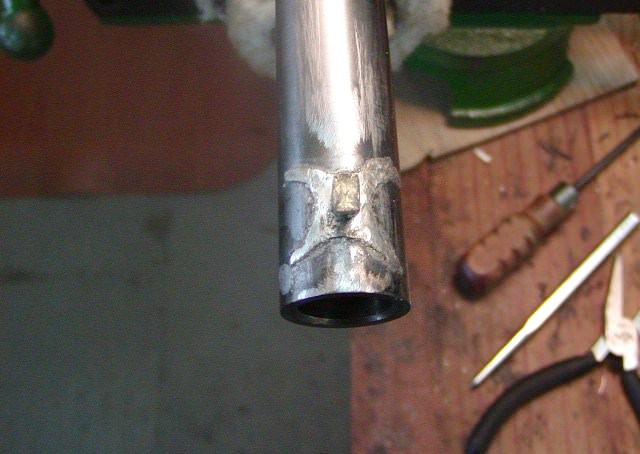
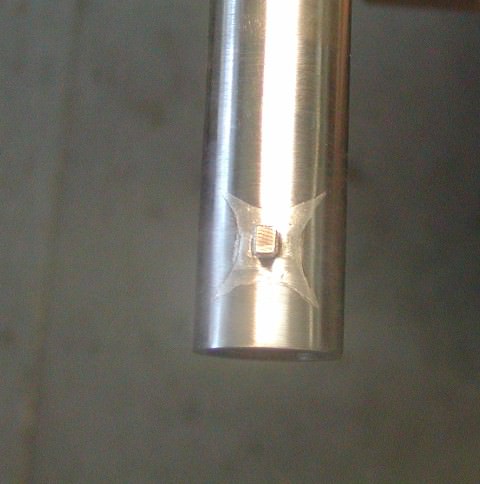
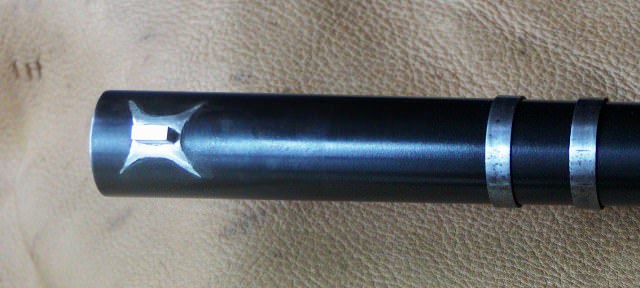
Also, I have another question. How in the world did they mount these brass front sights? I can't see any evidence of solder of dovetailing. The plan is to get a small block of brass and file it do get the shape of a front sight, but I have no ides how they mounted them.
1614837876857.png
 
That barrel inlet is a puzzle. But I would not get panicky yet a lot of barrels burst through here.
I think it is a little deceiving as well. I think it may need to come down far less than you think but you won't know without fitting the breechplug.
The crux will be does it foul the lock with the barrel set right?
I am thinking silver solder was probably used. Even braze would work right up there but I hate the idea of getting a barrel that hot.
If not then there would need to be a post going through to the bore and that would be harder to do.
 
I was just watching a vid by Bill Raby on his fusil build, his barrel did the same thing only it was far lower into the lock mortise. I think I have nothing to worry about considering how much wood I have to work with. Now my concern is making sure the barrel doesn’t go into the ramrod tube mortises, but I’m sure if I measure everything I’ll be fine.
 
Hi,
Here is how that front sight was mounted. A mortice is cut into the barrel. The sight blade is made with a tiny dove tail filed around the bottom. It is placed in the mortice and the edges of the mortice are peened to push the steel into the dovetail on the blade. No solder needed.
GI8Lk43.jpg

BdAmlfn.jpg

cP89clY.jpg

pSdP8Rf.jpg


A version of this on high end guns is the silver spider sight shown below. Same method but a little more intricate. In this case, the mortice is dovetailed and the silver is peened into the dovetails. The blade is riveted and soldered to the star base.
79RN9Da.jpg

vze17w5.jpg

4AaPf4Z.jpg

lM0fAP3.jpg
 
Well, it’s been about 20 days since I posted here, might as well post some progress. Due to school and spring break, progress has been.... slow. Barrel is fully inlet, now I’m currently inletting the barrel with the tang attached. (Black stuff on barrel is violin rosin from when I reattached the tang)
F36E440C-6298-4ACC-AE52-88A64277FBDF.jpeg

8746FC16-5D33-4BB1-BCCA-83B2BD738228.jpeg

D7BF13C5-3664-4A21-BAEE-D48B883D7B02.jpeg

1675F68A-10F1-40BB-B806-66511FC1C4BD.jpeg

Never would have thought building guns was as fun as it is. I thought the most work I’d get done in a days is about 2 hours. When I work on this gun, I regularly throw on a documentary and listen via Bluetooth speaker and work away for 5 hours. Those with TRS barrels, how resistant are they to rust? Spring in Kansas is very rainy, and with the gun being in my garage, I obviously don’t want the barrel to rust.

For those who are interested, I watch my documentaries on this YouTube channelhttps://youtube.com/c/TimelineChannel
Their documentaries on the Napoleonic Wars are amazing, cant recommend them enough.
 
Ok, barrel is practically there. I need to bend the tang, which is no big deal. I’ve read around the forum and turns out I don’t even need heat to bend the tang. However, there are holes in the lock mortise and the rear of the barrel is sitting on some very thin wood. Of course I’d like to strengthen the stock. Below the rear of the barrel channel, there is an empty space, kind of like a ramrod channel. Since the ramrod won’t sit that far back, I plan on gluing some wood in place so the stock is a lot stronger and the barrel can sit on something that is more than 1/64” thick. I also plan on putting acraglas in the channel, as I hear is strengthens the stock as well as beds it. Pics!
72EF64EE-139E-4556-80B2-EDC355613EC5.jpeg
19519879-4F09-4443-B9E0-39E083AC98BB.jpeg
 
Update:
I decided that I am going to use heat on the tang, as cold bending it did not work. I looked around this forum and it turns out I should have filed the tang to be thinner. It is too late for that, as the mortise I made for the tang is too deep for me to make such a change. Should have the tang bent and looking nice by next weekend.
Looks to me that tou just need to file some off thr top if it is in deep enough.
Not sure its right but that was the only way i was going to get a nice even curve in mine.
 
Looks to me that tou just need to file some off thr top if it is in deep enough.
Not sure its right but that was the only way i was going to get a nice even curve in mine.
That would be the case, except the bottom of the tang (at the bottom of the barrel) is touching the bottom of the barrel channel with the rest of the barrel. The top part of the tang (the one that is shown in the pictures) is only partially touching the mortise I chiseled out, meaning it should be bent.
 
Yes. Yes it does.
Is shortening the tang some a useful consideration?
Mine bent by putting the end in a padded vice to where i wanted the bend. Applying a little pressure using the barrel then striking the tang with a soft hammer.
 
If you are hammering on a finished surface, make sure to face your hammer. file it and then smooth it. If you don't, the hammer face will transfer all the dings in it to your surface. You're building a gun, not a house.
 
Yes. Yes it does.
Is shortening the tang some a useful consideration?
Mine bent by putting the end in a padded vice to where i wanted the bend. Applying a little pressure using the barrel then striking the tang with a soft hammer.
If you are hammering on a finished surface, make sure to face your hammer. file it and then smooth it. If you don't, the hammer face will transfer all the dings in it to your surface. You're building a gun, not a house.
Both good points. Shortening wouldn't work, tang mortise is basically the exact size of the tang. Facing the hammer is also a great idea. I have a family friend who is a professional metalworker with over 20 years of experience, including making firearms. Since he has the torch, I'm going to take it to him and we are going to figure it out.
 
C&Rsenal (the You Tube series about arms leading up to and used in the Great War) has a spinoff series with a Gunmaker named Mark Novak. He has a series under the "Anvil" name. I can't tell you which one it is (because I've seen them all) he shows how to "face" a hammer, but the process is pretty simple. File it, sand it with increasingly fine wet sand paper, and you're done. I wouldn't think you need to go past 600 grit. At least I never have.
 
C&Rsenal (the You Tube series about arms leading up to and used in the Great War) has a spinoff series with a Gunmaker named Mark Novak. He has a series under the "Anvil" name. I can't tell you which one it is (because I've seen them all) he shows how to "face" a hammer, but the process is pretty simple. File it, sand it with increasingly fine wet sand paper, and you're done. I wouldn't think you need to go past 600 grit. At least I never have.
Do this myself basicallt make the hammer face as polished as you wish to transfer.
It still can leave divits but shiny ones.
Facing then adding a couple of layers of tape really helps reduce impact marks.
 
Back
Top