• This community needs YOUR help today. We rely 100% on Supporting Memberships to fund our efforts. With the ever increasing fees of everything, we need help. We need more Supporting Members, today. Please invest back into this community. I will ship a few decals too in addition to all the account perks you get.


    Sign up here: https://www.muzzleloadingforum.com/account/upgrades
  • Friends, our 2nd Amendment rights are always under attack and the NRA has been a constant for decades in helping fight that fight.

    We have partnered with the NRA to offer you a discount on membership and Muzzleloading Forum gets a small percentage too of each membership, so you are supporting both the NRA and us.

    Use this link to sign up please; https://membership.nra.org/recruiters/join/XR045103

RE finishing my stock

Muzzleloading Forum

Help Support Muzzleloading Forum:

This site may earn a commission from merchant affiliate links, including eBay, Amazon, and others.

tom in nc

45 Cal.
Joined
Aug 20, 2019
Messages
640
Reaction score
778
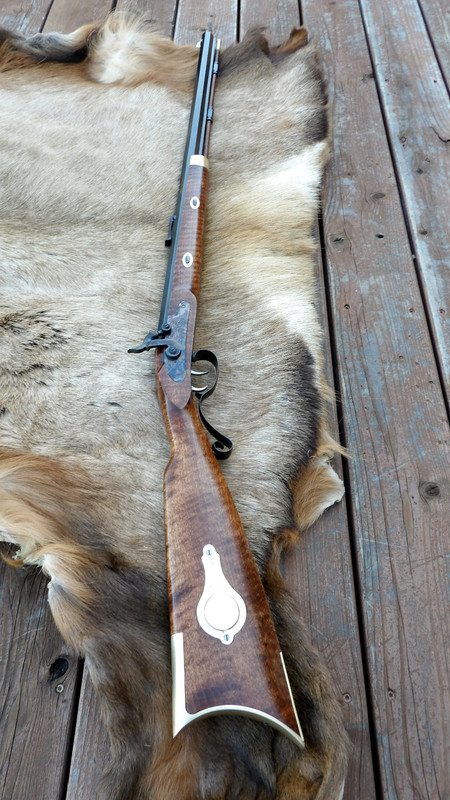
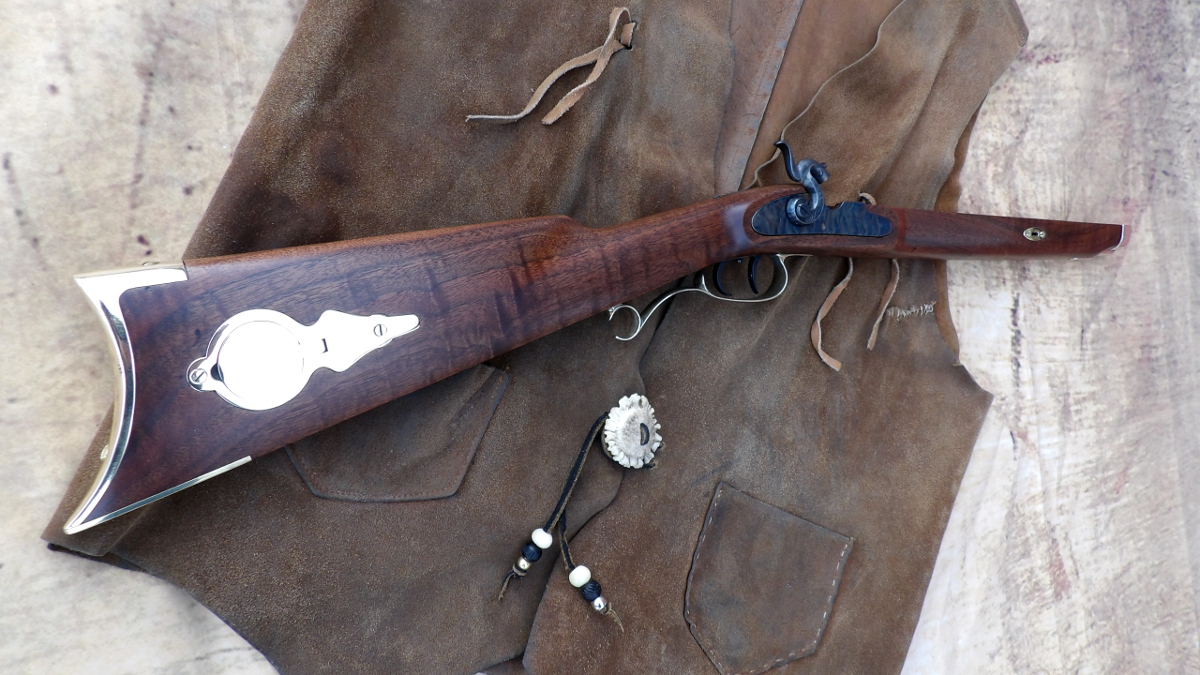
I love the older CVA Hawken flintlock I recently bought but the stock is not as pretty as I'd like. The brown barrel, the lock, and everything else, except for the butt plate, which I have a replacement for, is fine.
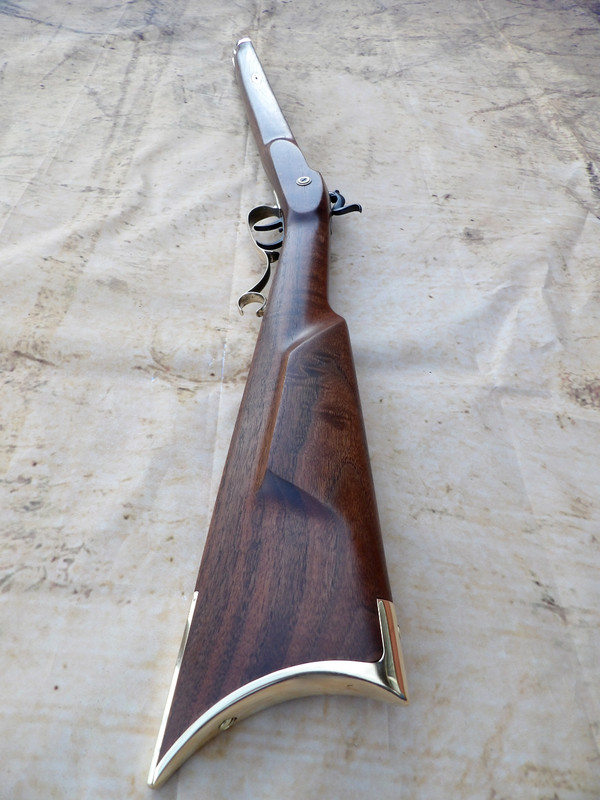
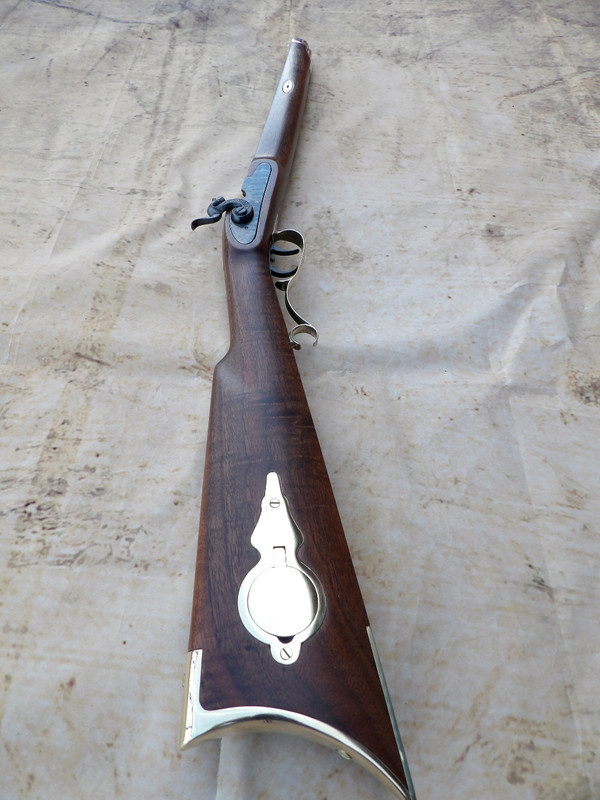
I want to refinish the stock, but I'm unsure how to start. I suppose the first step is to remove the old finish. Should I use fine paper to remove the existing color without changing the contours of the wood? Then proceed with my choice (walnut) of stain. I've read about finishing stocks, but the removal of the old finish is what I'm nervous about. I don't want to do anything wrong. Here's a couple of pics of the stock as is.
20200221_155613.jpg
20200221_155736.jpg

See what I mean?
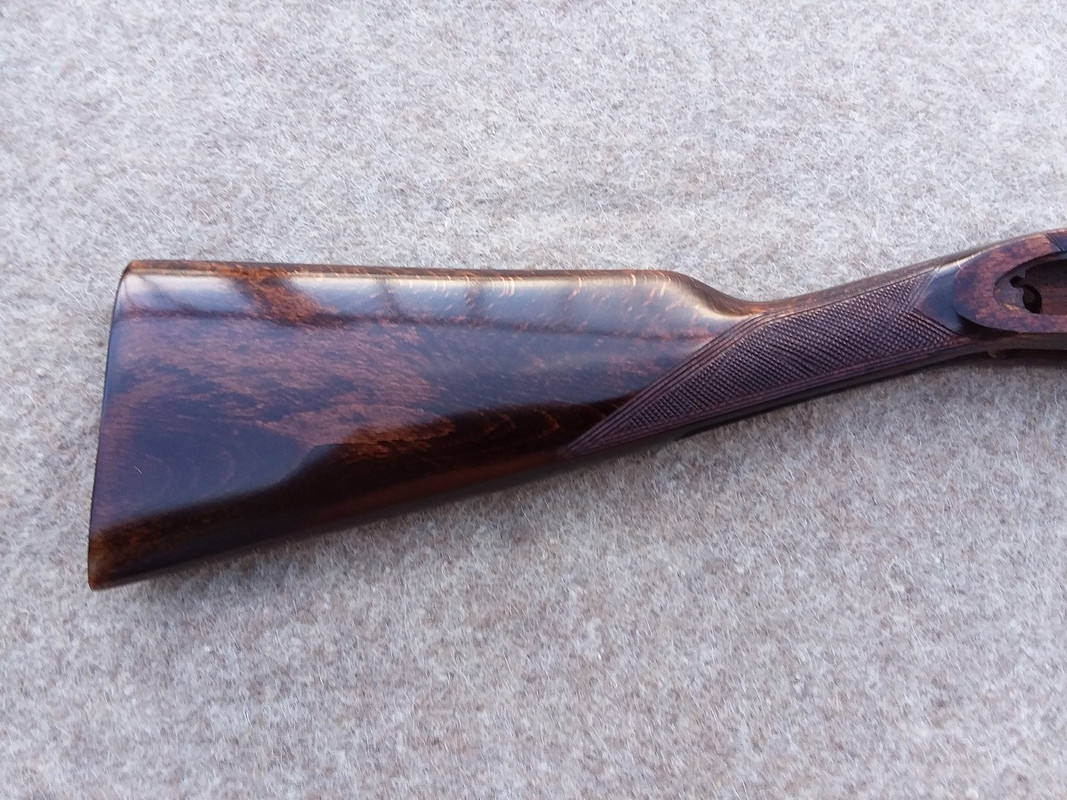
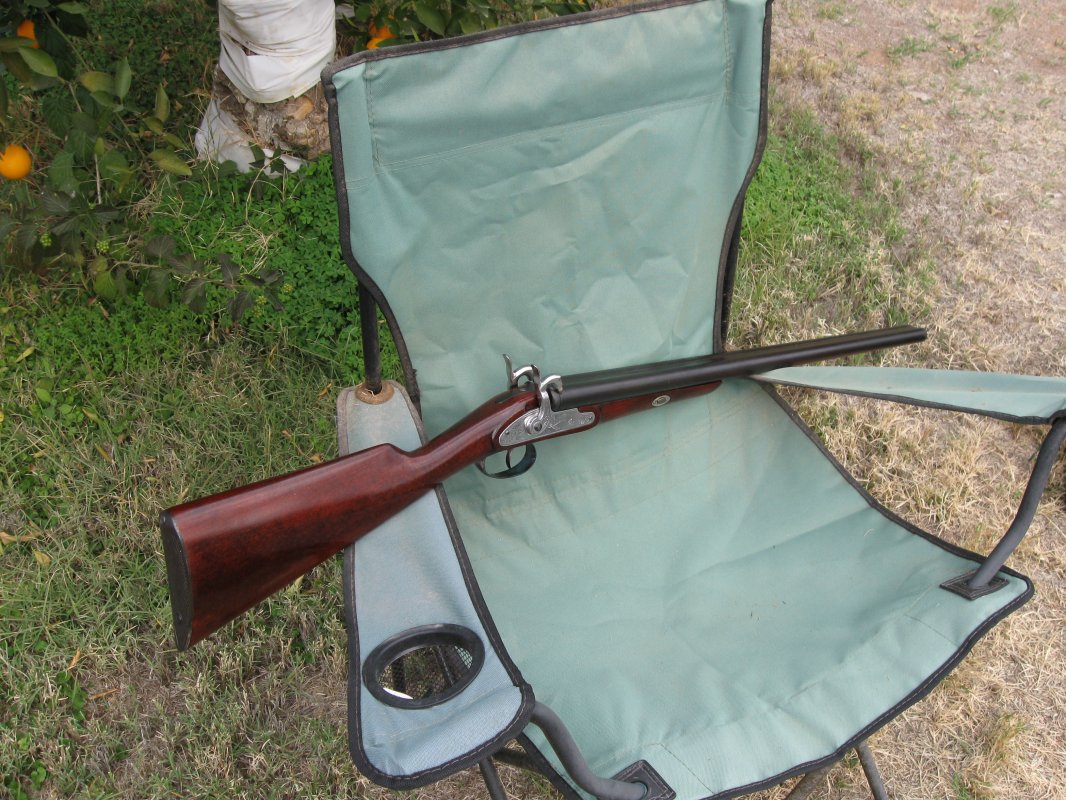
Zonie recently posted a pic of a shotgun with the color that I would love to have on it. Thanks Zonie. Hope you don't mind if I use your pic again.
cva-shotgun-001-jpg.13968
 
Last edited:
Disassemble completely then use a stripper. You want to be at raw wood then do any reshaping as you see fit with files and or rasps. Refit or add items as needed. Then scrape and sand using backing blocks. Don’t forget to whisker as you go threw the sanding grits. Then stain and recheck your work and if up to your standards apply the finish. Done in this order is fairly quick and gives good results.
 
Tom:
That CVA shotgun was a kit that was built by my neighbors dad back in the '80's and he did the typical slap it together and paint the stock with varnish. To say the least, it was butt ugly and poorly done.

I stripped the finish off using some paint remover I got at the local Ace Hardware store. These strippers aren't good for the skin so when doing this I wore some rubber gloves and just followed the instructions that were on the can.
After the finish had been scraped off with a putty knife, I sanded the wood, first with some 80 grit sandpaper and then with some 120 grit sandpaper. I do not recommend sanding any wood with any sandpaper that is finer grit than 220. I personally usually stop at 120 grit.

I don't know how much you know about wood finishing but the "whisker" Phil mentioned means removing the fine grains of wood that stand up on the surface after the wood drys. These should be removed. To do this, once the stock is dry, rub your bare hand from the butt towards the muzzle end. Then rub the wood in the opposite direction.
One direction will feel smooth. The other direction will feel rough. That's because the grain whiskers are pointed in the direction the grain is running.
Use a fresh piece of 120 grit sandpaper and very lightly, push it in the direction that felt rough. Just a few light strokes is all that is needed to remove the whiskers.
Once you've finished whiskering, the wood is ready for staining.

After it is stained, do NOT paint it with a brush. Use either a good tung oil with driers or something like Birchwood Casey Tru-Oil and apply it a little at a time with a clean, smooth fabric rag, rubbing it into the surface in small overlapping areas. It may take several coats to get the finish you want.

Another view of my shotgun to nudge you along with your project. :)

CVA-SHOTGUN-003web.jpg
 
Tom:
That CVA shotgun was a kit that was built by my neighbors dad back in the '80's and he did the typical slap it together and paint the stock with varnish. To say the least, it was butt ugly and poorly done.

I stripped the finish off using some paint remover I got at the local Ace Hardware store. These strippers aren't good for the skin so when doing this I wore some rubber gloves and just followed the instructions that were on the can.
After the finish had been scraped off with a putty knife, I sanded the wood, first with some 80 grit sandpaper and then with some 120 grit sandpaper. I do not recommend sanding any wood with any sandpaper that is finer grit than 220. I personally usually stop at 120 grit.

I don't know how much you know about wood finishing but the "whisker" Phil mentioned means removing the fine grains of wood that stand up on the surface after the wood drys. These should be removed. To do this, once the stock is dry, rub your bare hand from the butt towards the muzzle end. Then rub the wood in the opposite direction.
One direction will feel smooth. The other direction will feel rough. That's because the grain whiskers are pointed in the direction the grain is running.
Use a fresh piece of 120 grit sandpaper and very lightly, push it in the direction that felt rough. Just a few light strokes is all that is needed to remove the whiskers.
Once you've finished whiskering, the wood is ready for staining.

After it is stained, do NOT paint it with a brush. Use either a good tung oil with driers or something like Birchwood Casey Tru-Oil and apply it a little at a time with a clean, smooth fabric rag, rubbing it into the surface in small overlapping areas. It may take several coats to get the finish you want.

Another view of my shotgun to nudge you along with your project. :)

View attachment 24658
Beautiful finish!
 
FF21314B-A916-496F-A8D1-01E093B70467.jpeg
I would add that carefully removing the finish and peeping to use a water based stain lightly applied. When you do you will find scratches, when you sand it down.
LM forge sells a good choice of water based stains. Aqua forte is the best looking stain... but I’ve never been happy with it when I’ve tried it. Top is BC walnut, bottom is LM walnut
843256E2-4BFE-48BE-AEE7-A1A52ECF6F0D.jpeg
 
Its hard to tell by your pictures, but is the color difference around the patchbox oil staining into the wood? Ive refinished lots of stocks and seen that issue often, especially on modern types. People oil their rifles up and do the stocks at the same time. That oil seeps through worn finishes and goes into the wood a ways. If thats whats going on with yours, it takes acetone, lacquer thinner etc. and a lot of blotting or use whiting as a paste to soak it out. Its doable but takes time. If you dont get it out, its hard to overcome the color change, but an oil finish would be your best bet.
 
citristrip, lots of 150 grit sand paper, 220 grit, 320, 400, 600, 800, 1200 and then 2000 grit as the final job. I know guys use 220 grit as a final sand job but that IMO just flat out sucks. For your beech stock, you'll want to go with either an alcohol or water based stain.

 
citristrip, lots of 150 grit sand paper, 220 grit, 320, 400, 600, 800, 1200 and then 2000 grit as the final job. I know guys use 220 grit as a final sand job but that IMO just flat out sucks. For your beech stock, you'll want to go with either an alcohol or water based stain.

Really nice looking, and great photo. Thanks.
 
Thanks for the tip about beech stocks. Got a Spanish half stock .386 bore to fix up, refinishing the metal parts and the wood. Depending upon how the wood looks maybe put a buffalo horn nose cap, trigger guard and/or butt plate on it.
 
Walnut is a fairly open grained wood compared to maple. Be a little careful when you are getting down to the finer grains of sandpaper, as, a lot of times the wood dust is just pushed back in to the pores. And, walnut is a softer wood than maple. Most of the time, it will take 3-4-5 (or more) whiskerings to get all the little hairs off. I personally don't go past 320 grit (with sugar maple). I stop when 2 successive wettings don't seem to yield any more roughness. It gets a couple more when I apply and heat the FN crystal application, and another with the lye (my preferred acid neutralizer), as, both use water as the carrier.

If you wish to fully fill in all the pores of the walnut you certainly can to get a very stunningly smooth finish (similar to the currently produced fine guns of Holland and Holland, Boss, Purdey etc.), but be aware that that is a finish that may take up to 70-80 coats, and was not a typical finish for guns until the later part of the 19th century.
 
Last edited:
Back
Top