• This community needs YOUR help today. We rely 100% on Supporting Memberships to fund our efforts. With the ever increasing fees of everything, we need help. We need more Supporting Members, today. Please invest back into this community. I will ship a few decals too in addition to all the account perks you get.


    Sign up here: https://www.muzzleloadingforum.com/account/upgrades
  • Friends, our 2nd Amendment rights are always under attack and the NRA has been a constant for decades in helping fight that fight.

    We have partnered with the NRA to offer you a discount on membership and Muzzleloading Forum gets a small percentage too of each membership, so you are supporting both the NRA and us.

    Use this link to sign up please; https://membership.nra.org/recruiters/join/XR045103

Building a Chambers Isaac Haines rifle kit

Muzzleloading Forum

Help Support Muzzleloading Forum:

This site may earn a commission from merchant affiliate links, including eBay, Amazon, and others.
I took your posted pic and enlarged it to 300%. The resolution was better than the printed page. To my eyes, it's a cut, definitely. It's too symmetrical to be a chip, that's purposefully put there.
 
Perhaps it was a slow time in the shop and he took a little more time on this particular piece.
I think the rear of the cheek piece "sorta" matches the front but not quite. It would look a little strange to my eye to have the area at the front but a hard edge at the rear, but who knows. Maybe some study on other Haines carvings might lend inspiration.
 
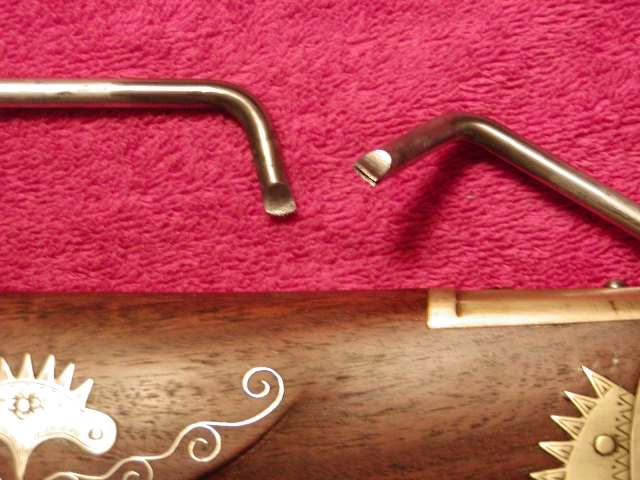
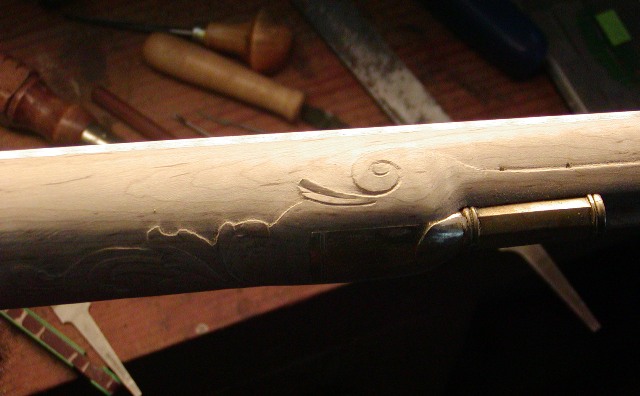
Dave, when I was reviewing your pictures I noticed right away that the forward thimble had two pins. :)

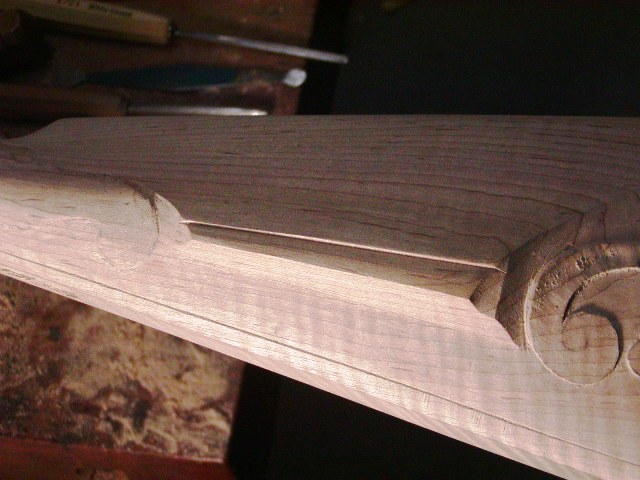
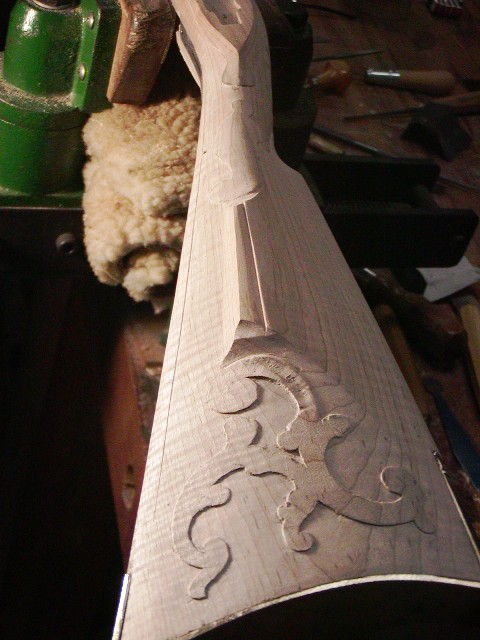
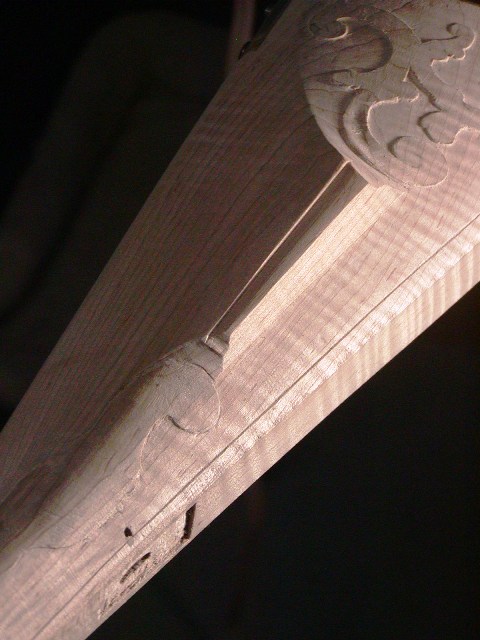
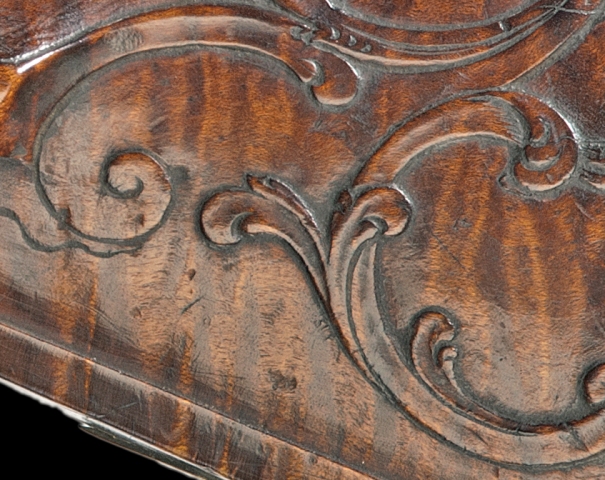
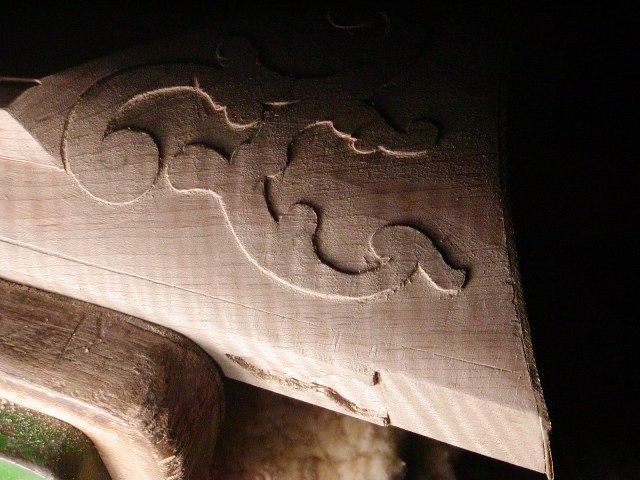
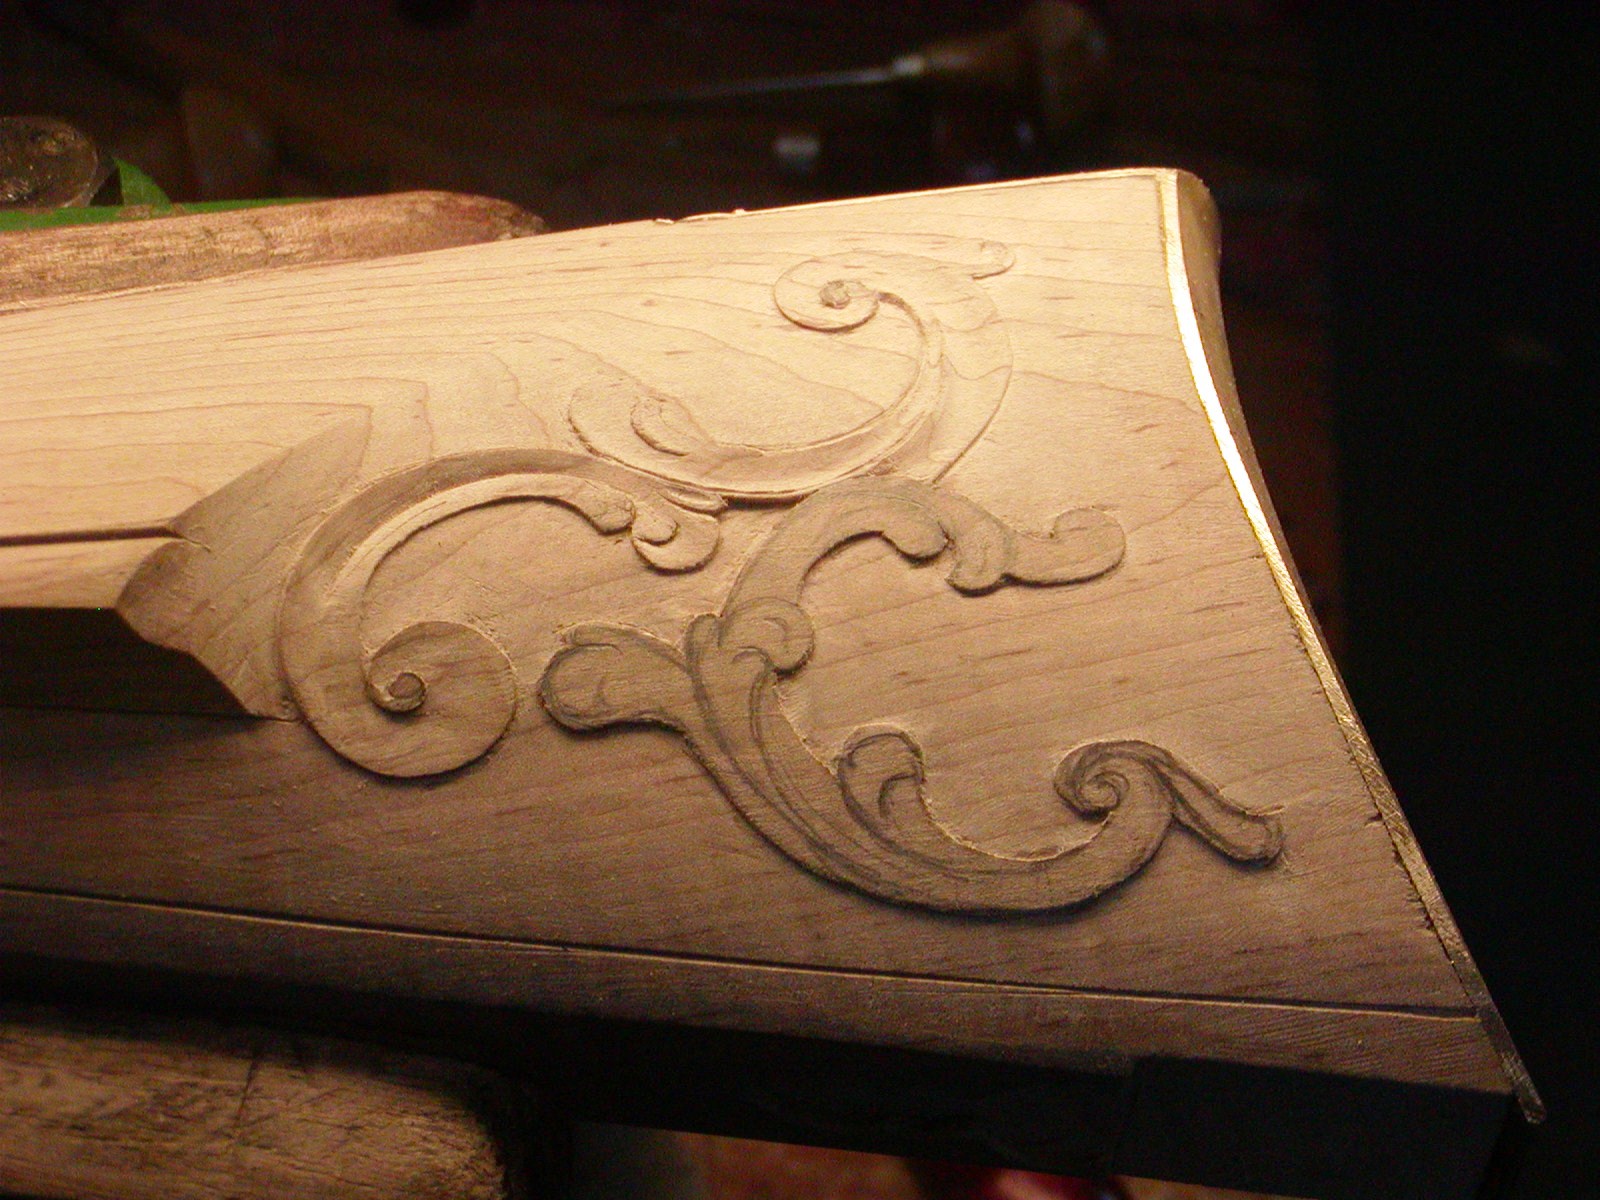
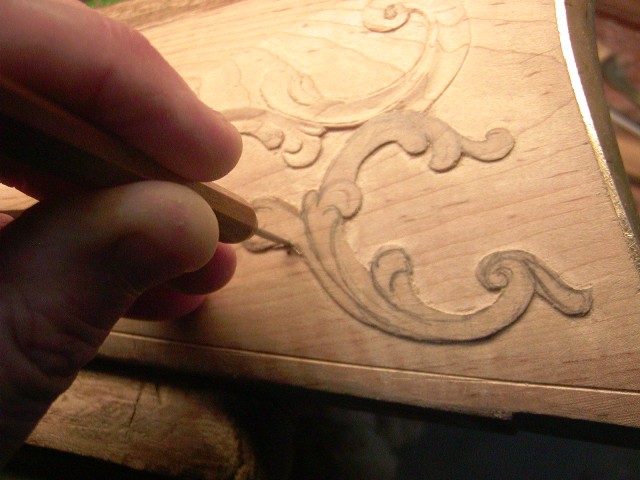
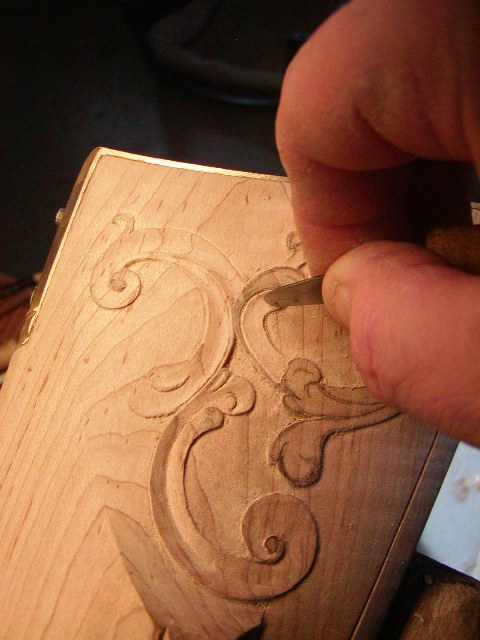
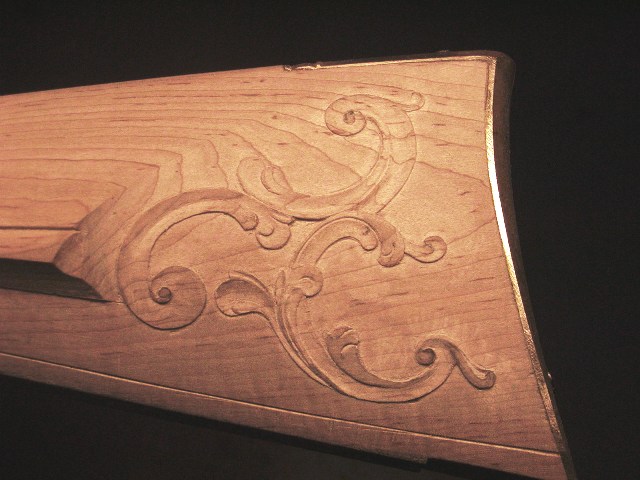
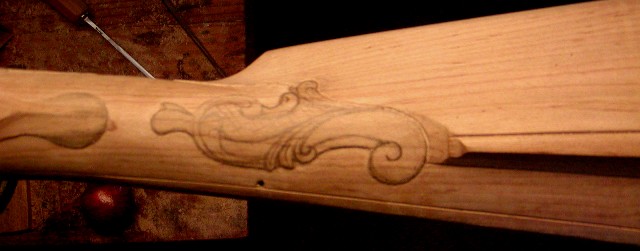
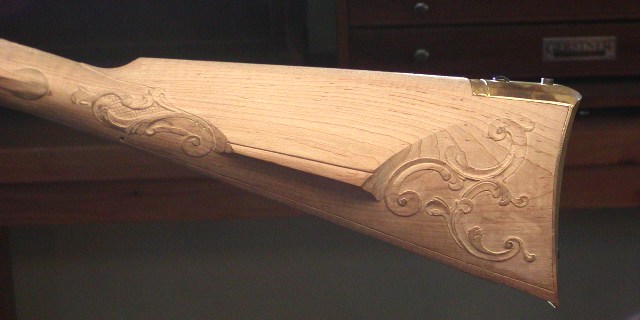
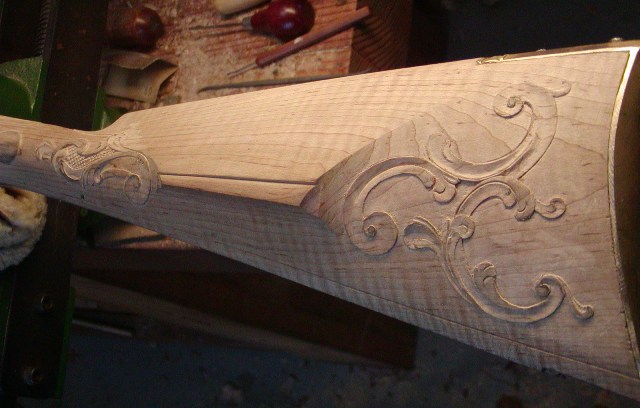
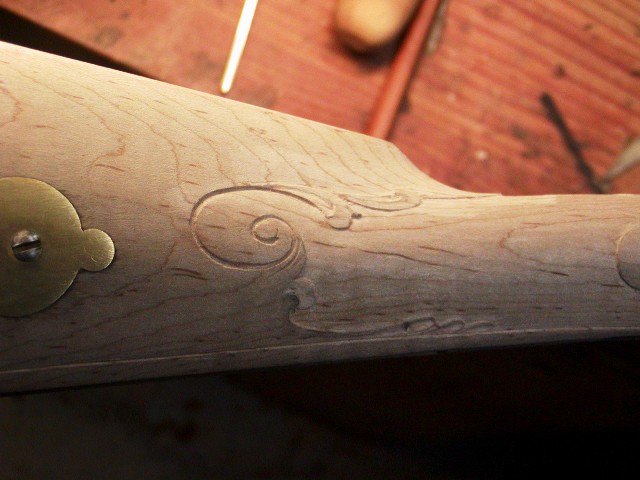
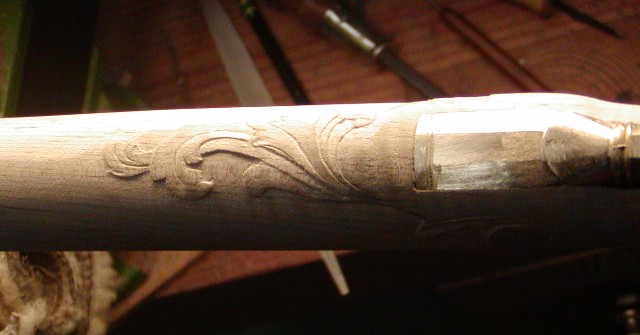
Regarding the rear cheek piece...I hauled out my RCA book and looked at it under magnification. I believe it is an intentional step put in place to "enhance" the very bottom end of the long, curved and sharp line that sweeps up and back defining the back of the entire cheek piece. The upper edge of that step looks like a curved final extension of that whole sweeping line. Now, take a look at #80b. While it's an unadorned cheekpiece, it appears to have an incised line, front and back, that may be attempting to do the same thing. On #81, there doesn't appear to be anything on the front edge since it sweeps nicely without a separate line or step. But both 80 and 81 appear to also have an incised line at the very bottom of the cheek piece molding. It's a really obvious line on 80 since there is virtually no adornment and it sticks out like a sore thumb, less obvious on the picture of 81, but it appears to extend from the carving at the back of the stock to the carving in front of the cheekpiece.

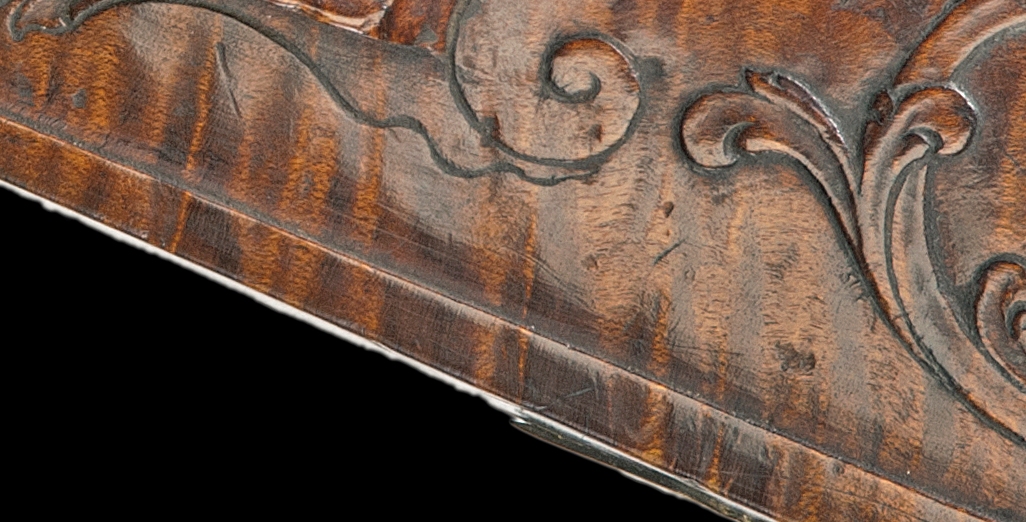
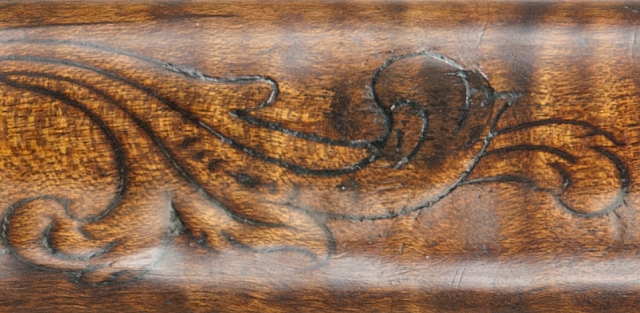
I wish RCA had higher quality pictures. Compared to the pictures in "An Intimate Look At the American Longrifle - Its Art and Evolution," RCA's pictures suck. Speaking of the "Intimate Look" book, The pictures of the Haines rifle on pg 13 and 15 show a very defined "line" at the bottom of the cheek piece. Apparently Haines did not like the cheek piece bottom to simply "blend in" at the bottom. He liked some kind of definition there. The middle left picture on pg 15 shows this line extending to the front carving. I think that line looks out-of-place on "unadorned" #80, but it's almost like he couldn't help himself...he just had to define the bottom of the cheek piece more! Also on page 15 in the lower right corner closeup, the rear of the cheek piece is not a long sweeping line like on #81...it's a rather short arc and goes right into the carving, but there is still a defining incised line from the carving in a sweep down and back along the very edge of the lower cheek piece. So it appears to me, that he liked very crisp and clear "definitions" of these edges. At least that's my rather inexperienced view of what he might have been doing.

One could look at those pictures for a lifetime and probably not catch in one's brain all the exquisite detail of these guns!

Just a note to anyone following this post that Dave had suggested the "Intimate Look" book to me and while it's not cheap, it is filled with absolutely glorious full-color photos of guns filling nearly 200 pages...most highly decorated. I leave it right on the living room coffee table for guests to enjoy.
 
Last edited:
Dave, I looked at RCA and would say that was applied. I also found pictures of another Haines rifle that has similar treatment in Masterpieces of the American Longrifle. Tony
 
Hi Folks,

Thank you Wayne, Pete, Mike, and Tony. I appreciate your input very much and agree with your conclusions. I cut the detail on both ends of the cheek piece. I think it looks pretty good. I've been cleaning up the whiskering and start carving details tomorrow. Notice that the lower stock border line is almost gone in places. I expected that as I clean up the stock. I'll be cutting it back in tomorrow but it also brings up a question for you guys. Again, look at the lower stock border on RCA 81 really closely. I initially interpreted that border as just a simple line but sometimes when I look at it closely, it seems it might actually be a raised border or shoulder such that the lower edge or border is raised slightly above the upper edge. I am not convinced of that so I would really appreciate your input. It is nice to have other eyes and minds interpreting those photos. Either way, the border will be easy to re-establish. The bottom photo is of another Haines gun zoomed in on the lower molding. It almost seems the top edge of the border dives down below the lower edge. What do you think? Again, thanks for the help.

dave

FQMVEaL.jpg

gEfl3XG.jpg

GdEr3bD.jpg

0cnepuG.jpg
 
Last edited:
Dave, from the photo, it appears to curve in a bit, forming a lip. Then continuing the curve to the toe of the stock. A point here, this was initially printed in the late '70s to early '80s, and reprints were done from the same negatives. Half-tone graduations were coarse then, probably 150 lines per inch. That can play tricks on the eye. Either would look good. Sorry, I can't be of more help.
 
Hi,

I wanted to make some comments about Haines' carving and illustrate some details. Below are photos of a very fine Haines rifle. The first photos shows details of carving behind the cheek piece. The design is virtually identical to the rifle I am building. One feature I want to point out is how Haines used stabbed borders and "V" chiseled borders to add highlights to the carving. In the first photo note how he used a "V" chisel to outline the volute just behind the cheek piece and the lower edges of many volutes. In contrast, the outlines of the heads of most leaves and volutes are stabbed in. The "V" cuts are below the surface of the wood giving depth and a sense of the carving rising out of the wood while the stabbed in portions give the sense of relief above the surface of the stock. During my preparations for carving, I mapped all of the edges of the designs indicating where they are outlined with a "V" chisel and where stabbed in. Now look at the carving around the rear ramrod pipe. Note the whole design is cut in using a "V" chisel. It also is the least precise and detailed of all the carving on the gun. That is typical on most original long rifles. On the Haines gun pictured, the lowest quality carving is around the rear pipe, middling quality is around the barrel tang, and best quality around the wrist and cheek piece. However, it appears to me that all of the carving on RCA 81 is of almost equal quality. It is a real exception among long rifles and begs the question, who was the customer?
dave
9km6Ho6.jpg

oWVBJ41.jpg
 
Hi,

I got details cut in the carving behind the cheek piece. The first step is to draw all the details on the roughed out design.
E5UMMZs.jpg

TAkIgMm.jpg

Then I stab in many of the details and carve the edges to their final shape.
gyXQXA7.jpg

Using small gouges, flats chisels, and rounded scrapers, I sculpt and smooth the final details.
Dcy1Wwi.jpg

Some of that shaping is my interpretation of the B&W photos. Hopefully, my carving is close to the original. I really cannot use the better photos of some of Haines' other guns because the carving on RCA 81 is better and much more detailed than those other guns. Anyway, the cheek carving is about done and only needs a little edge clean up and a few final details added before stain.
fnblyw3.jpg

Now on to the other areas.


dave
 
Not only masterful work, but excellent tutalage as well. I wish I had this as a guide when finishing my Marshall rifle, I might been more inclined to have given carving a go on it...
 
Good evening friends,

I mostly finished the cheek side carving at the wrist. This is a very complicated and difficult design to carve. It is right off the very fine jaeger rifles of 18th century Germany. I believe Isaac Haines was the finest stock carver from the Lancaster area during the 18th century. I am sure I got some details wrong but did the best I can given the photos.
The first step after establishing the background is to clearly draw the design details on the wood. In my opinion, this is one of the most critical and perhaps the most important step in good carving. Another is to visualize in your mind what the carving should look like. Certainly skill with your chisels, scrapers, and knives is important but after those skills are learned, the drawing of the design on the wood can make or break the work.
0O5AUmu.jpg

After drawing the design, I stab in the borders and back cut to establish the relief.
i96oC58.jpg

The back cuts are cleaned up and with little gouges, flats, "V"s, and scrapers, I sculpt the carving.
oBrtloc.jpg

The checkering was cut using tools I made that are little saws producing thin grooves and not pyramid-shaped diamonds. That is important because the top of the checkering is flat not pointed. Those cutters could not get into the tight corners or small spaces. In those areas I used a 60 degree veiner chisel.
Khy1t3X.jpg

The carving came out well but I will come back and clean up some edges and add some details later. I need to clean up the checkering a little but I will wait for that until after I put the first coats of finish on the gun. The reason is that the diamonds are at risk of chipping off until finish helps harden them in place. That is why you checker a gun after the first coats of finish, not before.
cjapELA.jpg

aCob5g1.jpg

Now on to other areas.


dave
 
I know it's hard to believe but even old Zonie is learning from your detailed photos and comments. Many thanks to you sir. :) :thumb:

(No, it's not because Zonie knows all of this stuff. He actually knows just enough to be dangerous when it comes to carving. What's amazing is that an old bonehead like him can actually still learn anything at his age. :D:D ))
 
Hi,

A little more done today. The barrel tang carving came out well and so did the wrist carving on the lock side. All the carving still needs a few details added and final cleanup during the final sanding phase before stain. I'll get the last detail bit done tomorrow and then on to final finishing everything before stain.


dave
yh8uUzH.jpg

CPSLYPX.jpg
 
Hi Mike,
Thanks for the nice comment. Yes, I do engraving as nearly the last step. While stain and finish are drying, I will polish and tune the lock, polish the brass, and engrave. Because I probably won't have many more sunny days above 65 degrees, I'll have to let the stock dry and cure inside my shop. That works fine but it increases the time needed by a factor of 3 because the UV waves in sunlight greatly speed drying. Consequently, I suspect I will have ample time for engraving while the stock is curing.

dave
 
Looks great! It inspires me! I have a reproduction Tower Boarding pistol I'm going to do some decorations to. I didn't pay anything for it so I think it's a good candidate for practice carving and inlays.
 

Attachments

  • KIMG1785.JPG
    KIMG1785.JPG
    107 KB · Views: 72
Hi,

More done today. I cut most of the detail in the carving around the rear ramrod pipe. It is almost entirely a copy of the barrel tang carving. The main difference is the decoration connecting the tang carving to the ram rod channel molding. None of my photos show this transition area for the original gun and I can only divine so much from the photo showing the rear pipe. Consequently, I had to wing it a bit. Examining other Haines' guns does not help much because RCA 81 appears to be quite different. Anyway, I intuited a design and carved it on both sides of the stock. I will add more accent lines and details in the carving everywhere after final scraping and sanding of the stock. Then before stain, I will sharpen up the edges and details of all carving with a "V" gouge and my stabbing chisel to re-establish all the crisp edges and features.
sP0HhxU.jpg

uVSiAQQ.jpg

One of my problems with the kit is that the rear ramrod pipe tang is too wide. It makes it difficult to keep the bottom of the stock well rounded. I can do nothing about it because the machine inlet is the width of the tang and permits no thinning of the tang. That is one of the reasons I hate kits.

I am also experimenting with stains for the stock. I want the stock color to match the Haines rifle in David Hansen's book on long rifles and the one shown on the KRA CDs. I posted some photos of that gun previously in this thread. I normally use ferric nitrate crystals dissolved in water containing more iron and that stain may be what I use. However, I am also experimenting with plain nitric acid to create a red undertone and one of Jim Klein's "Homer Dangler" stains on top. Years ago, I stained maple using dilute nitric acid (no iron added) with a top coat of some golden brown stain. Some of the most beautifully stained guns I've ever made used that strategy. Anyway, I have the piece of wood from the kit that was supposed to be used for the wooden patch box lid. I'll be experimenting with that slab while I prepare the rifle for finish.


dave
 
Last edited:

Latest posts

Back
Top