


Brokennock
Cannon
BrownBear said:Brokennock said: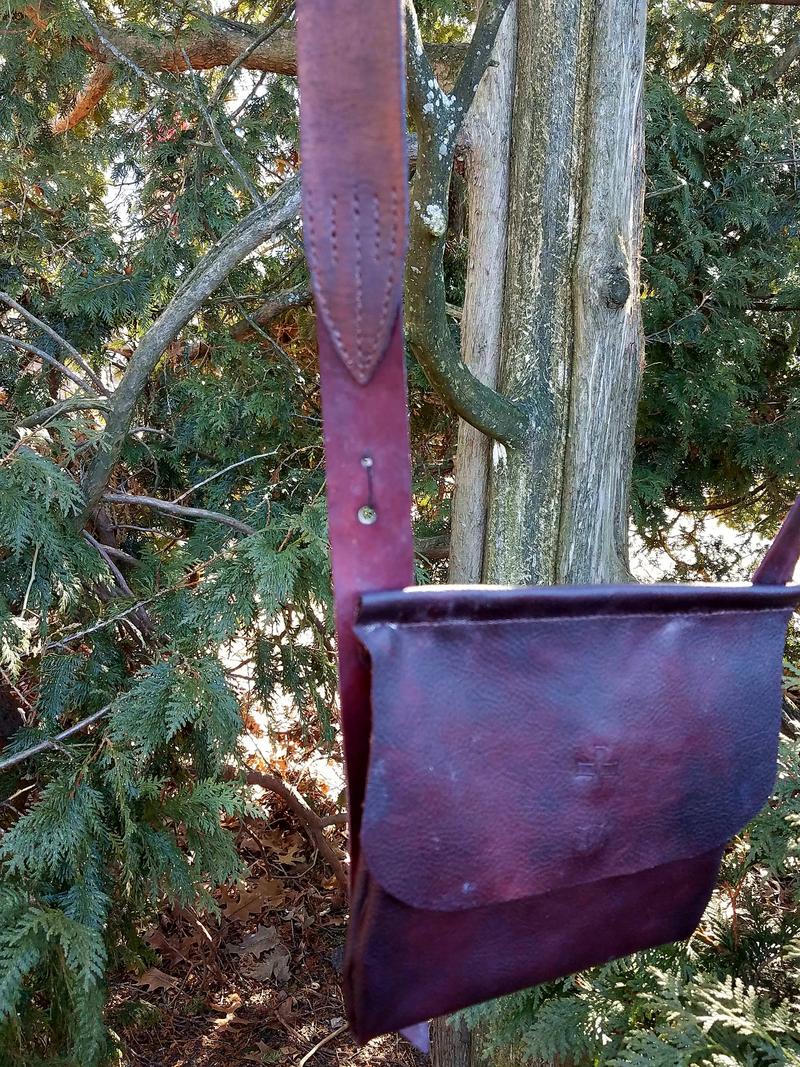
Thoughts?
I keep coming back to your photos because I like your bag.
I can't find a single thing to criticize, but I want to plant a seed for future projects if you get into thinner leathers on straps.
The extra decorative stitching where you join the pieces is cool and I like it a lot. But if you ever get to thinner leathers, all those holes can create a weak spot where leather can tear with a lot of weight or when you stumble while the bag is hung up on a limb or brush.
Related, but not specific to muzzleloading, I made myself a very classy leather "messenger bag" style computer carrying case with too many holes where the strap joined the body, and the strap parted as I jogged through an airport. Pretty darned scary and no small part startling when your computer suddenly hits the concrete! Same for muzzleloading if you ever got to the far side of a brush patch and discovered you were no longer wearing your shooting bag! :shocked2:
Thanks B.B. that you like it that much means a lot.
That leather is pretty thin, I'll check and get back to you on how thin. Not as thin as the bag leather, but thin. The curved stitching is virtually non-load bearing, the vertical single lines of stitch are doing the work.
If I go thinner on the strap, say as thin as what the bag is made of, won't I be back to sewing something like fabric to the back of it like on bag #1?

")
