Follow along with the video below to see how to install our site as a web app on your home screen.
Note: This feature may not be available in some browsers.
This community needs YOUR help today. We rely 100% on Supporting Memberships to fund our efforts. With the ever increasing fees of everything, we need help. We need more Supporting Members, today. Please invest back into this community. I will ship a few decals too in addition to all the account perks you get.
Friends, our 2nd Amendment rights are always under attack and the NRA has been a constant for decades in helping fight that fight.
We have partnered with the NRA to offer you a discount on membership and Muzzleloading Forum gets a small percentage too of each membership, so you are supporting both the NRA and us.
Thanks for showing some tricks of the trade. Although, I'm not a builder, I often take in orphan rifles and redo them and shot them, giving them new life and a new look.
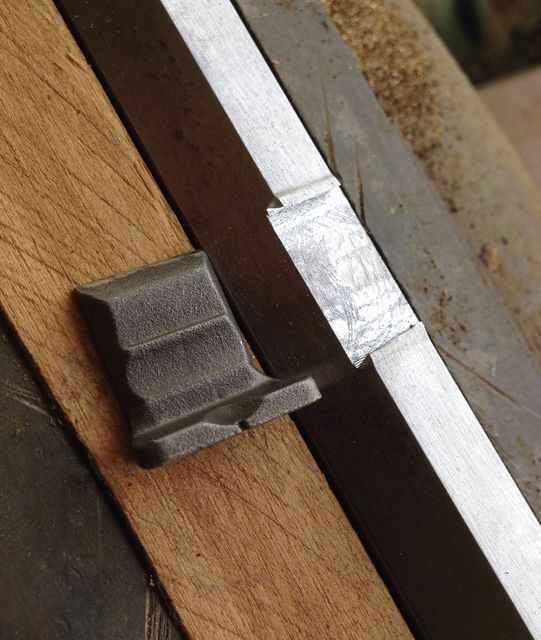
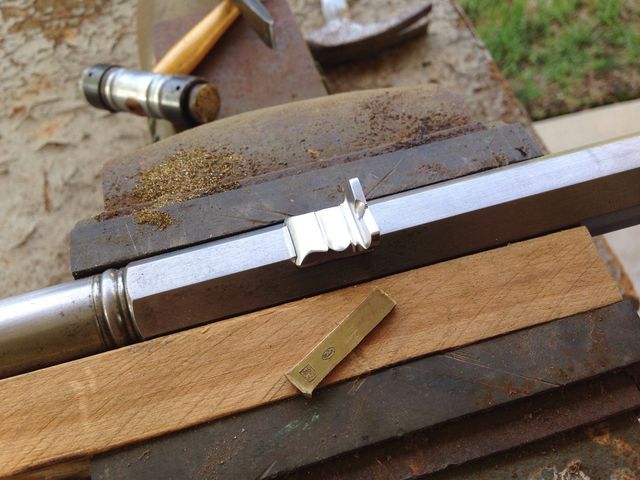
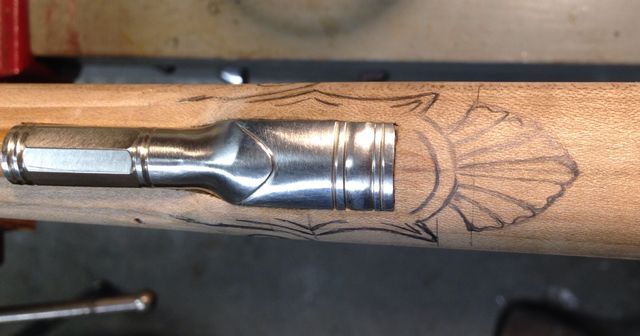
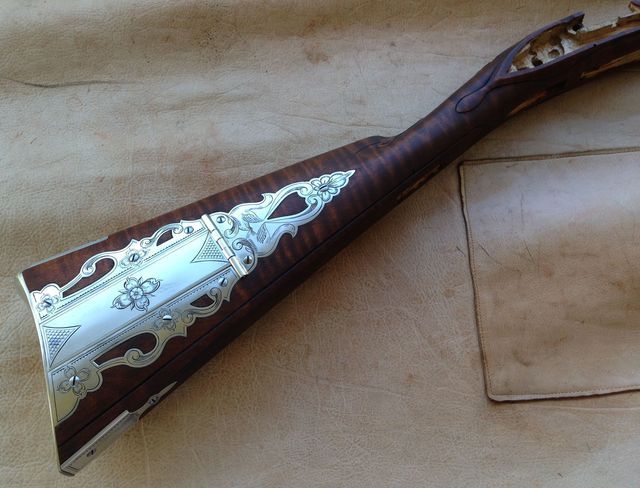
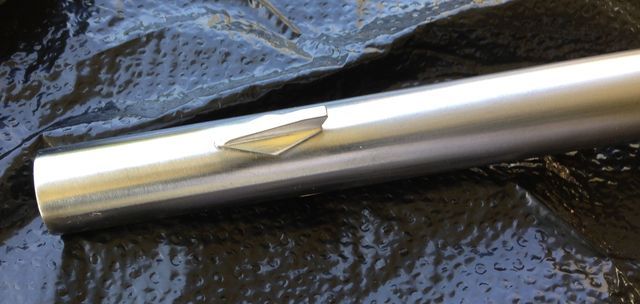
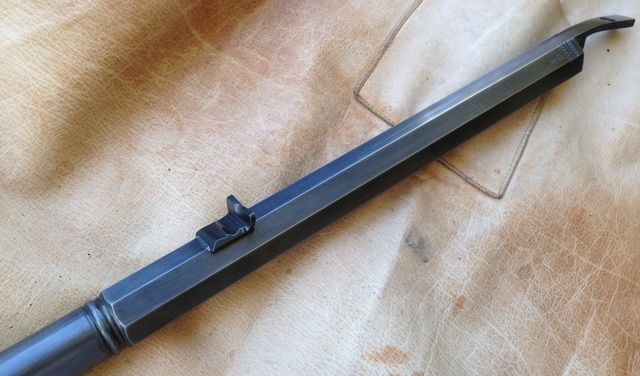
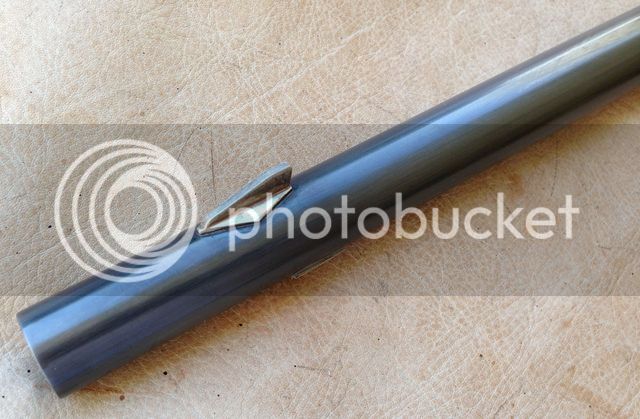
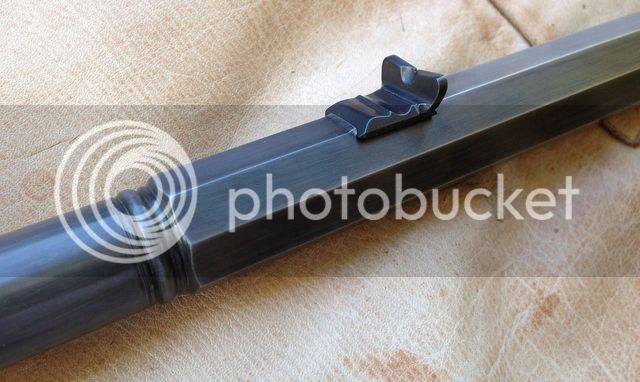
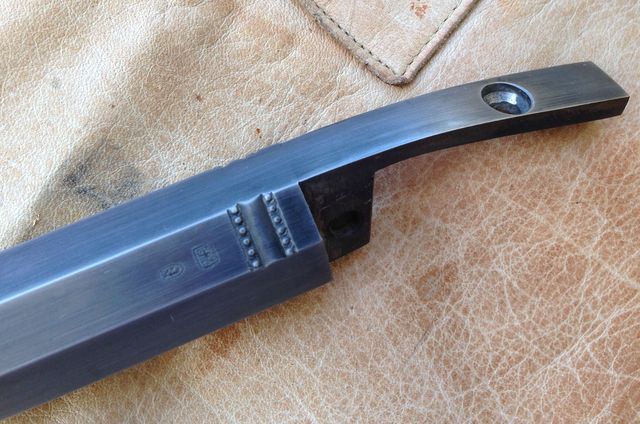
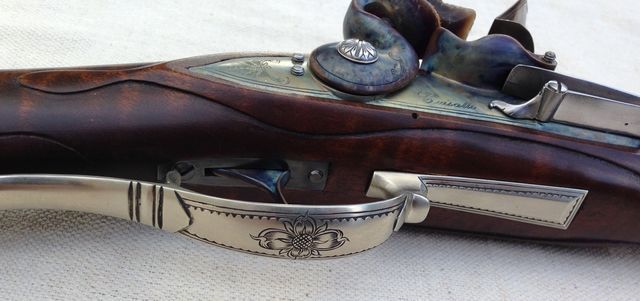
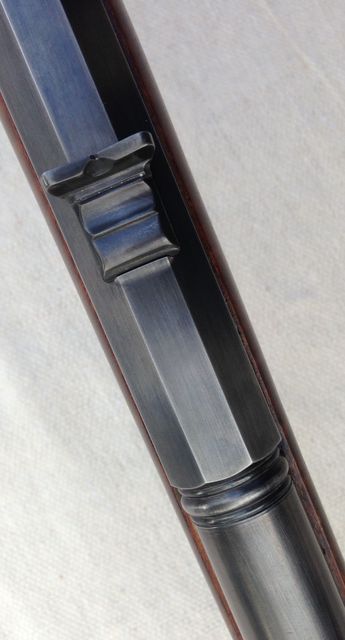
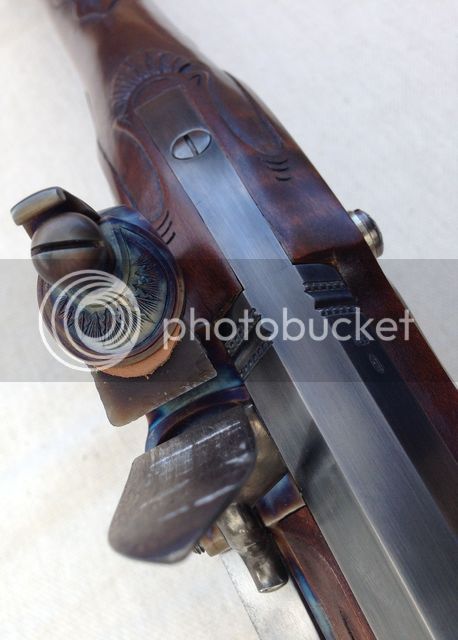
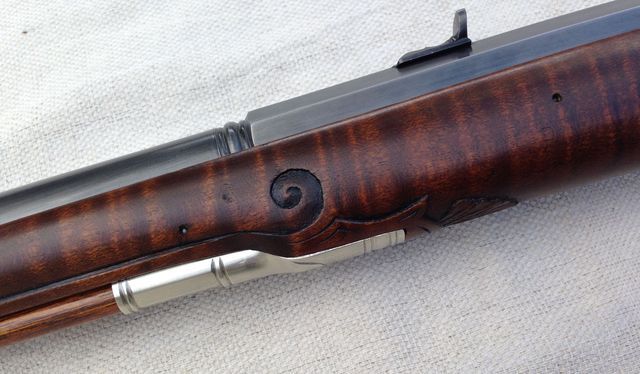
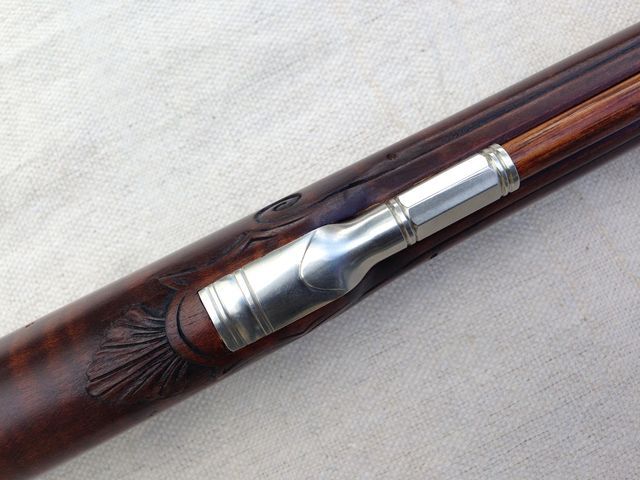
Another project on hold for many months due to work.....However, I promised the owner that I would try to get this one finished for him before the holidays, so I am stepping out smartly as of today. Â Cut the rear sight dove tail, fitted the sight, and then finished the cast surfaces. Â Will make the silver front sight later today and solder it on. Staring on the rest of the carving and stock finishing now.
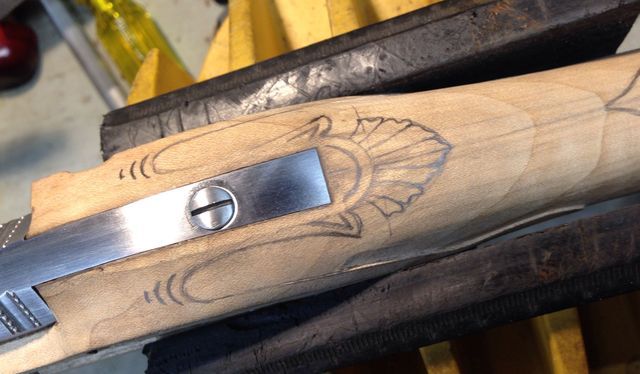
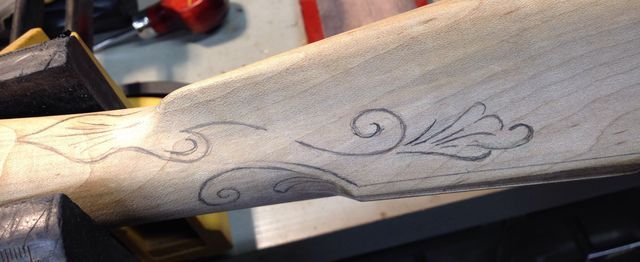
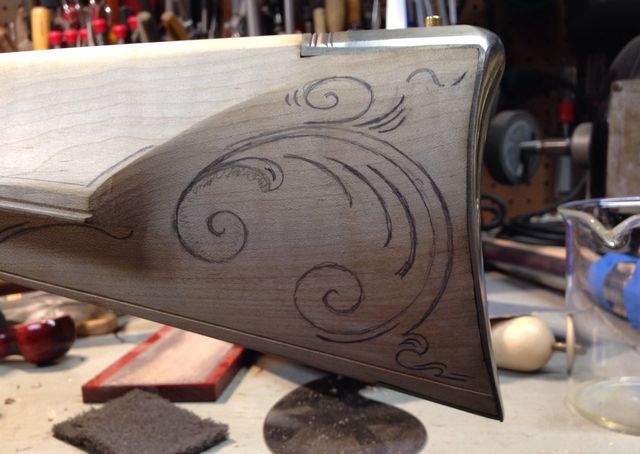
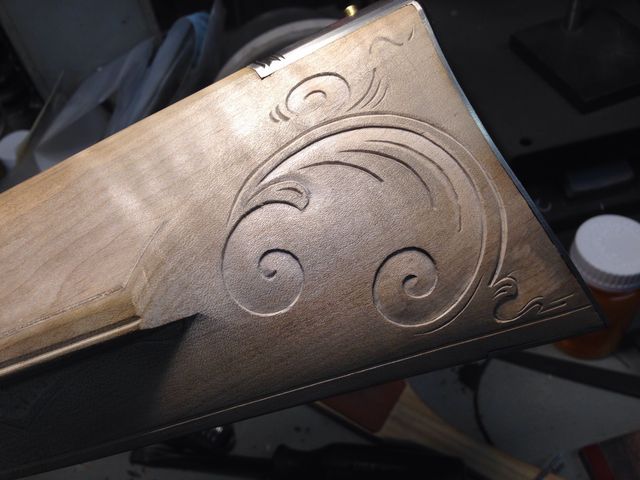
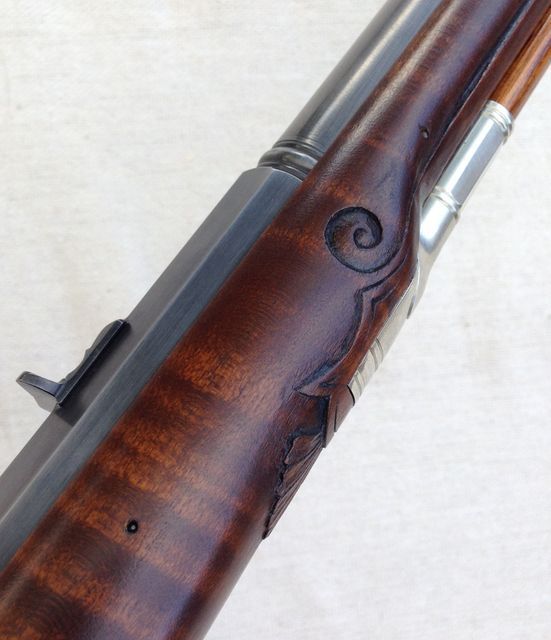
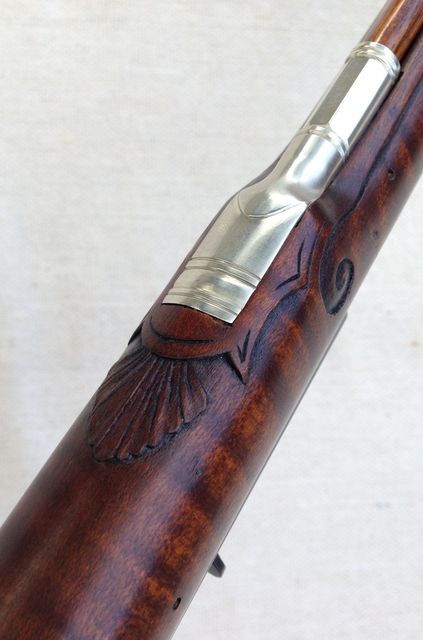
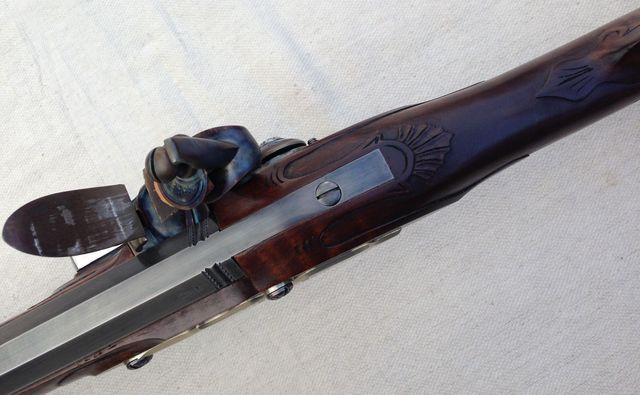
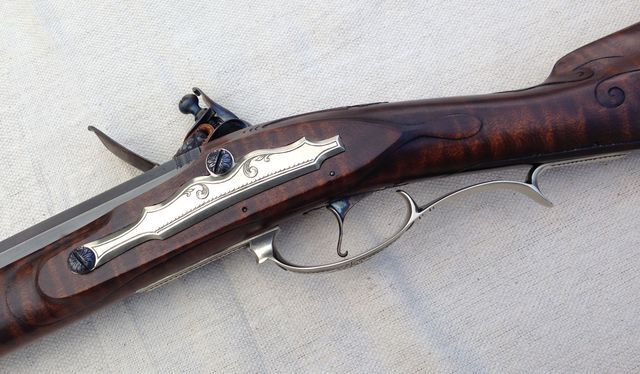
Carving is the next step and deciding on the design is always the hardest part for me. Â This is the second set of "on stock" sketches for this little rifle and, if I go with these, they will also morph into something similar but different as I start cutting.
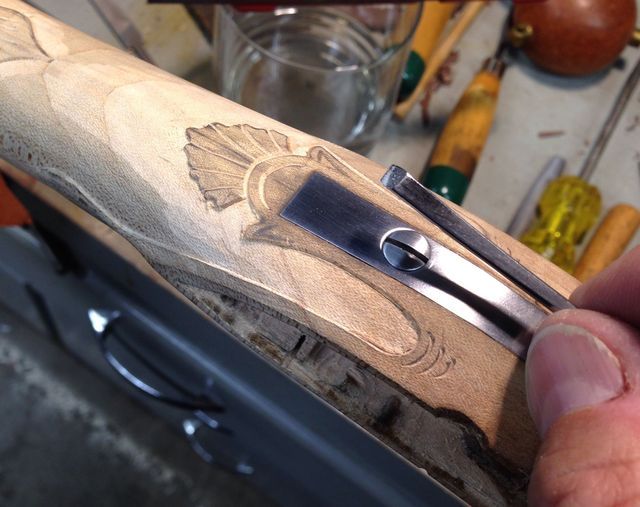
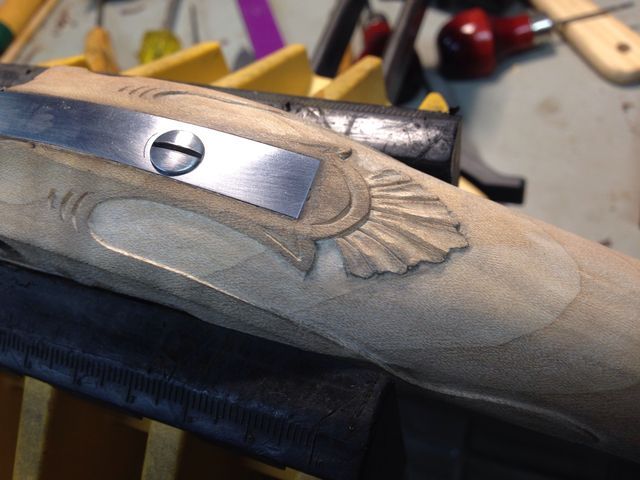
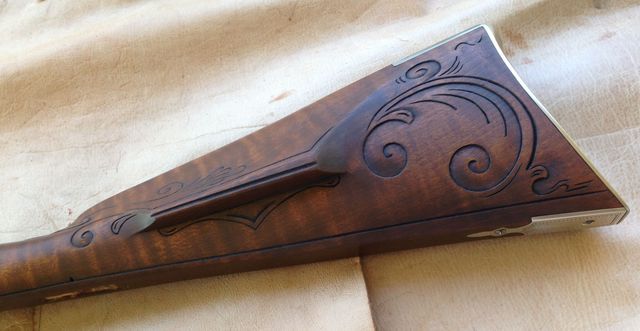
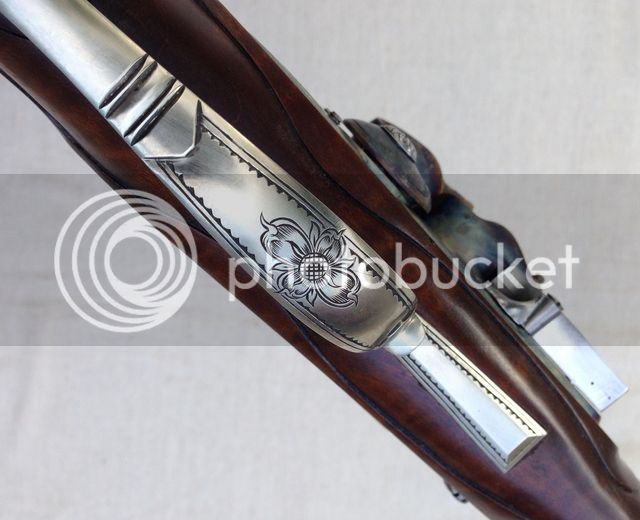
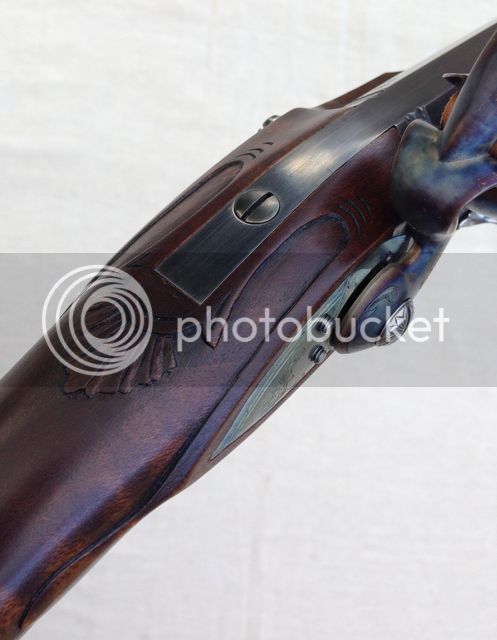
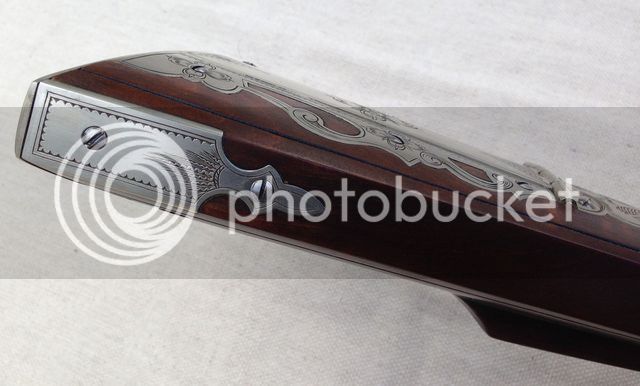
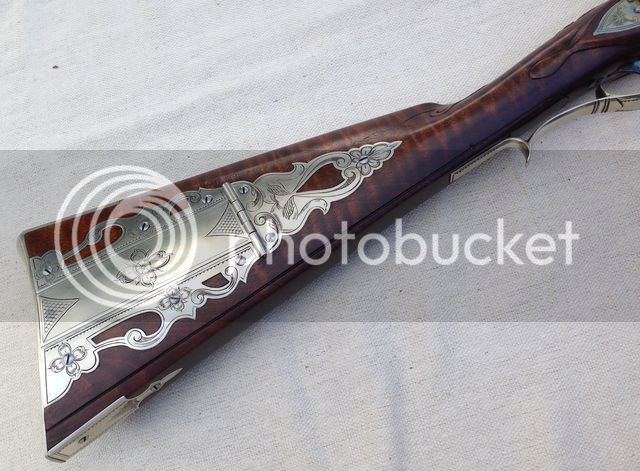
Covered some ground today in getting the carving completed........The breech area....start of the carving.........
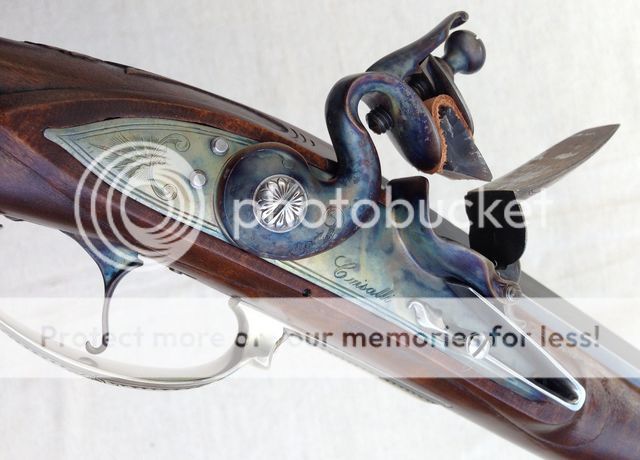
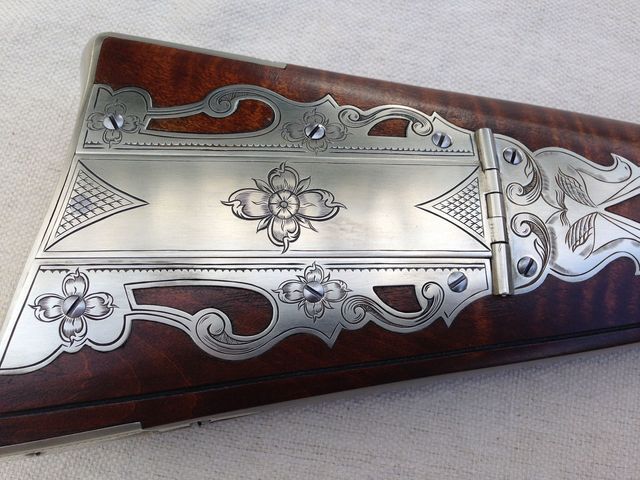
Stunningly beautiful work as always. Two, probably rediculously obvious/stupid, questions. First, how do you get the perfect mirror image carving design on both sides of the tang (the design in this case being my favorite that I can remember seeing)?
Second, why is the "breach decoration" not carried over the top flat?
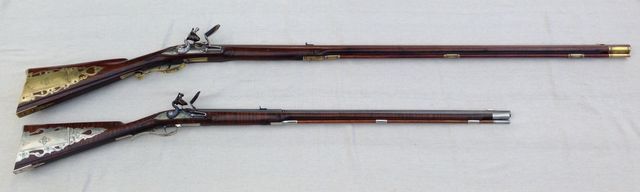
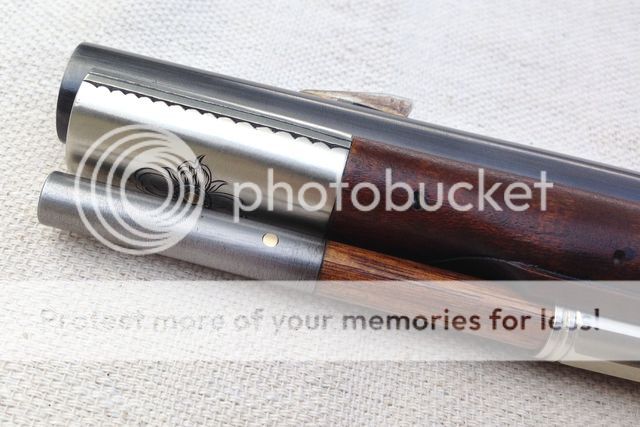
Completed the little rifle over the Thanksgiving weekend. Here we go with perhaps too many photos, but I like to see others work in detail, so here goes:
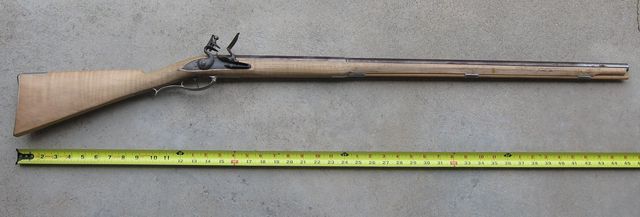
A reminder of where this all started:
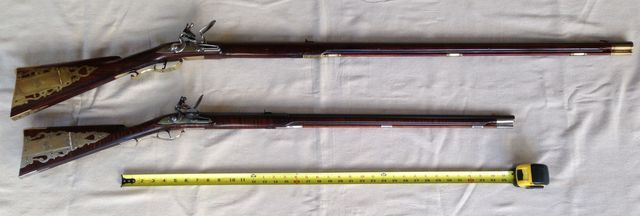
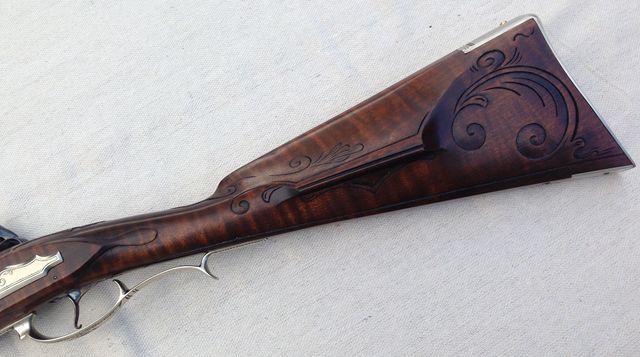
A comparison between the little rifle and what I consider to be a full size rifle. The larger one has a 42 inch barrel and the little one has a 30.5 inch barrel. The pull on the little rifle is 13 inches and on the large one, 13.25 inches. So the little rifle can easily be shot by an adult but is easy to handle and light enough for a young person or a petite lady.
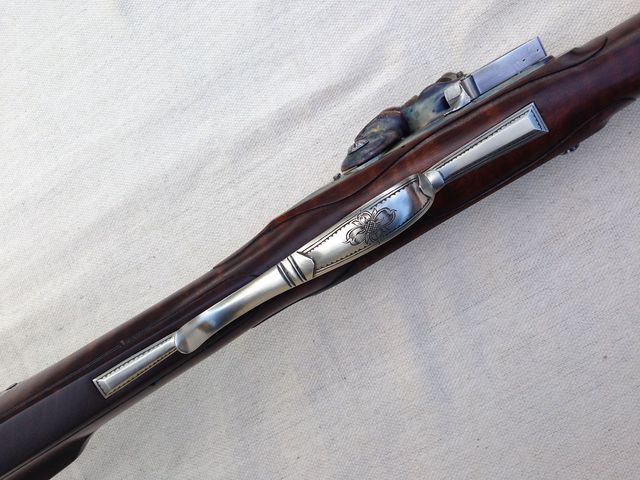
I like it! Including the patch box lid let inside the butt plate rather than cut through it. That prevents people unfamiliar with patch box releases from digging their fingernails under the lid and prying it open, probably damaging the hook release.
 (there... found it)