• This community needs YOUR help today. We rely 100% on Supporting Memberships to fund our efforts. With the ever increasing fees of everything, we need help. We need more Supporting Members, today. Please invest back into this community. I will ship a few decals too in addition to all the account perks you get.


    Sign up here: https://www.muzzleloadingforum.com/account/upgrades
  • Friends, our 2nd Amendment rights are always under attack and the NRA has been a constant for decades in helping fight that fight.

    We have partnered with the NRA to offer you a discount on membership and Muzzleloading Forum gets a small percentage too of each membership, so you are supporting both the NRA and us.

    Use this link to sign up please; https://membership.nra.org/recruiters/join/XR045103

I need help with a TRS Baker Rifle flintlock build

Muzzleloading Forum

Help Support Muzzleloading Forum:

This site may earn a commission from merchant affiliate links, including eBay, Amazon, and others.

Larks

40 Cal
Joined
May 12, 2020
Messages
151
Reaction score
138
Location
Queensland, Australia
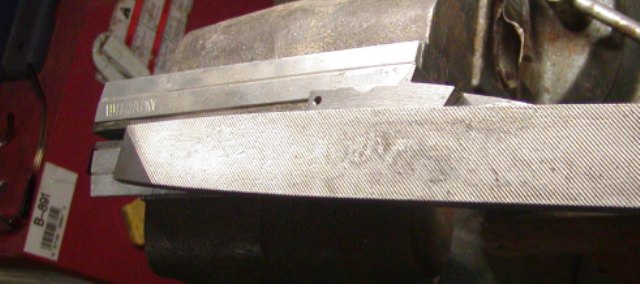
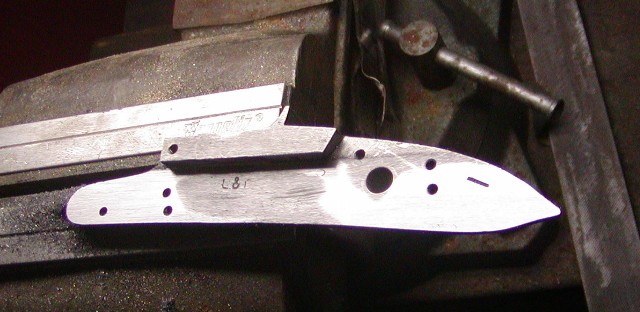
I’ve been endeavouring to build the TRS Baker Rifle flintlock from the parts kit that they provide and am really struggling with it. I don’t have anything like a mill or any fine/accurate metal working equipment so have been attempting this with hand files, a Dremel, my large floor standing pedestal drill press and a lot of emery paper......

I have made quite a few mistakes along the way so you will see a few things in my photos and video that don’t look as pretty as they should, but I don’t think any of them are contributing to the latest two problems that I’m hung up on:

Number one is that the mainspring seems to be getting hung up on the tumbler as the tumbler roles forward, not always but four out off five times. Before I go taking any more metal off of anything (like the tail end of the mainspring where it seems to be hooking up between the “axle” (??) and the “toe”/“ear” - I don’t know the correct names but hope you might be able to understand??) is this likely due to the rounded end of the mainspring being a smidgen too long or could it be something else?

Number two may be two different things: I can’t feel a half cock as I pull the cock back, other than where the sear engages the fly just before the full cock. There is a notch forward of the full cock that I assume is the half cock and the sear would engage if the fly wasn’t in place but the fly seems to cover that notch.

I gather from the TRS web site that the fly is supposed to aid in lightening the trigger but I can’t see how that is the case, can anyone explain how the fly should actually work and what its purpose is? Would I be better off leaving it out?

(I’d originally ordered a complete lock from TRS because I knew I’d need more refined tooling than I have to get this right, but unfortunately they made an error in the order and sent the kit instead. Although they then promised to send the complete lock about 12 months ago I can’t now get any response from them and they seem to have written me off, so I’m very keen to try and get this lock working properly....)

Here’s a video showing the movement that may show up something obvious to those more experienced than me (which will be anyone here)....or it may just give you a chuckle.....

 
IMG_2432 2.JPG


IMG_2435.jpg
IMG_2437.jpg


IMG_2439.jpg
 
With fly in the lock from full cock you have to let the hammer all the way down to the stop and pull it back to get to half cock. That is normal. The fly is there to keep the sear nose from catching in the half cock notch when fired using set triggers. The fly looks like it might be in backwards. The side with more slope should face the sear nose to let it ride over the half cock notch without hanging.
With a firm trigger pull the fly isn't necessarily needed.
 
Number one is that the mainspring seems to be getting hung up on the tumbler as the tumbler roles forward, not always but four out off five times. Before I go taking any more metal off of anything (like the tail end of the mainspring where it seems to be hooking up between the “axle” (??) and the “toe”/“ear” - I don’t know the correct names but hope you might be able to understand??) is this likely due to the rounded end of the mainspring being a smidgen too long or could it be something else?

G'day Mate,

Let's take them one at a time.

Yes, it sure looks like you need to take a little metal off the rounded end of the mainspring so it doesn't cramp against the Tumbler. As you shorten it a very little bit at a time, it would be best to keep it rounded.

Best way to do this is take the mainspring off the lock as well as the bridle, sear spring, and sear. IOW, you would have just the Tumbler on the inside of the lock. Then install the mainspring and screw. Now as you pull the Cock/Hammer back, you can see if it is hitting/cramping on the tumbler.

Take a little metal off the mainspring at a time and ensure it is rounded as you do it. Once the end of the mainspring is not cramping, then polish it with Emory cloth.

Once that is done, remove the mainspring and screw and set them to the side.

End of Part 1

Gus
 
Part 2

First, does the fly have a small post that protrudes down into a hole in the tumbler something like the following? In the following image, the small post is facing upward (which means it is shown upside down compared to the way it goes into the tumbler).
1629641125342.png


OR is there a hole in the fly that mounts onto the post on the cut out portion of the tumbler?
1629641056934.png


Need that answered before going further.

Gus
 
Last edited:
G'day Mate,

Let's take them one at a time.

Yes, it sure looks like you need to take a little metal off the rounded end of the mainspring so it doesn't cramp against the Tumbler. As you shorten it a very little bit at a time, it would be best to keep it rounded.

Best way to do this is take the mainspring off the lock as well as the bridle, sear spring, and sear. IOW, you would have just the Tumbler on the inside of the lock. Then install the mainspring and screw. Now as you pull the Cock/Hammer back, you can see if it is hitting/cramping on the tumbler.

Take a little metal off the mainspring at a time and ensure it is rounded as you do it. Once the end of the mainspring is not cramping, then polish it with Emory cloth.

Once that is done, remove the mainspring and screw and set them to the side.

End of Part 1

Gus

You know I can't tell if the half moon point of the front of the Tumbler is hitting the Mainspring. This is something else to check while you have only the mainspring and tumbler in place on the inside of the lock.

I would mark the top and bottom of the half moon point with a permanent black magic marker before installing the mainspring. As you check for the end of the mainspring cramping on the tumbler, if the point is hitting the inside of the curve of the mainspring, I would take a tiny bit off the point until it doesn't hit.

Gus
 
With fly in the lock from full cock you have to let the hammer all the way down to the stop and pull it back to get to half cock. That is normal. The fly is there to keep the sear nose from catching in the half cock notch when fired using set triggers. The fly looks like it might be in backwards. The side with more slope should face the sear nose to let it ride over the half cock notch without hanging.
With a firm trigger pull the fly isn't necessarily needed.

Thankyou for that - the fly can only go in the one way so it’s definitely in the right way, however it came as cast with the sprue still attached so I do wonder if I may have over filed it in cleaning it up ..... or not filed it enough...? It is loose in its position but should the edges perhaps be sharper?

IMG_2349.jpg


IMG_2446.jpg
 
You know I can't tell if the half moon point of the front of the Tumbler is hitting the Mainspring. This is something else to check while you have only the mainspring and tumbler in place on the inside of the lock.

I would mark the top and bottom of the half moon point with a permanent black magic marker before installing the mainspring. As you check for the end of the mainspring cramping on the tumbler, if the point is hitting the inside of the curve of the mainspring, I would take a tiny bit off the point until it doesn't hit.

Gus

Thankyou Gus, I really appreciate your advice on this and I reckon you’re onto it with the spring end. My concern with such fine work is taking too much off of anything - I’ve already made a mess of the tumbler but I doubt that i’ll be able to get a replacement (I initially drilled the cock screw hole too deep and not quite square - you may be able to see some weld putty coming out the side of the tumbler axle (?) that the bridle sits over.

I managed to correct it by plugging it wth an oversized machine screw and re-drilling it - straight - but it’s not a pretty picture and the bridle axle is not symmetrically round but I’m loath to mess with it any more. You’ll see that I’ve slightly oversized one side of the bridle hole for that axle as I initially thought that was causing the binding - I’m sure it doesn’t help anything but I’m also pretty sure that it’s not contributing to that problem.

Having pulled it apart again as you suggested (during smoko this morning) I can see two things - one that the ear/toe/half moon of the tumbler doesn’t look perfectly curved - however the break in the sweep of the curve doesn’t “appear” to be the point that the spring is getting hung up as I control the cock going forward. Either way it needs attention and I’m sure isn’t helping things.

The other though, and it is difficult to see for sure (with my eyes), is that it although the front visible side of the spring end appears to be clear of the main axle of the tumbler, but photos show that the back side of the spring is not completely square to the front and may be hitting the main axle area as the tumbler rolls forward to that point f binding....if that makes sense???.


Coincidentally (?) the point where it binds seems to line up with the point where the sear would engage the fly as the tumbler comes forward, however whether I hold the sear up completely to clear the fly or not doesn’t seem to make much difference.

I’ll put a bit more time into it this evening and ink it as you suggest and will see if I can get some better pictures.


Here’s where the spring sits at full cock:

IMG_2443.jpg


And where it sits at the point of binding:

IMG_2450.jpg


IMG_2445.jpg


Back at full cock looking down, showing the spring off square:

IMG_2447.jpg


and at the point of binding:

IMG_2449.jpg
 
Larks,

Before going further, I have to ask how much "wobble" or movement is there of the Cock/Hammer and Tumbler when those are the only two parts attached to the Lock Plate? IOW, can you hold the Lock Plate in one hand and in the other hand grasp the Cock/Hammer and wiggle it around sideways? (Hopefully not much, if any at all.)

Ideally, the hole the Tumbler Arbor goes through in the Lock Plate should only be .001" to at most .003" larger in diameter than the Tumbler Arbor. The larger size that hole is in the Lock Plate, the more the Tumbler can wiggle around in operation and cause problems with the way the other parts work in the lock.


The other though, and it is difficult to see for sure (with my eyes), is that it although the front visible side of the spring end appears to be clear of the main axle of the tumbler, but photos show that the back side of the spring is not completely square to the front and may be hitting the main axle area as the tumbler rolls forward to that point f binding....if that makes sense???.

Yes, it absolutely makes sense. (This can be one of the results of having too much wobble in the way the Tumbler rides in the Lock Plate hole as mentioned above.) It also may be the result of the curved portion of the front top of the Tumbler (under the rear of the Mainspring) Is not perpendicular to the face of the Lock Plate. Of course the most simple explanation is the rear of the Mainspring may not perpendicular to the length of the Main Spring.
Do you have any kind of a square to check to see if the rear of the Main Spring is perpendicular to the length?

Larks, please understand that since I don't know you personally, I don't know what you have or not in the way of tools and what experience you have in the way of filing metal. So please don't take any question I have as being critical of you.

If the rear of the Main Spring is off perpendicular to the length of the Main Spring, do you know how to file it to get it at least pretty close? If not, I can give you some tips to do it.


To me, it looks like the rear of the Main Spring is not perpendicular to the length of the Main Spring in the photo above?

Gus
 

Attachments

  • 1629687644018.png
    1629687644018.png
    570.7 KB · Views: 47
Thanks again Gus. Sadly the fit between the tumbler and lock plate has more movement than would seem fit, which is somewhat surprising as this was one area where I was (or thought I was) quite careful not to over polish. I’m picking up about .004 for the most part but confess that the axle of the tumbler also isn’t perfectly round so that at one spot towards the top of the tumbler the gap would be more like .007-.008 .......

But holding the spring up to a square it does actually look reasonably square so your observation about the sloppy tumbler causing the problem is more likely the case than my thought of the spring being off square. It really is a bit of a mess and I can’t now think how to remove that sloppiness, other than if I can find someone who could perhaps machine it down further and press a sleeve onto it....

In fact of everything that I’ve done with this lock the tumbler really is the bit that I feel that I have cocked up the most so it makes sense that it would be the cause of the issue.

I have already tried to contact TRS again to buy a replacement tumbler due to my initial cockeyed cock-screw pilot hole drilling efforts. I’m also short a 6-32 UNC screw that was missing from the kit and which seems to be impossible to source here in Australia. But with no responses from TRS I’m floundering in the breeze unfortunately and trying to recover what I have... (I really can’t think of anything that I may have said or done to upset TRS but they do seem to have me on ignore, I’m hoping they may respond to a letter).

Tooling wise I have nothing with the sort of precision that I really need to put something like this together - files, a Dremmel, a large pedestal drill with a basic Chinese two way vice, a couple of large belt sanders and some grinders and polishing wheels and a couple of sets of Verniers. As far as metal working skills go I’m a capable blacksmith and welder but I am really not skilled or experienced with fine work like this with metal.

So don’t worry about being critical of my work with this lock - I’m far more critical of myself and was well aware before hand that I’d struggle with this level of fine work with the tools that I have and my skill level to work to fine tolerances - hence initially ordering the pre-built lock....

Ideally I wonder if I could find someone here in Australia who is experienced and skilled with flintlock builds to see if they could possibly recover my mistakes before I make more of a mess of it.

IMG_2454.jpg
 
Thanks again Gus. Sadly the fit between the tumbler and lock plate has more movement than would seem fit, which is somewhat surprising as this was one area where I was (or thought I was) quite careful not to over polish. I’m picking up about .004 for the most part but confess that the axle of the tumbler also isn’t perfectly round so that at one spot towards the top of the tumbler the gap would be more like .007-.008 .......

But holding the spring up to a square it does actually look reasonably square so your observation about the sloppy tumbler causing the problem is more likely the case than my thought of the spring being off square. It really is a bit of a mess and I can’t now think how to remove that sloppiness, other than if I can find someone who could perhaps machine it down further and press a sleeve onto it....

In fact of everything that I’ve done with this lock the tumbler really is the bit that I feel that I have cocked up the most so it makes sense that it would be the cause of the issue.

I have already tried to contact TRS again to buy a replacement tumbler due to my initial cockeyed cock-screw pilot hole drilling efforts. I’m also short a 6-32 UNC screw that was missing from the kit and which seems to be impossible to source here in Australia. But with no responses from TRS I’m floundering in the breeze unfortunately and trying to recover what I have... (I really can’t think of anything that I may have said or done to upset TRS but they do seem to have me on ignore, I’m hoping they may respond to a letter).

Tooling wise I have nothing with the sort of precision that I really need to put something like this together - files, a Dremmel, a large pedestal drill with a basic Chinese two way vice, a couple of large belt sanders and some grinders and polishing wheels and a couple of sets of Verniers. As far as metal working skills go I’m a capable blacksmith and welder but I am really not skilled or experienced with fine work like this with metal.

So don’t worry about being critical of my work with this lock - I’m far more critical of myself and was well aware before hand that I’d struggle with this level of fine work with the tools that I have and my skill level to work to fine tolerances - hence initially ordering the pre-built lock....

Ideally I wonder if I could find someone here in Australia who is experienced and skilled with flintlock builds to see if they could possibly recover my mistakes before I make more of a mess of it.

View attachment 91068

Larks,

Sounds like you have a good pair of precision digital or dial calipers? If so with them and with careful hand filing, you could get the Tumbler Arbor Diameter back pretty close to true, so you could get a machinist to turn a sleeve to better fit it and press it into the Lock Plate w/an interference fit or use low temp silver solder to install it.

As a Blacksmith, I assume you were you trained in how to file metal flat?

Gus
 
Last edited:
Thanks Gus - I use the title "blacksmith" a little too loosely, I’m certainly not a professional blacksmith or welder and am mostly self trained but with a number of good quality courses under my belt (mostly knife making, decorative blacksmithing and larger tool making) so I have developed/learned some reasonable skills in filing flat and fine polishing...... but sadly some of the flats have ended up on the rounds .... :doh: .
 
Larks, I can't help with the lock unfortunately. However, I was just on TRS website and it says they just finished moving and there are new contact details there. I would try giving them a ring(via Skype perhaps) on the new number during their working hours. They are in GMT- 5 time zone.
 
Larks, I can't help with the lock unfortunately. However, I was just on TRS website and it says they just finished moving and there are new contact details there. I would try giving them a ring(via Skype perhaps) on the new number during their working hours. They are in GMT- 5 time zone.

I don’t know when their move was actually completed but I recall that same notice on their website about the move being almost complete at least 18 months ago when I was conversing with them to buy the Baker Rifle. I have tried to telephone them a few times but the time difference between Oklahoma and Australia makes it quite difficult. Their opening hours of 9am to 4pm equate to midnight to 7am our time so I’ve tried to call at 6am our time but only ever managed to get an answering service.
 
Thanks Gus - I use the title "blacksmith" a little too loosely, I’m certainly not a professional blacksmith or welder and am mostly self trained but with a number of good quality courses under my belt (mostly knife making, decorative blacksmithing and larger tool making) so I have developed/learned some reasonable skills in filing flat and fine polishing...... but sadly some of the flats have ended up on the rounds .... :doh: .

In the 18th century through at least the 1st Quarter of the 19th century, they did not use lathes to make their Tumblers. Instead, they used what was called a Tumbler Grinder and a fancy one is shown in the pic below. This device actually cut the arbors to diameter size and cut the flats of the Tumbler Body perpendicular to the arbors - as the thumb screws were tightened to make the cuts.

1629713733999.png


Now most of us don't and won't ever have this kind of device to form or correct Tumblers.

If you don't have the skill to file the high spots off the Tumbler Arbor that goes though the Lock plate, then perhaps a friend with a lathe could just true up the surface diameter of that arbor. That way he could make a bushing for the lock plate with a hole in it no larger than .001" to .002" larger than the 'trued up' Tumbler Arbor.

You also might try calling Track of the Wolf to see if they have a replacement Tumbler or if they have a Tumbler that is a bit oversize to fit to your lock. They will also be able to sell you that missing 6-32 lock screw. I would write down the measurements of the diameters of the two Arbors on your tumbler and how thick is the body of the Tumbler. Matter of fact, it would be good to have the tumbler and your precision caliper handy when you called them. If you buy a Tumbler from them, make sure you check what size is the Cock Screw you have and if different, they also have a number of styles of Cock Screws.

I've done this sort of thing when I needed a Tumbler or Frizzen or other part for an original lock plate to keep from having to have a brand new Tumbler made or make one myself. They always are most accommodating.

The below information is from their website:

They are available to answer any calls between the hours of 9 am – 5 pm, CST. If you get a busy signal or no answer during the day, all lines are currently in use. Please call back in a couple minutes. Your call will always be answered by a real person, we do not rely on an answering machine. If paying by credit card over the phone, we will ask you for your CCID number.
Our phone number is:
763-633-2500

I'm afraid I don't know anyone to refer you to in Australia to work the lock for you. I know we have other Forum Members from Australia who may be able to help you out in that regard.

Gus
 
Hi Larks,
I've built and reworked many locks and Gus' advice is bang on. One critical thing to add is you must make sure the inside of the lock plate is flat. With TRS lock sets, that is usually the very first task before doing any other fitting. Take a wide mill or bastard file and carefully flatten and true up the plate.
9Log7mI.jpg

r2I4BZJ.jpg


dave
 
My lock was bent like a banana when I received it.... that was a challenge to straighten out :rolleyes:
 
I have a few rifle shoppe lock kits, the interior side of the has warps and bumps that do need to cleaned up, the challenge is not to remove too much steel as the plates are pretty thin.

My smallest Rifle Shoppe lock is an 1803 rifle lock and I had some issues with the bridal contacting the tumbler, which is more of a gemotriy issue of the original casting.
 

Latest posts

Back
Top