-
This community needs YOUR help today. We rely 100% on Supporting Memberships to fund our efforts. With the ever increasing fees of everything, we need help. We need more Supporting Members, today. Please invest back into this community. I will ship a few decals too in addition to all the account perks you get.

Sign up here: https://www.muzzleloadingforum.com/account/upgrades -
Friends, our 2nd Amendment rights are always under attack and the NRA has been a constant for decades in helping fight that fight.
We have partnered with the NRA to offer you a discount on membership and Muzzleloading Forum gets a small percentage too of each membership, so you are supporting both the NRA and us.
Use this link to sign up please; https://membership.nra.org/recruiters/join/XR045103
You are using an out of date browser. It may not display this or other websites correctly.
You should upgrade or use an alternative browser.
You should upgrade or use an alternative browser.
Refinishing a TC Hawken
- Thread starter RhinoDave
- Start date

Help Support Muzzleloading Forum:
This site may earn a commission from merchant affiliate
links, including eBay, Amazon, and others.
RhinoDave said:
In case you may not be aware of it, just a word to the wise about doing anything that would further weaken the already relatively weak area around the lock mortise, trigger mortise, lock bolt hole areas.
There has been a chronic stock cracking problem on the left side of TC Hawkens for decades due to so much interior wood being removed for the lock, triggers, and the lock bolt holes.
The cracks always appear on the lock panel...starting on the lower right (looking at your photo) and run up forward right past the top edge of the lock bolt hole, ending at the edge of the barrel bed.
TC finally seemed to fix it by adding wrist strengthening components consisting of the front tang wood screw being replaced with a long 1/4" tang bolt that goes all the way down through and screwing into a redesigned trigger guard.
This also requires a redesigned trigger plate which relocates the front trigger spring out of the way and has a large pass-through hole in the front of the plate for the bolt to pass down through to screw into the trigger guard.
Might want to ensure yours has those strengthening parts before you're finished and start shooting it...would hate to see all the work wasted if the stock split.
I am in the process of refinishing an older TC Hawken as well. I hope I am not highjacking your thread, but we are in about the same stages of the our projects. The original gun was percussion. I bought a L&R RPL flintlock and Lyman Trade Rifle flint barrel in 50 cal. This weekend I took a hacksaw to the tiggerguard and started to modify it. I like the new look, but that's my opinion. It still looks like a TC guard, but it looks a little different. I also made a new side plate out of three pieces of brass, that I soldered together. I am using brass from a door push plate from one of the big box home improvement stores. $7 bucks for a decent size piece of brass. It will use a recessed 8-32 lock screw. I have also included a picture of the reshaped cheek. The next steps are new brass plains style nose cap and a toe plate. I am also thinking of putting an oval brass inlay on the cheek. As usual comments are suggestions are welcome. If you feel that I am highjacking this thread, just let me know. I was hoping that we could kind of work together on our projects, watch each others progress and maybe exchange some ideas.
Thanks, Tim
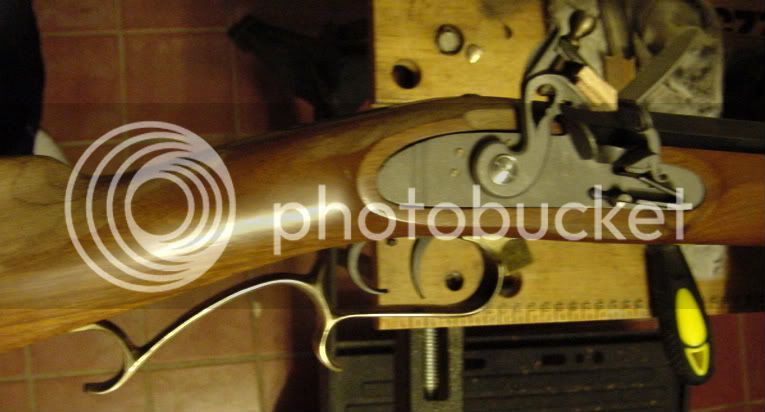
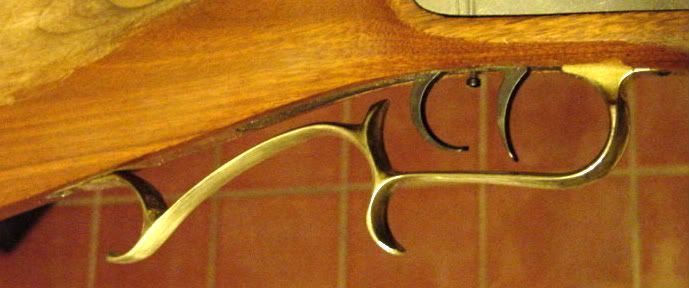
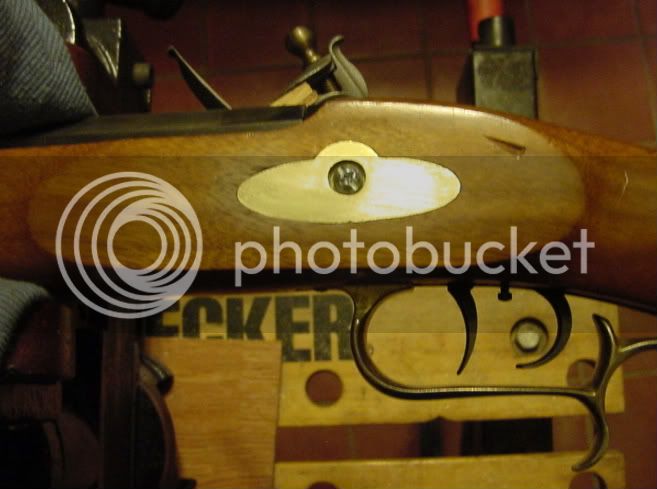
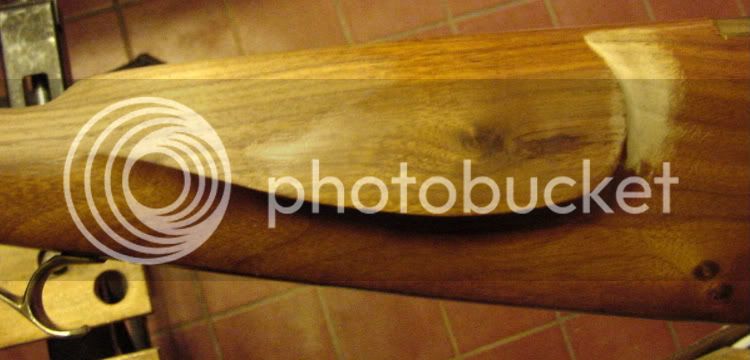
Thanks, Tim


RhinoDave
40 Cal.
Tim,I think it would be great to compare our work as we progress and it would probably keep the thread alive and interesting. RB thanks for the tip. My rifle is the old style with two screws in the tang so I guess I'm going to scrap the idea of doing a little wire inlay in the side plate. I don't want to create any more stress points by driving wire into the side. I might go ahead with the star because it is pretty thin and I won't be taking out much wood. Ebiggs, I am aware of the thickness issue and am trying not to take any wood from the side and lock plate faces, thanks for mentioning it. Haven't done any more work on it because I have to get some tools sharpened first. More updates to follow if and when I get more done. Thanks again for all the tips and suggestions.
Sr. Chief, the lyman barrel was almost a drop-in. The breech hook is not as wide as the TC hook. It only took a little work with a file to make it fit. The underlug for the wedge is in the correct place, but that too only took a little fitting. The under rib is the correct lenght. All in all, not more than 30 minutes of work to make it fit. Well, worth the $105 buck, shipped to my house for the Lyman barrel.
Tim
Tim
RhinoDave,
Thanks, I will continue to post updates as I get stuff done. I too have the old style rifle with the tang screws. Is there a way that the wrist can be reinfored with the purchase of a new tigger and guard? The rifle belonged to my dad who no longer shoots it, so I got that for free. Other than the lock and barrel, I am trying to keep this a low budget as possible.
Thanks, Tim
RhinoDave said:"...RB thanks for the tip. My rifle is the old style with two screws in the tang so I guess I'm going to scrap the idea..."
They're pretty easy to convert...order the new style tang bolt, trigger plate, and front trigger spring.
Transfer all the trigger parts to the new style plate, adding the little trigger spring;
Then drill a through hole using the hole in the new trigger plate as a guid up through the front tang wood screw hole;
Then mount everything and use the through bolt to make a slight mark where it hits the trigger guard...take the TG back off, and drill & tap it at the same slight forward angle that the bolt has.
I've converted several and am an all thumbs kind of guy.
RhinoDave
40 Cal.
RB, Did you get the parts directly from TC or from some other source? I would be interested in converting this rifle while I have it torn down. Any idea on how much the parts cost? I would think a bolt triggerplate and spring wouldn't be very much. Do you have any drawings or schematics?
RhinoDave
40 Cal.
Thanks for the info.
RhinoDave
40 Cal.
I checked my TOW catalog and the triggerplate is listed as is the trigger spring. Track only has generic Tang bolts so I would have to figure out length and thread size before ordering. I couldn't find them on the website so I might give them a call tomorrow. I'm trying to decide if I want to order a different triggerguard before I call them. I'm looking at using this one instead of the stock one.


Make sure there is enough room for the double set triggers. :hmm:
I got the trigger parts from TC this week. That project will have to wait. I haven't had a lot of spare time lately. I had to work over the weekend, but I did manage to get a couple of things done in the evenings. I got the cheek inlay, muzzle cap and toeplate inlet. This weekend's project will be to reform the tail of the new lower thimble to match the stock profile. I haven't tried anything like this before,so I hope it goes well.
Here are pictures of the progress over the last couple of weeks.
Please feel free to comment and make suggestions, Tim.

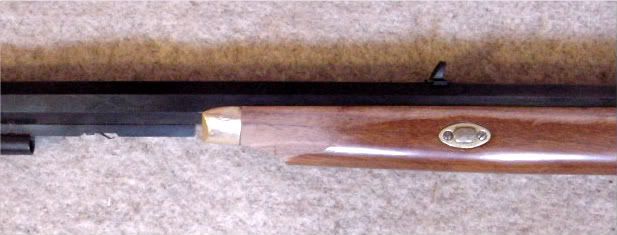
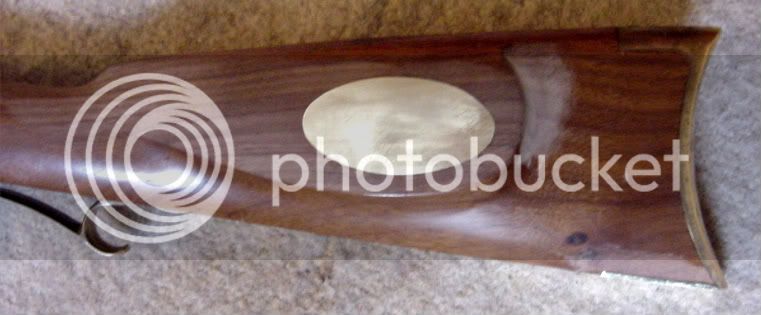
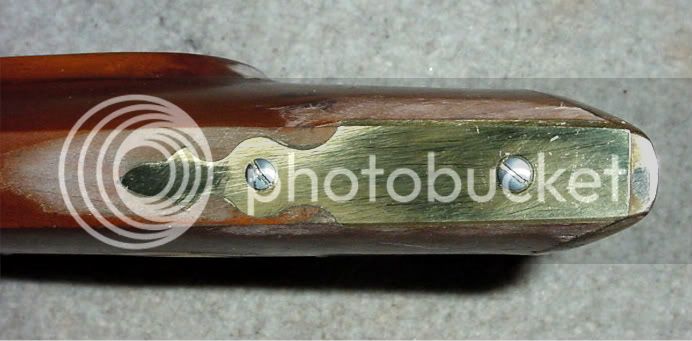
Here are pictures of the progress over the last couple of weeks.
Please feel free to comment and make suggestions, Tim.


RhinoDave
40 Cal.
Nice job. It's really starting to look good. I'm afraid I've been procrastinating on mine as I can't decide on some of the inlay shapes and sizes. I'm only now shaping the toeplate. I've decided to use the star shape and a star cutout on it and add a small star between the toeplate and triggerguard. Pictures to follow when I've actually gotten something done.
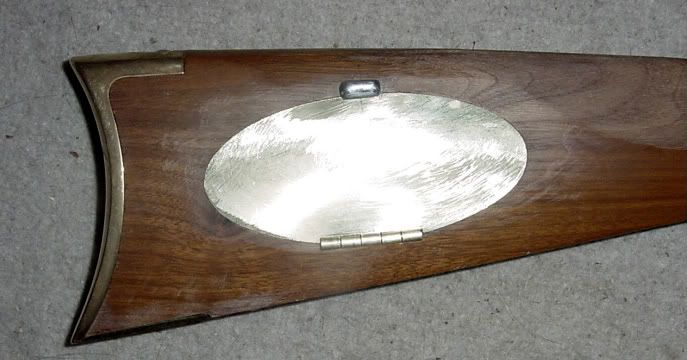
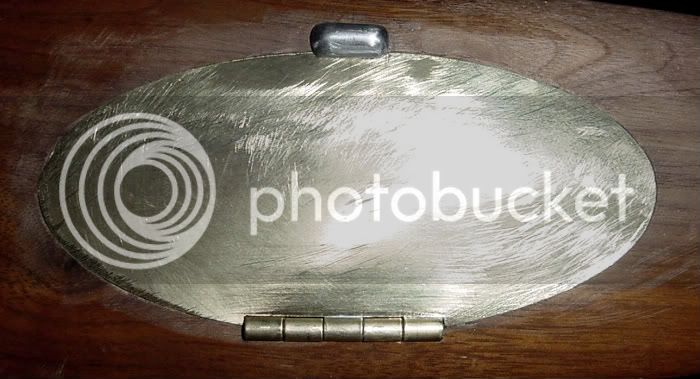
I got some more work done over the week. I was able to get the a new patchbox made and the lower thimble inletted. The patchbox was made from the same brass push plate and a commerial brass hinge that I solder together. I use pretty simple shapes, since I don't have alot of available tools. I just rough them out with a hacksaw and finish shaping them with a file. I got the latch made as well, but I broke the patchbox spring, so I will have to make another one. Now, I need to solder an extension onto the underrib to make up the difference between where the old TC nosecap and the new one ended. Slow progess, but the project is moving forwared, Tim.
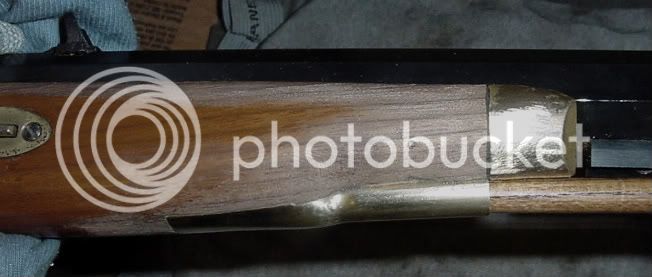


RhinoDave
40 Cal.
Like I said before, you're more dedicated than I am as I'm quite a ways behind you. I really like the nose cap. Did you do all the fabrication on that or did you buy new parts to fit. Here's a few pictures of my progress (or lack of).
Toeplate fab and beginning of the inlays (very slow as I have to sharpen every tool I have.)


I'm also thinking about using wing inlays either spread or next to the barrel wedge plates like these. Any suggestions? Yes , No, separated or not?


Eagle wire inlay layout. Plan on using both silver and brass wire for this.

That's enough for now. I'm still looking at a few other things as well.
Toeplate fab and beginning of the inlays (very slow as I have to sharpen every tool I have.)


I'm also thinking about using wing inlays either spread or next to the barrel wedge plates like these. Any suggestions? Yes , No, separated or not?


Eagle wire inlay layout. Plan on using both silver and brass wire for this.

That's enough for now. I'm still looking at a few other things as well.
Similar threads
- Replies
- 7
- Views
- 271
- Replies
- 27
- Views
- 2K
Latest posts
-
-
-
-
-
Short Barrel Rifles verses Long Barrel Rifles test. Details Below...
- Latest: Relic shooter
-


