• This community needs YOUR help today. We rely 100% on Supporting Memberships to fund our efforts. With the ever increasing fees of everything, we need help. We need more Supporting Members, today. Please invest back into this community. I will ship a few decals too in addition to all the account perks you get.


    Sign up here: https://www.muzzleloadingforum.com/account/upgrades
  • Friends, our 2nd Amendment rights are always under attack and the NRA has been a constant for decades in helping fight that fight.

    We have partnered with the NRA to offer you a discount on membership and Muzzleloading Forum gets a small percentage too of each membership, so you are supporting both the NRA and us.

    Use this link to sign up please; https://membership.nra.org/recruiters/join/XR045103

Symmetry

Muzzleloading Forum

Help Support Muzzleloading Forum:

This site may earn a commission from merchant affiliate links, including eBay, Amazon, and others.

Guest
O.K. so I'm carving/shapeing the side of my rifle from a blank. No woosey precarved for me. Anyone have any feedback as to which way is best. Carve/shape one side and then the other, or should she be on her back and work both sides at once. Any pro's or con's. I personally am leaning towards one side then the other, and relying on a centerline mark. So far I don't think I have turned it into kindling. I keep working at it for about a hour then spend two or three naalyzing what I did. and trying to figure out whether I removed too little or too much. With this new Organization are we gonna get discount rates with a shrink. I mean this is my third build, and I'm still paranoid. :youcrazy: :cry: :blah: :youcrazy: :sorry:
 
Remember, the buttstock should be asymmetrical. You generally want 1/4" cast off with the buttplate being right of center if you're right handed. Otherwise, I think removing equally would be the way to go.
 
I agree with the cast but the left side (for a right handed gun) needs material to form the cheekpiece.
Depending on what is being made, this can be as much as 1/2 inch.
 
draw your center lines , make sure to place you cast off correctly .
i myself do the cheek side first by just ruffing out the cheek peice , from there on i do both sided at on taking some of off one side then some of the other . this keeps the stock form twisting if you lose you center
 
Bill,
Way to go!! You are on the right track. I generally do one side of one specific area and then the other.

Working from a blank gives you the advantage of fitting it to you prefectly, instead of the "average" fit of a precarve,( although some precarves can be modified, if left large enough.)

Make sure you know "exactly" the trigger pull, drop, and cast off you want before you go too far.(A "try stock" will really help here.)

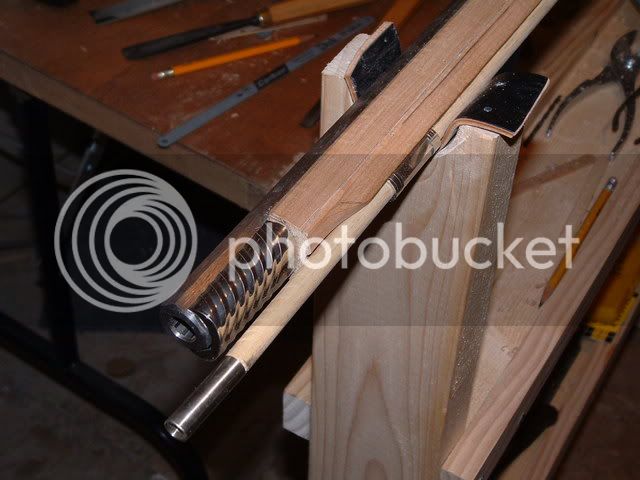
Assuming the barrel and tang are inlet, and centerlines established from there, top and bottom,(they will have to be redrawn many times.), the first step is to inlet the LOCK at the right place. This determines both the trigger location, and thus the buttplate location(for correct pull), but more importantly, establishes the width of the wood on the lock side of the stock.(usually a fat 1/4" or so of wood in lock area, if you leave the plate bevel proud.)( I then do the same on the "washer" side). This, along with buttplate and and barrel width, will determine the measurements for the rest of the whole stock, both fore and aft.

I always figure a fat 1/8" width of wood ON EACH SIDE of the barrel from foreward of the lock area to entry thimble,(wrist will be this same width or a bit wider for a swamped barrel) and a fat 1/16" from there to muzzle, depending on style,and following countour of barrel, if swamped.

Also, do not make the stock too "HIGH" through the wrist and lock areas, that is, You do not need more than about a fat 1/8" of wood beneath the RR hole from the guard to entry thimble, IMHO , and also keep the panel around the lock "slim", about 1/8".

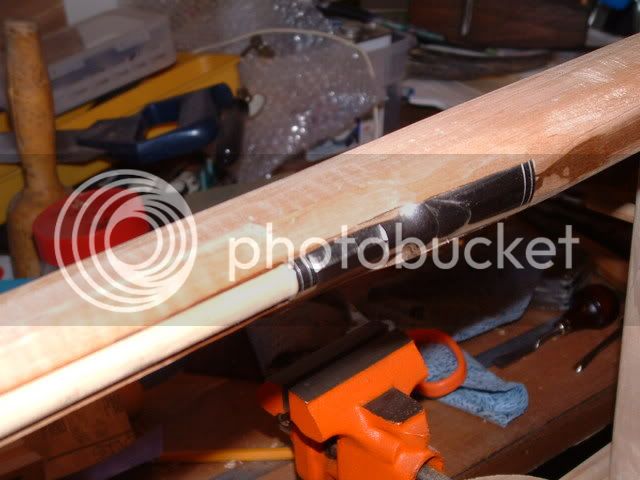
Another mistake some folks make, is leaving the edges of the buttplate too "thick", in the side view. Most originals show only about 1/16" or less on the side view of plate edge.

As said before, take the cheekpiece into consideration.

I also do the butt one side at a time, always working from the centerlines. Different styles, and :results:

Sorry for the ramble, and hope this helps instead if confuses. (Get EVERY BUILDING BOOK you can get your fingers on, and adapt each to YOUR style.

Regards,
Terry
 
Thanks Stumpy, Zonie, CaptChee, and Terry. I can see there's different approaches with a common thread (center line being most important) This is actually my third scratch build, but I still feel like a first timer at times, and feel the need for support, and reassurance, as it has been 25 years since number two. It does appear though that it's like riding a familiar bike, a little shakey at first, but gets steadier the more you peddle. Again thanks for the insite and direction. :redthumb:
 
I always take licks on both sides of the buttstock and forestock with planes, spokeshaves, chisels, whatever I am using to rough shape it. Yes the buttstock is assymetrical but I find that removing wood from both sides keeps me on track. I have a theory that the tools we use actually help determine architecture and so I want to use the same tools in the same order on both sides.
 
Rich, good point about same tool on both sides. As I mentioned in another thread, I had a brainfart, and used a power plane cause I got in a hurry. Fortunatly nothing that I can't repair, and the last time I'll use a power tool other than the drill press on a build. I'm using almost exclusively 100year old plus tools, that seem to be the best for the job. It's ending up that my primary tool is becoming a very, very, very sharp shallow gouge. It gives me great control, and allows for very thin slivers to be removed with very little effort, and all I have to do is keep removing the high spots to get flat. Again thanks for all the help getting back on the bike, it's a grand addiction. :haha: Bill
 
I too like to work a bit from each side, trying to keep from loosing the centerline. But I do have to admit, even though I have been collecting and using antique tool for 20+ years, the Sureform and Microplane rasps are my favorite gunstock shaping tools! :imo:
 
Hey Bill, how about some pics? And remember: throw that electric planer away! Hand tools....just keep thinking hand tools. :thumbsup:
 
I'll try some pix, see if I can get them to post. All rough butt-shaping was done with a a very wide shallow gouge with a mallet, then a drawknife, then different spokeshaves, then rasps, files and scrapers.
PierceNo8comb.jpg

PierceNo8patchboxside2.jpg

PierceNo8locksidefull.jpg

CS2lockafter.jpg
 
Here's some of the job so far.
DSCF0024.jpg
DSCF0026.jpg
DSCF0023.jpg
DSCF0027.jpg
This last one shows the repair of my OOPs, as far as I have gotten with it. The different color is from the oxidation of the wood I'm using which is from a slab that was in that location on the full plank. Did start my vinegar stain today. Three tree inch pieces of barbed wire in about a pint of vinegar. Have'nt decided on a trigger guard yet, but am leaning towards a gillespie South Carolina, Whats yerall opinion. TTFN Bill
 
So far so good, Bill. Hey wait just one minute.....you're pretty accomplished from what I see. I think we should be asking you some of those questions!

Nice job there, Bill! :thumbsup:

(especially the repair patch!)
 
Bill... that's an interesting gun vise you have there... Is it bolted to your bench or set-up to be removable?
 
I'll try some pix, see if I can get them to post. All rough butt-shaping was done with a a very wide shallow gouge with a mallet, then a drawknife, then different spokeshaves, then rasps, files and scrapers.
PierceNo8comb.jpg

PierceNo8patchboxside2.jpg

PierceNo8locksidefull.jpg

CS2lockafter.jpg


Hey, how about a flip side so we can see the other side, some of the carving and the cheek piece.
 
Bovey, search builders bench a couple month back I had pics, and specs for building it, it's my interpretation of one I saw on another site. if you can't find it PM me and I'll email you the info. Oh Yeah, it's free standing
gun20vise.jpg
This is the original I found, I modified the vice part some.
 
Back
Top