• This community needs YOUR help today. We rely 100% on Supporting Memberships to fund our efforts. With the ever increasing fees of everything, we need help. We need more Supporting Members, today. Please invest back into this community. I will ship a few decals too in addition to all the account perks you get.


    Sign up here: https://www.muzzleloadingforum.com/account/upgrades
  • Friends, our 2nd Amendment rights are always under attack and the NRA has been a constant for decades in helping fight that fight.

    We have partnered with the NRA to offer you a discount on membership and Muzzleloading Forum gets a small percentage too of each membership, so you are supporting both the NRA and us.

    Use this link to sign up please; https://membership.nra.org/recruiters/join/XR045103

Refinishing the 1847 Walker and percussion pistols

Muzzleloading Forum

Help Support Muzzleloading Forum:

This site may earn a commission from merchant affiliate links, including eBay, Amazon, and others.
Joined
May 30, 2020
Messages
831
Reaction score
742
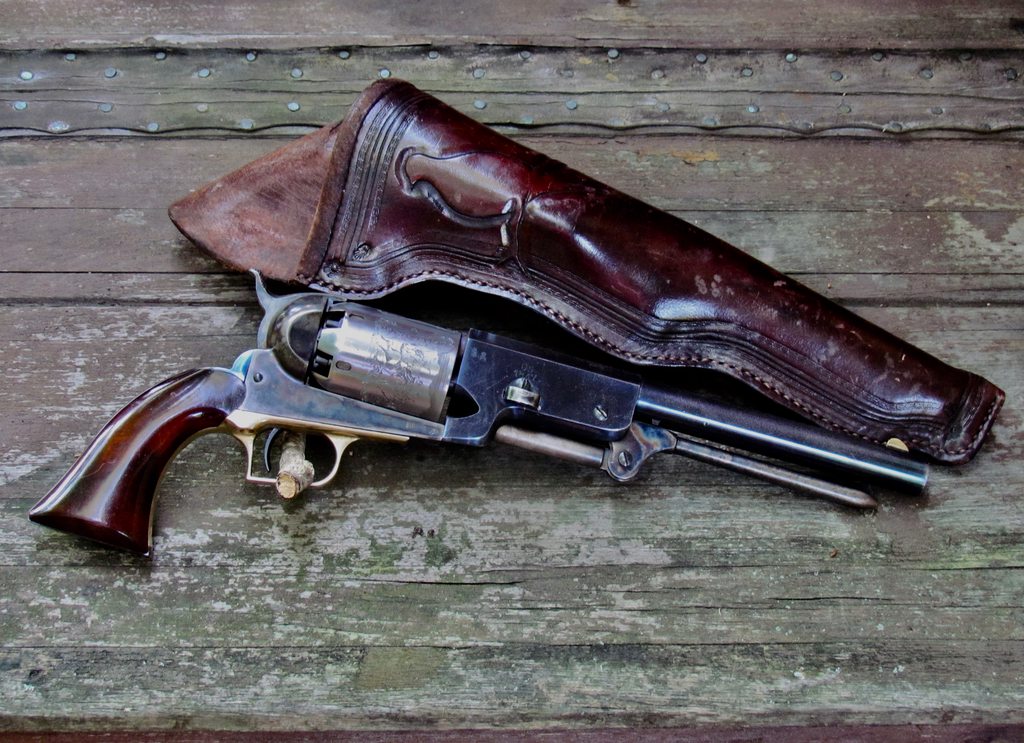
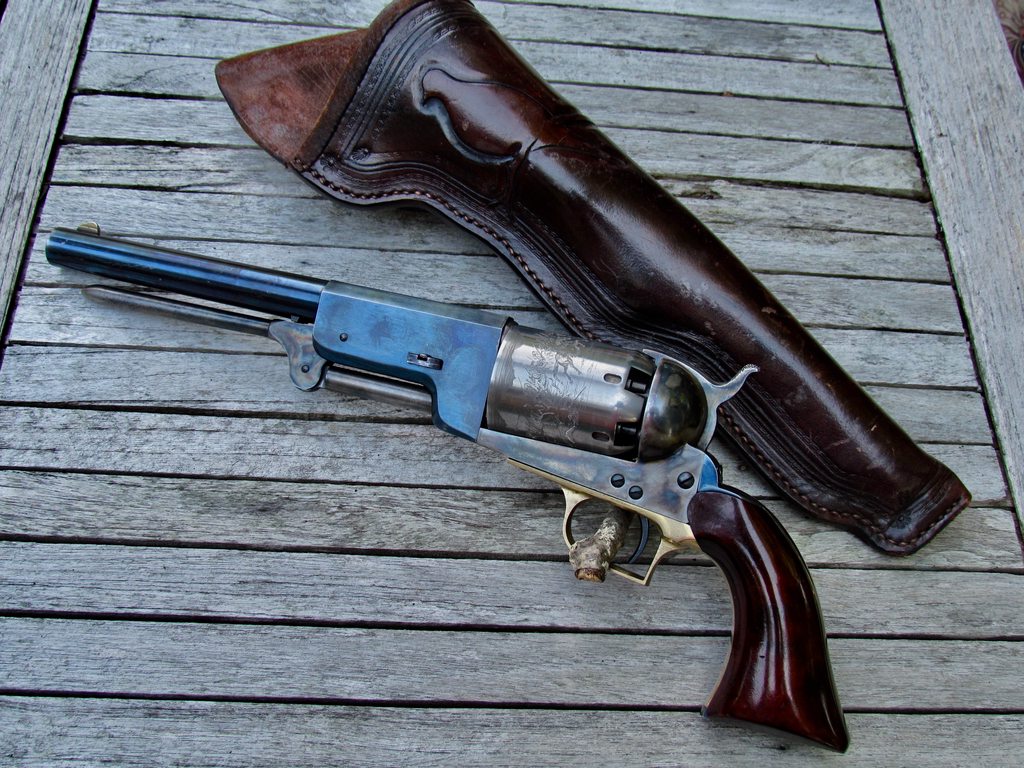
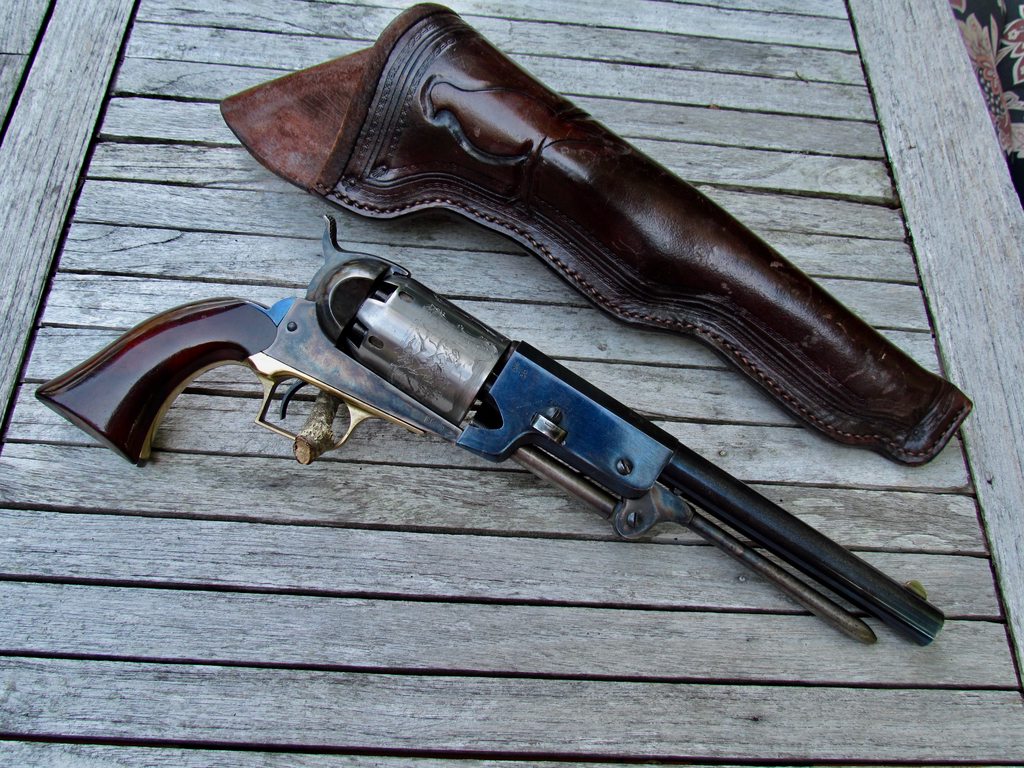
I wanted to start my own thread rather than thread crash the poor soul who've I've been thread crashing regarding Walker pistols! I recently picked this Walker up for a crazy deal that included the pictured vintage Meyer holster. Unlike some of the more talented amoung us I'm not capable of making the kind of holster I wanted ( Slim Jim) and then finishing the leather.
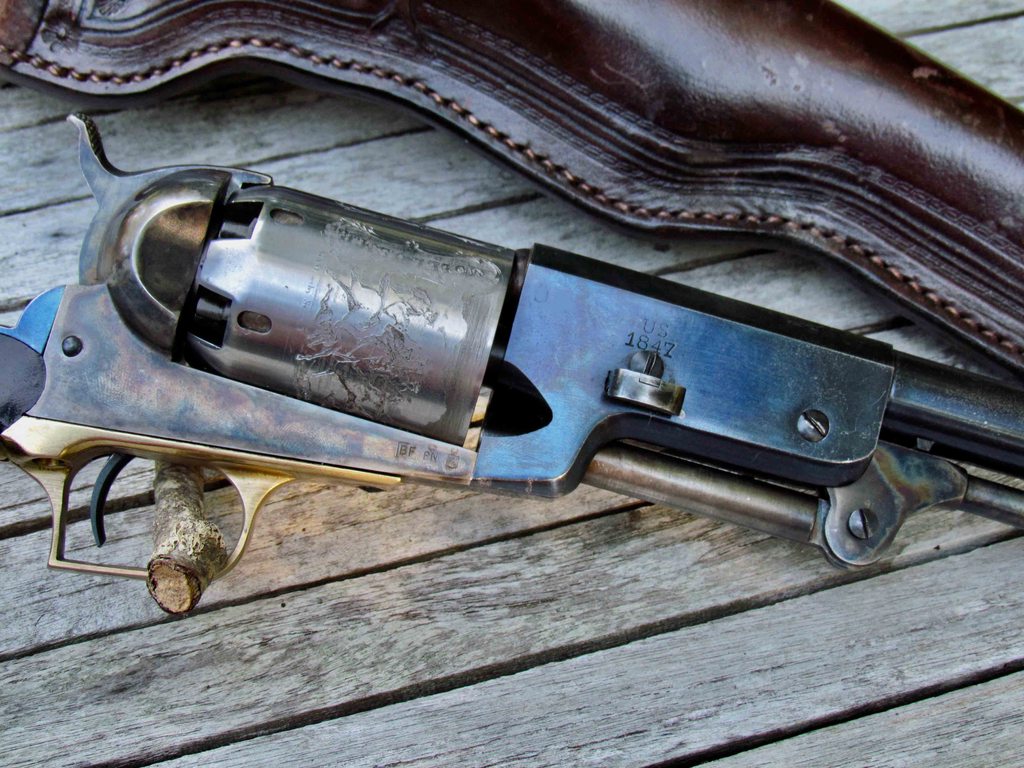
I'm posting to get some hands on feedback. I wanted to take down the bluing of the pistol and have the materials for the job. My question is how to go about it. Rather than removing the bluing entirely I'd like to slowly take it down so traces of faded-blue -turned-brown remain in the recesses.
I havewhite vinegar and EvapoRust on hand, as well as some Birchwood Super Blue paste and Plum brown. I don't want to immerse the pistol but rather use a soft cloth to go more slowly, for gradual vs instant results.
Have any of you done this work on percussion pistols ? By all means please post your experiences and pictures in this thread, looking to gain the knowledge!

iia2ANch.jpg


uA0ioT0h.jpg


yihSyR7h.jpg


sXkznEfh.jpg
 
This is another gun ( not the one in the original post) which has had it's finished removed.


Walker#1.jpg
 

Attachments

  • Walker#6.jpg
    Walker#6.jpg
    229.8 KB · Views: 142
Last edited:
I beleive the original Colts had the bright blue that Uberti offers on their guns. I beleive they refer to it as charcoal blue. My understanding is that it is not very durable and simply putting the revolver in and out of a holster will wear it off pretty quick. You might want to have it blued in this way and it will wear in quick. It sure looks pretty on a new gun but I have avoided it because of the poor wear qualities. A friend of mine did some small parts in his yard that involved packing the parts in charcoal and burring them in the ground and I think he built a fire over the charcoal and dug them out with the blue finish. I can't remember exactly just what he did but I'm sure the directions are on the web if you want to give it a try. Hope this may help but I am sure more knowlagable members can tell you more on the original finishes and the blueing process.
ThreeCrows
 
That's a good looking Walker. I agree with GT. Let the gun wear in naturally.
Think about it. All weapons issued back then were brand new, and kept that way cause the owner`s life depended on it.
Plus ordered to keep weapons cleaned and oiled. A lot of those boys it was the first time to have a brand new shiny weapon.
Don`t understand why reenactors want to have a gun look like its 100 yrs. old, when Quarter master just issued you the gun.
I did the ageing process to a revolver I had about 50 years ago and used a product called Navel Jelly rust remover. Didn`t hurt the metal
and left the gun with a light blueish gray color. I don`t think Navel Jelly is made any more tho. After I did it I wished I hadn`t.
Cause I`m gonna keep my weapon as clean and new looking as I can. Any wear an tear will be honest.
Any way just my 2 cents.
Good luck.
Maurice
 

Attachments

  • pix230507849.jpg
    pix230507849.jpg
    186.8 KB · Views: 123
That walker looks VERY close as is to the best condition museum grade originals.

I wouldn’t refinish it! The cylinder looks GREAT too.

The only thing I might consider is refinishing the grips. If you look at the originals, even the really nice condition ones still around, they do not have such a shiny gloss finish like the Italians enjoy so much. They are also more rounded and sort of “melted” at the butt of the pistol on originals.

If you did that honestly it’d look real close to how a new one would’ve. One thing you can do if you want to add some patina over time is rub a dirty cleaning patch on the outside of the gun after cleaning. It’ll replicate the original look in time nicely.
 
If you look at the originals, even the really nice condition ones still around, they do not have such a shiny gloss finish like the Italians enjoy so much.
I disagree. Although I haven't personally handled any pristine original specimens, photographs of them indicate a high gloss finish on the grips.
 
I personally have never seen original Colt Walker grips- in any condition have the kind of polish the Italian repro grips do.

I agree.

The grips appear to have an oil type finish and I’ve looked at a bunch. But this is not “high gloss” and the Ubertis are simply overdone in this regard.
 
That's the kind of finish I'd like to achieve on the grips.

I'd call that 'condition excellent' if not minty. Case colors still there though faded. Grip panels 'condition very fine- excellent'. Original bue mostly there with slight fading. Brass is mustard colored excellence. Add in the case accessories, card from Col Colt himself and the miniscule numbers which were made and you've got a six, excuse me seven figure gun.
A very rare and beautiful condition percussion pistol.

 
Last edited:
That's the kind of finish I'd like to achieve on the grips.

I'd call that 'condition excellent' if not minty. Case colors still there though faded. Grip panels 'condition very fine- excellent'. Original bue mostly there with slight fading. Brass is mustard colored excellence. Add in the case accessories, card from Col Colt himself and the miniscule numbers which were made and you've got a six, excuse me seven figure gun.
A very rare and beautiful condition percussion pistol.

The finish was most likely achieved with a linseed’s or a tung’s oil. You could use many things, even Birchwood Casey Tru Oil from the local gun shop. Rub it on in THIN layers with your hands, working it in to build up heat. Use only about one drop at a time and really rub it in till warm. Allow a day or two to dry (if a moist climate, maybe longer) and repeat probably 3-6 times till you get the desired results. It will look a little too glossy so then what you do is let it cure up for a month or so until it doesn’t smell like solvent or anything then use rotten stone and mineral oil to buff down the sheen to get this satin look.

There are a million ways to do this. Also after stripping the finish you could round out and soften some of the corners like you see on the originals. Be careful not to remove any wood where it touches the frame as that could leave a gap. Also, you could add a little quality walnut stain to darken them before finishing.
 
What would you use to strip the finish ? I considered simply sanding/ steel-wooling them down but the finish is so thick I'm now thinking a remover is what I need.

I use CitriStrip and it works real well and is natural based. Smells of oranges.

Layer on a thick layer and left sir covered in plastic for as long as overnight. It’ll sort of turn to wax and then scrape the wax off with an old credit card etc. and the finish will be gone. Remove any residue with a rag and mineral spirits or paint thinner. Works great!
 
I really love Tru Oil wood finishes. I found this tutorial on how best to use the CitrisStrip and Tru Oil combo, what do you think ? Can Try Oil be mixed with leather dye for a darker finish ?


I've not mixed leather dye with Tru Oil but used Fiebings leather dye as a wood stain and it works great.

You can experiment on the back of the grips with a little stain or dye to try and find the color you want. Check out Laurel Mountain Forge stains, lots of rifle builders use it and it’s good stuff. I personally would avoid the common Minxwax brand stains as the color is just muted and bland.

Also be sure to “whisker” the wood before staining and finishing. This will ensure they are nice and smooth and will help the stain make an even color.
 
Back
Top