• This community needs YOUR help today. We rely 100% on Supporting Memberships to fund our efforts. With the ever increasing fees of everything, we need help. We need more Supporting Members, today. Please invest back into this community. I will ship a few decals too in addition to all the account perks you get.


    Sign up here: https://www.muzzleloadingforum.com/account/upgrades
  • Friends, our 2nd Amendment rights are always under attack and the NRA has been a constant for decades in helping fight that fight.

    We have partnered with the NRA to offer you a discount on membership and Muzzleloading Forum gets a small percentage too of each membership, so you are supporting both the NRA and us.

    Use this link to sign up please; https://membership.nra.org/recruiters/join/XR045103

Traditions Kentucky Pistol

Muzzleloading Forum

Help Support Muzzleloading Forum:

This site may earn a commission from merchant affiliate links, including eBay, Amazon, and others.
What are you trying to do??? Why would you jam a dowel down the bore to brown it? Unless you are intentionally pouring browning agent down the barrel you don't need to plug it... Place a good coat of oil inside the bore via a patch to protect it from moisture during the process. Only time I plugged a bore was forgetting to charge my rifle... A .54 caliber ball will seal your bore nicely. :doh:
 
Same here. Have one in the barrel of my Bess that I'm browning right now.
 
The directions called for it? Told me to jam one in there.

Wine cork is a great idea! an excuse to drink wine?

Ill take pictures in a few hours when I check on my gun. But man, it is a mess. I don't know how I can stop it from being streaky when I have the inscription and that peg sticking out. You guys will see and critique. Not too worried, $175 pistol, and I knew this was going to be practice, better to make it now than on an expensive gun.
 
Interesting... Never used a stick or cork. Mason jar with boiling water, a trash bag and parts to be browned. My method is this, I place the boiling jar into my igloo lunch box... Parts or barrel to be browned next, then slip that trash bag over top of everything and there ya go, instant humidity. Has never failed yet.

Note, I do coat the bore with a rust inhibitor to protect it from the moisture. Usually use a light coat of ballistol or bearing grease.
 
I dont understand your method. How do you hang your barrel?

I did just find out that showers create far more humidity than baths. I had used the spout for bath twice before, now I used shower, my barrel is turning black.

Also, by the "nipple" I believe, the piece that sticks out of the barrel, how do I make sure that gets browned evenly?? I had to take my finger and dab it after I still saw some shiny parts. This is quite fun.
 
This is kinda fun, but not so cost effective. I can see where there'll be streaks. Like to get this resolved before going to a more expensive set.
 
Browned my barrel and cleaned with baking soda and water. Had a few questions

#1) Is that pitting?


#2) Is there anyway to remove this nipple so that I can brown it properly?


#3) Just showing it did mostly cover up the letters, enough to my liking. Im not sure more bluing would have covered it up more.


#4) Again is this pitting? And is the answer to rub with 0000 steel wool?

#5) just showing overall barrel.


Would like to get these questions addressed before I start on my actual long rifle.
 
I don't hang the barrel, I also don't use LMF browning solution. I prefer R.E. Davis browning solution personally. The method I described in the previous post has yielded wonderful results numerous times. Think what your seeing that resembles pitting is an excessive buildup of the browning agent. Also, that nipple is your powder drum, it can be removed easily but most have flats that easily allow you to use a standard wrench to remove it. Your style will need to be removed with channel locks or vise grips which I wouldn't recommend doing since you'll likely chew the drum up. I would grind/ cut two flats on the drum allowing the use of an adjustable wrench for easy removal. Easy and quick to do! :thumbsup:
 
It's "scale" you can rub it off if you want. But you'll remove the finish too.
It could have been dealt with during the process with a patch of course fabric like canvas.
Baking soda does work but in my experience not very well, I use Household Ammonia.
Do Not remove the Drum, it's indexed and drilled at the factory.

The Glory of LMF browing is it can all be easily removed with 220 sandpaper on a block. It's not that hard and you can try again to get the results you want.
Here's how the drum is installed;

CVA1.jpg
 
Wow! Good explication on the drum... Didn't even know those were indexed from the factory. Good to know for future reference. If one does remove it, I always make an index mark so I know the exact location upon reinstalling.
 
Ugh. That's going to make it quite difficult. There isn't really a neat way to go around it. I guess ill have to use a small cloth.

And yes, that was just excess rust, rubbed most of it off with my denim jeans. They told me to use old ones, but I definitely plan on washing these ones and reusing it. Unfortunately with my work schedule I won't get around to this barrel until March. Still debating on whether to do a new rifle or pistol as the kits are only about $200 difference.
 
So im lmf browning my kentucky rifle...zonie said too much moisture could be bad. Is that point when the barrel gets wet from moisture? Because i dure did it just now
 
You probably want to hear from someone else and I suspect they are on the way.

In the meantime, the humidity should not make the barrel wet.

Often, putting a cold object like a barrel in a very humid area will cause condensation to wet the surface.
If this is the problem your having, try warming the barrel up before placing it in the humid area.
That will keep any condensation from happening and as soon as the barrel gets to room temperature the moisture in the air will begin working.

Have fun. :)


Does the browned barrel clash with the factory blued percussion set?

If so, how do I blue the percussion set? Or somehow make it match?
 
Now your getting into what individuals like and dislike.

As for me, I have several longrifles with browned barrels and blued lockplates and one (in the photo below my posts) that has both the barrel and lockplate "in the white".
I also have some longrifles with browned barrels and browned lockplates and a double barrel shotgun with rust blued (blackened) barrels with polished bare metal lockplates.

Do whatever suits you and makes you happy.
 
So, kinda not my pistol but my rifle too.

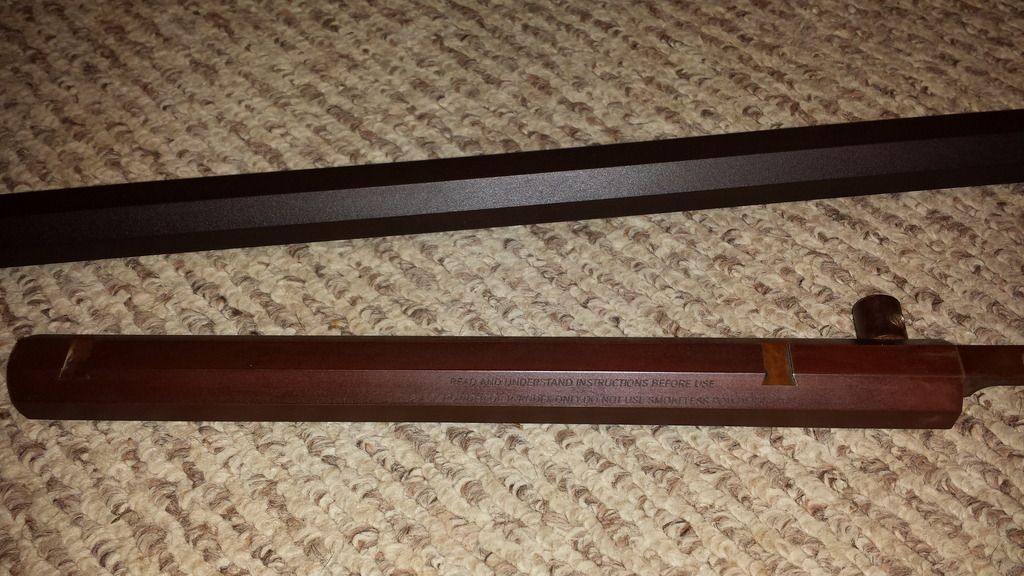
Look at my bluing job. The pistol barrel is one I kinda did whatever on, you can see it is more brown and if I had more pictures, you could see the splotchiness. The kentucky rifle barrel though is more darker and matches the blued percussion pieces. I like it.


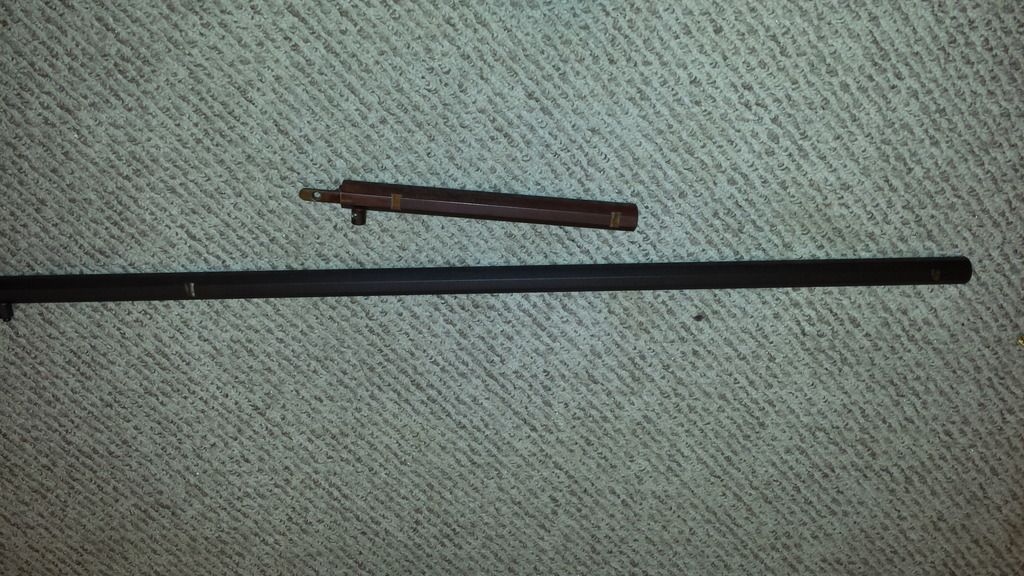
This one is kentucky rifle

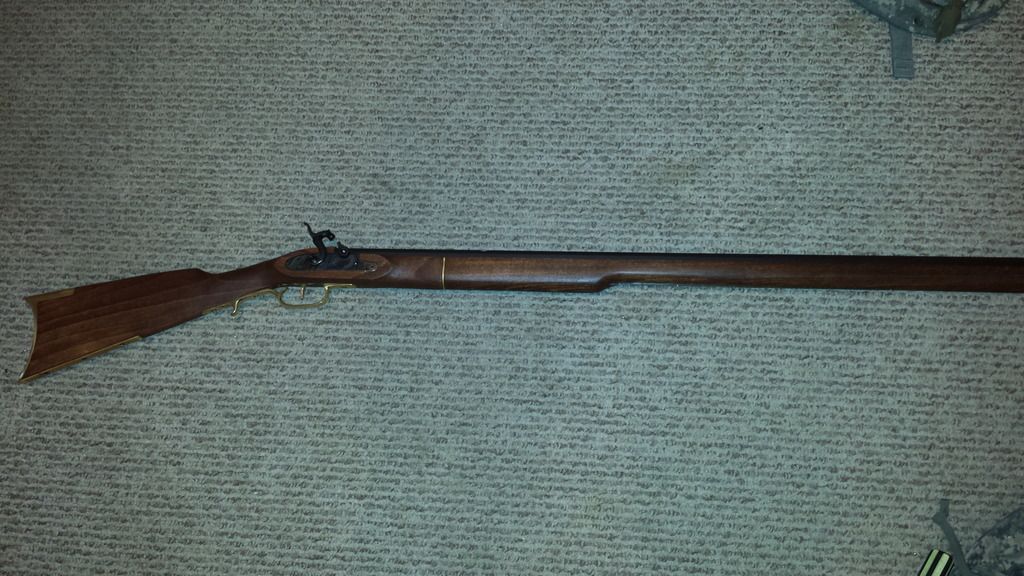
Gun mostly pieced together without the little piece on the bottom of the barrel done.

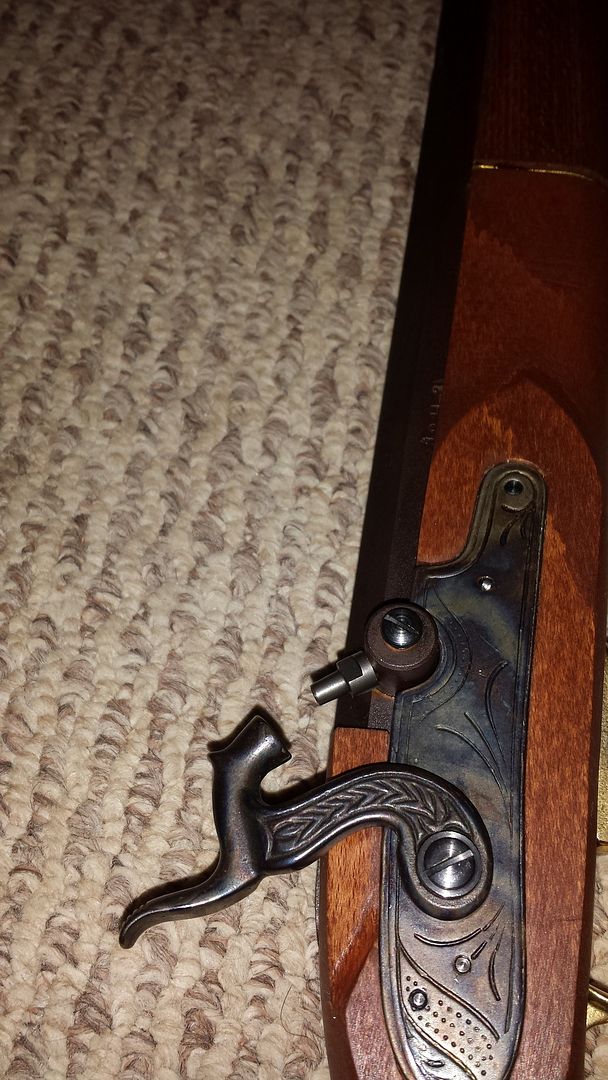
Close up of the blued percussion and the barrel

Problem #1 The brass piece does not fit so well.

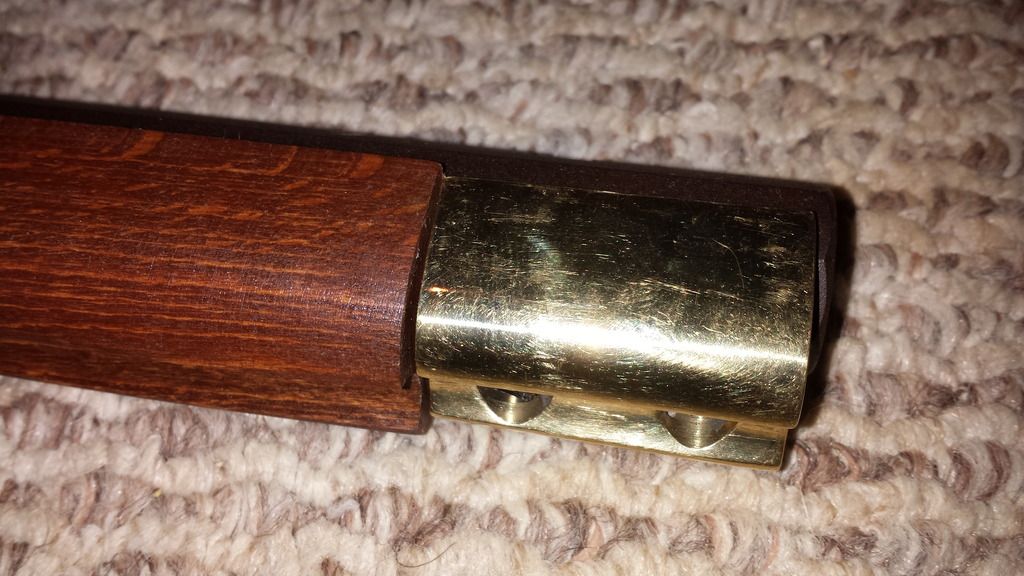
problem #2 For some reason I never measured this and didn't sand it down. The brass piece is not flush with the rifle stock.

So Problem #1, how do I cut into the stock? I just don't know if I should cut longer lengthwise?

Problem #2, should I just resand and reshape?

Since this stock has had tung oil put on, does it matter if I sand down or cut as needed and then am I able to restain?

If I put tung oil on the barrel, and I want to redo the barrel (kentucky pistol) do I need to strip the oil to re-blue it?

Lastly, I didn't make that trigger assembly flush with the wood either.

As much as i'd like to rush to a more expensive project, i'd like to fix these things first.

Any comments would be appreciated.
 
Yes. you will have to sand the wood to match the shape of the muzzle cap.
Do not just sand the area right next to the cap.
Instead, blend the size and shape into the wood at least 4 to 5 inches behind the cap.

By the time you get all of that wood behind the nosecap removed so it matches the metal you will need to restain and reapply the finising oil to the area.

Although you don't have much wood to work with, blend the loser area by the ramrod groove like the lower sketch this picture.


If you applied any kind of oil to the barrel it will have to be removed before any re-browning can be done.

To remove the oil you can use lacqure thinner, MEK, Acetone, Disk Brake Cleaner or Coleman gasoline. Do it outside and don't set your self or your house on fire. Most of those things are very flammable.
 
Thanks for the pictures...is a method to douse it in acetone and set it on fire? I assume it would brown the barrel pretty well...
 
Well, it's been a while and I finally got about 99.9% of my rifle finished. I just need to do some sanding around the tiny holes I drilled to pin the barrel to the wood stock and fill with stain. My lesson learned, you get what you pay for and you get what you put into it.

My project was the Kentucky Traditions Rifle, cheap set and I chose it as it was a 90% complete kit that required basic sanding, drilling, staining, and least amount of time. Took me several hours as this was my first rifle. I'm sure it would've turned out nicer if I had spent more time doing more sanding layers, but, I just wanted the basics down to move onto harder kits.

Overall, it was fun and I have you guys to thanks for all the help. I'm not sure I want to embark on ANOTHER one, though I do have my pistol I need to finish up. I'm pretty sure i'll do another Rifle (flintlock this time) as I have alot of the bluing agent left (I hope there is no expiration date).

Anyways below are some pictures. If anyone has any questions about this kit or want more pictures please let me know. It's not anymore as beautiful as most of these rifles on here, but I wasn't going for that either.


This is where I had to drill exactly to get the bolts to go through predilled holes. I will be filling them with wax and stain


I'm wondering for next time if I should shave down the wood right as the main part of the barrel meets the wood so that all the wood is flush with no sharp edges (near the percussion cap


You can see that next time i'll be doing a better sand job


Just the other side view


This is the kentucky traditions rifle kit. Not everythigng will be fitted well

 
Back
Top