• This community needs YOUR help today. We rely 100% on Supporting Memberships to fund our efforts. With the ever increasing fees of everything, we need help. We need more Supporting Members, today. Please invest back into this community. I will ship a few decals too in addition to all the account perks you get.


    Sign up here: https://www.muzzleloadingforum.com/account/upgrades
  • Friends, our 2nd Amendment rights are always under attack and the NRA has been a constant for decades in helping fight that fight.

    We have partnered with the NRA to offer you a discount on membership and Muzzleloading Forum gets a small percentage too of each membership, so you are supporting both the NRA and us.

    Use this link to sign up please; https://membership.nra.org/recruiters/join/XR045103

Cabela's Blue Ridge Flintlock

Muzzleloading Forum

Help Support Muzzleloading Forum:

This site may earn a commission from merchant affiliate links, including eBay, Amazon, and others.
I got the 45 flinter frontier also and love the gun its light hangs well, a bit light in the butt areas but i installed some lead under the butt plat to even it out a touch. I did drill out the vent liner to 5/64 and its got really fast ignition time now and very reliable. I use the 7/8 english flints from TOTW. I laugh my backside off when i hear snap from the cap guys and hear them grumble. You Sir have a great rifle. Let us know how the 54 works out.
 
What a day! I'll add to this tomorrow but so far:

The lead flint pad tossed the flint on my third shot.

The "Hawken" sights have the rifle hitting about a foot low. At 25 yards.

Hangfires occur often and they are substantial, in spite of my liner mods as outlined earlier.

The muzzle is very sharp/rough and it seems the rifling is, too. I brought out several cleaning patches that had been sliced through in places.

Aside from all that, it carries well and is great fun to shoot when all goes well. I think it can be modified and tuned into a very nice working rifle. Here's a video I shot of the only "game" harvested today, Robinson Creek. Near-instantaneous discharge on this one: Blue Ridge .54
 
J. Williams said:
Hangfires occur often and they are substantial, in spite of my liner mods as outlined earlier.

This is pure a SWAG (Scientific Wild Assed Guess :grin: ), but I get lots of hangfires when I get the powder too tight under the ball. I still like a firmly seated ball, but as a last step before priming I poke my vent pick into the vent to loosen the powder back up a little. Sure seems to help in all my guns.
 
This is an exchange of PMs between the late Paul Vallandigham and I.
At the time I was new to good flintlocks and I had a custom rifle that was giving me some problems. It was a 45 with a Chambers Late Ketland. It's one of the best locks on the market.

Now I do not care for lead wraps but Paul was a big fan of them. I did not get into the springs because the lock functioned well in that area.

His advice and explanations on how a flintlock burns powder is priceless.

I left the vent at 1/16 and I used mainly 2ffg as prime from then on. As the years went by that rifle would function well with 3ffg prime and 3ffg main charge but it also done well with 2ffg main and prime as mentioned and even without picking the vent. She became very reliable and if it was not excessively fouled, she was sure fire.

I did deepen the pan and polish it. I also ever so slightly polished the vent hole with a pointed stone. Not enough to truly cone it just enough to polish the entrance. It was a simple drilled vent. The rifle fired reliably with a Ka Pow. While not as quick as my coned Siler gun, that rifle ended up being like the old Ronson Lighters, "Lights the first time, every time."


paulvallandigham said:
Travis; Take a look at my article
www.chuckhawks.com/flintlocks.htm

Its about tuning and shooting flintlocks.

You don't say where the touch hole is located in relationship to the top edge of the pan, but you need .030" of space between the top of the powder and the vent for good ignition. Not many builders put the holes that high, so you have to bank the powder away from the vent, to get ignition.

Also, you don't mention using a vent pick through the vent to poke a hole in the powder charge before priming. The hole exposes lots or powder granules to the heat from that burning prime, and provides oxygen ( in that hole) to suck the fire into the charge. Use FFg powder in flintlocks, because the larger granules leave more oxygen in and around each granule, than does FFFg. You also don't want to compact the FFg powder charge, either by holding the barrel straight up, so that the powder falls all the way to the breech when you pour the powder into the muzzle, or by compressing the powder with your PRB. Just seat the PRB on the powder so you can feel a slight amount of grinding when the ball touches. . Mark the rod for your permanent load, and load to the mark thereafter. You will find its much easier to load to the mark if you clean between every shot, rather than after 3 shots. And, your accuracy will be much better, too. If you choose to continue to clean only after 3 shots or more, you will need to have a bore brush handy to help you get rid of the crud ring that developes right where the PRB is seated.

The frizzen has a boot heel that is the cam on the frizzen spring. Its sound like that needs to be polished, too, and probably re shapened. The frizzen should open with no more than 1.5 lbs. of tension put on the top of the frizzen. See my article. The true test of a good lock is that it will spark well, without a frizzen spring in the lock. Think about it: the only job that spring has to do is keep the frizzen closed when you point the muzzle downward. It is not there to provide resistance to the flint!

Next, the flint should be scraping steel bits off the face of the frizzen, and not gouging out steel. Ckeck the angle at the point of contact where the flint edge and the frizzen face meet. The angle should be close to 60 degrees, with the center being the POI, the bottom leg of the angle being a line from that point along the top of the BOTTOM JAW of the cock, and the top arm of the angle being a line from the point of impact, to the top of the face of the frizzen. You may have to enlist the help of a friend in holding the protractor and a straight edge to get this measurement, but with good hands, I have done this for years all by myself.


Check the mainspring tension, too. I describe how in the article. There is no reason for a 30 lb. mainspring, and I have seen many springs that are that strong, and stronger. 15 lbs. is more than enough to spark the frizzen.

Since I wrote that article I have learned another thing to do with that main spring, and that is to give it some Wrist action. You do that by grinding or filing a short, steep bevel into the hook at the end of the long arm, and then file the long slow tapered bevel from the point 1/5 from the bottom of the V, to the short bevel. This short bevel allows that last half inch of the spring arm to flex more than the rest of the spring, altho not by much. You want the entire arm to flex as one unit, so you don't wear out the spring.

The affect of this kind of shaping of the mainspring allows the whole arm to move the tumbler around its axis, as the cock is rotating forward in its fall. Most locks have the full cock notches set so that the cock goes back beyond the 90 degree position, so that the flint has to climb back to the 90 degree position before it can begin gaining speed going forward. That wrist action helps to slam that flint into the frizzen faster as the tumbler is turned down over that 90 degree position, and is now using gravity to help it gain speed in rotation. Done right, you should see just a slight amount of bending at that short bevel when the cock is at full cock. Otherwise, the entire working arm should be straight. I call it a " wrist " because it reminds me of watching a baseball pitcher's arm at the height of his pitch.

If you have questions, please feel free to ask me. I think we can get that flint giving you 100 sparks if you will have the courage to do the things you need to do to tune that lock. And, in the process, we can get you having 100% reliable ignition. The load you have is okay for a .50 cal. Its a very hot load in a .45, where 60 grains will give you more than 1900 fps. In a 50, 80 grains should give you 1650-1700 fps.

You can tighten your groups by using OP wads, or a fller between the powder and PRB, as well as lubricating the barrel in front of the PRB with a heavily lubed cleaning patch. For speed, have them already lubed in a separate baggie, and after you have started the PRB down the barrel with your short starter, put the lubed patch on the muzzle and drive it and the PRB down together. Your jag will then pull out the lubed cleaning patch for you to use again. Lubing the barrel increases MV a little, but reduces your SDV a lot. It fully coats the barrel with lube so that powder residue is kept damp, and is much easier to remove. Excess lube is simply swept up by the patch around the ball, feeding it extra lube to keep it moist, and free from being burned with those heavy charges of powder behind it. If you use the OP wad, or fillers, the burned patch issue is taken care of, but the extra lub seems to help accuracy anyway.

54ball said:
Paul,
First off thanks for taking the time to measage me.
The touch hole was drilled at the correct position centered and above the pan. The hole IMO was tiny. A 1/16 bit really enlarged it a great deal moving it closer to the pan. I hope I didn't mess it up too bad as I thought 5/64 was acceptable for a flintlock and I had a little safety margin with the 1/16.
The pan on that Ketland is rather large, flat and teardrop shaped. I always tried to prime away from the touch hole like I do my with Siler smoothbore wich functions perectly. I do pick the touch hole before priming. The rifle refused to fire reliably with 3fffg as the prime. With 2ffg as the prime it fires reliably with a lot less powder. With 2ffg I place small amount of powder away from the touch hole and it fires like its supposed to. With the 3fffg it would not fire at all with the powder away from the touch hole. It would finally fire if I grossly overcharged it with so much prime the frizzen mashed the prime on closing. Again Paul, the rifle fires perfecly with 2ffg away from the touch hole, just like its supposed to do but not at all with 3f.
The geometry of that Classic Ketland, there are 3 Ketland styles on the market, an early 1760s, a Classic 1810s like mine and a Late 1820-30s with the waterproof pan, is very different when compared to a Siler. With the Siler on half cock the flint nearly touches the frizzen. With the Classic Ketland I have, the distance from the flint and frizzen on half cock is nearly the same as full cock on my Siler. The rifle looks like its on full cock when its at half cock when you compare it to the Siler. The flint strikes the frizzen and starts it's scrape about half a thumb nails length from the top of the frizzen. Thats more than 3/4 of the frizzen, more like 7/8. After polishing the burs of the frizzen flint life has improved. I was happy to get around 10 strikes now I'm getting about 20.
I will try lead in the jaws. I used lead in my Siler but I was not happy with it. I think I may have had it too thin. How thick does the lead need to be? Roughly the size of the leather pad?
I was loading with the rifle straight up. I tried to seat the ball gently on the powder charge but I think I compressed it too much. I will load at a slant and mark my rod. I carry too many habits over from percussion.
I will get back with you to truly tune my lock and post pictures of what I have.
Paul thank you very much,
Travis

paulvallandigham said:
My lead wrap keeps getting smaller as I clamp it down on flints during use, but it probably was 1/32" or less when I began. If you can bend it around a flint with just your fingers, its okay.

I think the position of that touch hole is what is causing the ignition problem with the 3Fg powder as prime. It should work as well as 2Fg, but not if the hold is too close to the bottom of the pan. Because FFFg powder burns much faster, it tends to blow away and upward more than will FFg powder, or 4Fg powder. You might have to take that up to 5/64, as I have done, and try to move that hole to the high side if possible when you drill. The other thing to consider doing is to have a machinst make you a plug to fit where the liner is, and then redrill the hold in the proper position. You can then take the liner out, and cone the inside of it, just like the factory made ones. Any machinist with a lathe can cut a parabolic curve on the cone, particularly if you give him the white lightning liner for a prototype, to match.

The coolest part of a flame is on the bottom, since heat rises. I learned what I was doing by actually studying a candle flame one night. We all have seen the cone inside the flame that is only air, and if you can move a stick match into the flame fast enough and stop it inside that air cone, it will not light. Well, all fires create that same vacuum of air in the middle, bottom of the flame. The same thing occurs when the powder ignites. What we do to use this tendancy to work for us is bank that prime away from the vent, so that the oxygen near the vent and in it draws the flame towards it, before the flame begins its rise. Fire is a greedy mistress, and she craves air. The more air, the hotter she can get. That is the reason for opening a hole in the main charge with your vent pick to begin igniting many granules of powder all at once. Its the reason to leave the powder in the chamber loose, and NOT compacted, as we would do with a percussion lock, so that more air is present to allow the fire to burn hotter faster. That raises the chamber pressure faster, and gets the ball moving down the barrel faster. If you lube the barrel after seating the PRB, the ball goes down the barrel even faster.

The other thing you can consider doing is grinding down the depth of that flash pan. Usually there is enough metal on those castings to allow you to lower the pan 1/32-1/16". Ever little bit helps. While you are at it, widen the pan to make a bigger target for your sparks. Then polish the pan to a mirror finish to make it very easy to clean with just the swipe of a cleaning patch over the pan between shots. Residue will not cling to the bottom of the pan well if its mirror smooth, with very tiny pores available in the steel. Its the residue that is hygroscopic.

Best wishes.
 
Last edited by a moderator:
I use a leather wrap on my 45 frontier and a 7/8 english flint and can get at least 20 shots off without touching a flint. I flip it over and get another 20 shots off. After that it gets a new or knapped one and the old one goes into the needs knapping pile. I havent tried to see but once how many I could get off without the flint being flipped or replaced and it was 38 shots (had a no flash on shot 38, but fired upon recocking and firing again) wouldnt go off a 39th time.
 
Leather here too -- I believe the lead does not hold as well as leather for the pressure that is reasonable to apply with a turn screw and jaws.
 
My only remark will be that most lead applications were usually military, from what I've found. I've used it on a Bess copy and it did well, rifles and fowlers with smaller cocks get the leather treatment!
 
Thank you for this timely and thought-provoking post! Between your post and Paul's excellent article, I'd wager that most all flintlock problems can be corrected by following the advice given.

To address the issues I outlined in an earlier post, I replaced the lead flint pad with a scrap of 2-3 oz. leather out in the field. It held the flint solidly for the rest of the day so for now, I'll stick with the leather. I've got some even thinner glove leather lying around here somewhere. I'll keep an eye out for it and replace the 2-3 oz with that once it's located.

As the pronghorn-style horns on the rear sight spent the day hooking/tangling my mittens, powder measure, frock, and anything else that came near, they are no more. I've never encountered such a sight on either an original or a serious contemporary longrifle, so off they came. I shaped the rear sight into a more conventional profile and am already happier with things. I'll do the math sometime in the next few days and get a proper set of sights on order, or perhaps I'll just make a set to suit me. Making them may be the only way to go if no suitable commercial sights can be located. I'm having a little difficulty imagining the sight arrangement that will raise POI a foot at 25 yards! :shocked2:

Here's a three shot group I fired yesterday offhand at 25 yards (I was cold, the wind was blowing, my socks were wet, the light was wrong...)and while many of you would laugh at this effort, I'm pleased with the promise it shows. Approximately the size of a small biscuit, it's aligned horizontally with the white spot I was using as an aiming point but sits about a foot low:

IMG_0605_zps110fca0a.jpg


The vent liner is installed low on the barrel flat and the lock's pan is both small and shallow. Before plugging the barrel and moving the vent, I'll try opening up the pan. There's plenty of material there to work with. I'll also follow Paul's recommendation of using FFg powder to see how that influences ignition. I shoot that in my Brown Bess and always keep several pounds on hand. As you can see in this video, not every shot hangs:

[youtube]Zq_Z-DUAqWA[/youtube]


Cleaning the rifle afterward showed that many of the sharp edges in the bore had been cleaned up by firing. My patches were coming out dirty but uncut. I'll dress the muzzle, which still has some sharpness to it, but will likely leave the bore alone.

Upon disassembly, I found the inner areas of the stock to be completely unfinished. Being unacceptable to me, I slathered these areas with a generous coat of linseed oil and will continue to do so upon cleaning until I feel these areas are sufficiently protected. This is going to be a working gun and I do so wish I'd gotten a photo of it when I finally dragged into the house long after dark! It was covered in dried mud and briar scratches, powder residue, and all manner of plant seeds and fibers. It cleaned up well but its future isn't likely to be an easy one.
 
I love to read about a man who is covered up in blessings as you have been. You really did well on the purchase of that rifle. It is essentially the same as the Hatfield that I had and I really loved that rifle. It was an excellent shooter once I found what it wanted to be fed. I would still have it today had I not run across a custom rifle that I just couldn't live without.

Let me make a little suggestion to help you find the exact load that it will want for maximum accuracy. Go to www.blackpowderrifleaccracy.com and order a copy of Dutch Schoultz' accuracy system. it is only $20 and the information is worth far more than that. It is information that you will use for every muzzleloading rifle that you will ever own. It is an excellent investment of a relatively small amount of money but will pay off many times over.
 
Last edited by a moderator:
You definitely will need a taller rear sight!

I use leather to hold the flint, and think that too thin will work against you. It needs to be thick enough to compress around the flint.

Ignition in the video seemed quick, so whatever you were doing for THAT shot was working well. I wouldn't plug and move the vent unless necessary. Try a different liner, polishing and deepening the pan, etc first. My quickest ignition flinter (.62) has a touch hole ~.055", so simply making the hole larger isn't the answer.
 
Yep, I agree with larry wv, you need to file the front sight. Don't mess with the rear sight just yet. You mentioned doing the math so I assume that you are familiar with that handy little formula. But, before filing on your front sight, try this idea. Use the base of your front sight to aim at your target. If your group is still too low, that means that you do not have enough front sight to file off and will need a taller rear sight. On the other hand, if your resultant group is too high, that means that you have plenty of front sight to file off to get you where you want. In the latter case, do your math and figure how much of your front sight you need to file off. Be gentle and go slowly because you can always take off just a bit more front sight but if you over do it, you can't easily put more metal back on your sight.
 
J. Williams said:
As the pronghorn-style horns on the rear sight spent the day hooking/tangling my mittens, powder measure, frock, and anything else that came near, they are no more...

I love that, and can picture the buckhorn sights almost irrepairably snagging everything they can while you fought back against the evil force of inanimate objects...

You may not need to do ANYTHING with your sights... Based on shooting low at just 25 yards with your rifle please try shooting at 50 or 75 yards on paper with a big dot before you make any sight changes and see if your point-of-impact isn't higher! That's right -- that's what I said.

Good luck.
 
I had to take a die grinder to my front sight it was about 2ft low. My front sight went from the super tall front sight to about a 3/16 blade if that much. I also knocked the full buckhorns horns off and made it for user friendly.
 
Alden said:
You may not need to do ANYTHING with your sights... Based on shooting low at just 25 yards with your rifle please try shooting at 50 or 75 yards on paper with a big dot before you make any sight changes and see if your point-of-impact isn't higher! That's right -- that's what I said.

Good luck.

Good advice, Alden. While I took several offhand shots at longer ranges (all low), I'll do some actual bench testing before I start modifications beyond removing the horns. I'll try upping the powder charge to 60 grains, as well. If the sights are intended for a heavier charge in the 100 grain neighborhood, my 50 grain pour would produce a much lower point of impact, right?


Billnpatti said:
Use the base of your front sight to aim at your target. If your group is still too low, that means that you do not have enough front sight to file off and will need a taller rear sight.

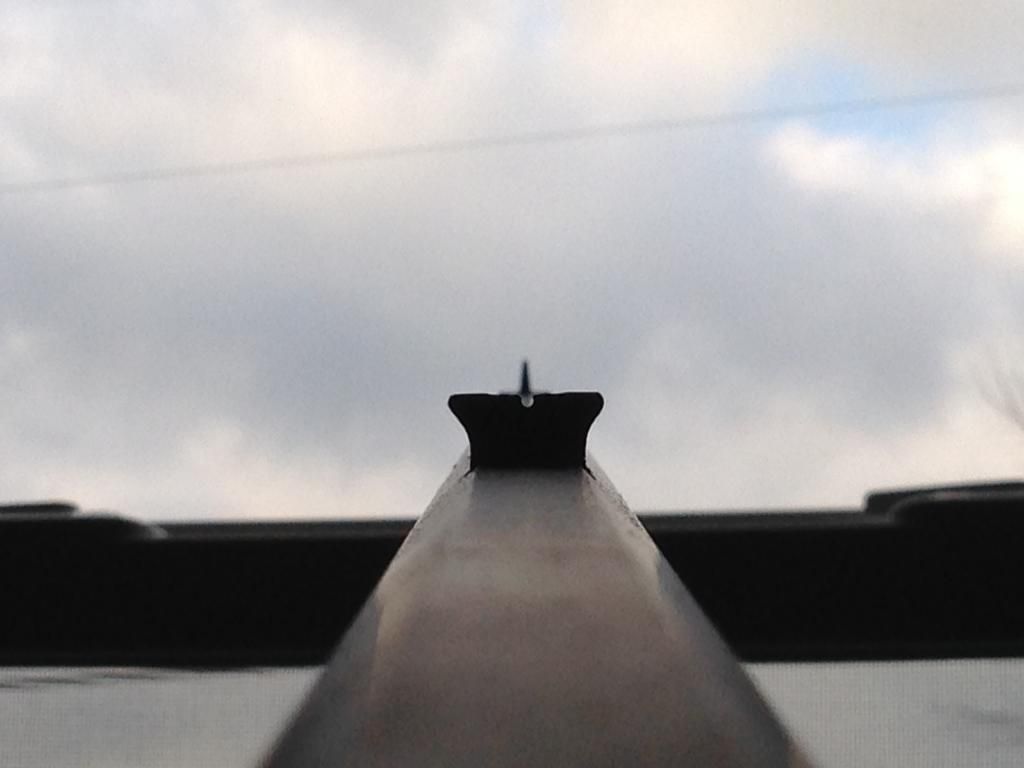
You describe the exact sight picture I used the rest of the day! With the top of the dovetail base of the front sight aligned with the top of the rear sight and the tip of the front sight on target, I was hitting dead money at 25 yards. If I filed away the entire front sight post I'd be dialed in. :doh:

photo8_zpsaac89418.jpg
 
It's leather for me; tried lead with NO success. I flip and knapp the flint, too; but always put in a new, fresh flint at the beginning of the season.
 
Great I never realized it before either but my frontier rifle is not browned on the muzzle crown either and left in the white.
 
Bill i am going through the same thing here, could you share the formula you mentioned or a link??

thanks Bill.

creek
 
You need three measurements, or four if the windage is off, too. For elevation adjustments, you need to know how much you need to raise your point of impact, how far it is from your rear sight to your front sight and how far from your muzzle to your target. All measurements are in inches. Let A be the distance in inches you want to raise your POI, let B be the distance from the front to the rear sight in inches, let C be the distance from your muzzle to your target in inches. Then B/C X A = amount in inches you need to remove from your front sight. The calculations for windage adjustment is the same except the result is how much you need to move your rear sight in the direction that you want to move your POI. If you want to move your POI to the left, moved your rear sight to the left. If you want to move it to the right, move your rear sight to the right. Before moving your rear sight, make a tiny scratch from your sight base down onto the barrel. Now, when you move your sight, you can use a feeler gauge to determine how far you have moved it.

If your POI is too high, you will need to lower your rear sight notch by the calculated amount. Alternately, you can buy and install a taller front sight.

Remember, always move your rear sight in the direction that you want to move your POI. Move the front sight opposite the direction that you want to move your POI.

If you need more help, just send me a PM and I will do all I can to help you.

Bill
 
Back
Top